Introduction
Welcome to the Maker Space wiki!
Here you will find (hopefully) all the information you could possibly want to know about our hackspace, how it works, what facilities we have and how to use them.
In progress
This wiki is still being populated. For now you may still need to head to the old wiki for some information.
The Space
Maker Space is split into four main locations/sections:
- Ground floor corridor
- Ground floor workshop
- South/tall/big basement workshop
- North/short/small basement workshop
Prepare yourself for a Microsoft Copilot guided tour through our space.
Pretty much all of the text in the above pages was generated by asking Copilot to “in the style of an estate agent, describe <very brief description of what is in the accompanying photo> in a hackspace”. The relevant, mostly correct, appropriate, amusing, (and if you are really lucky) actually helpful parts of the response were then selected and made into a mostly cohesive bit of prose.
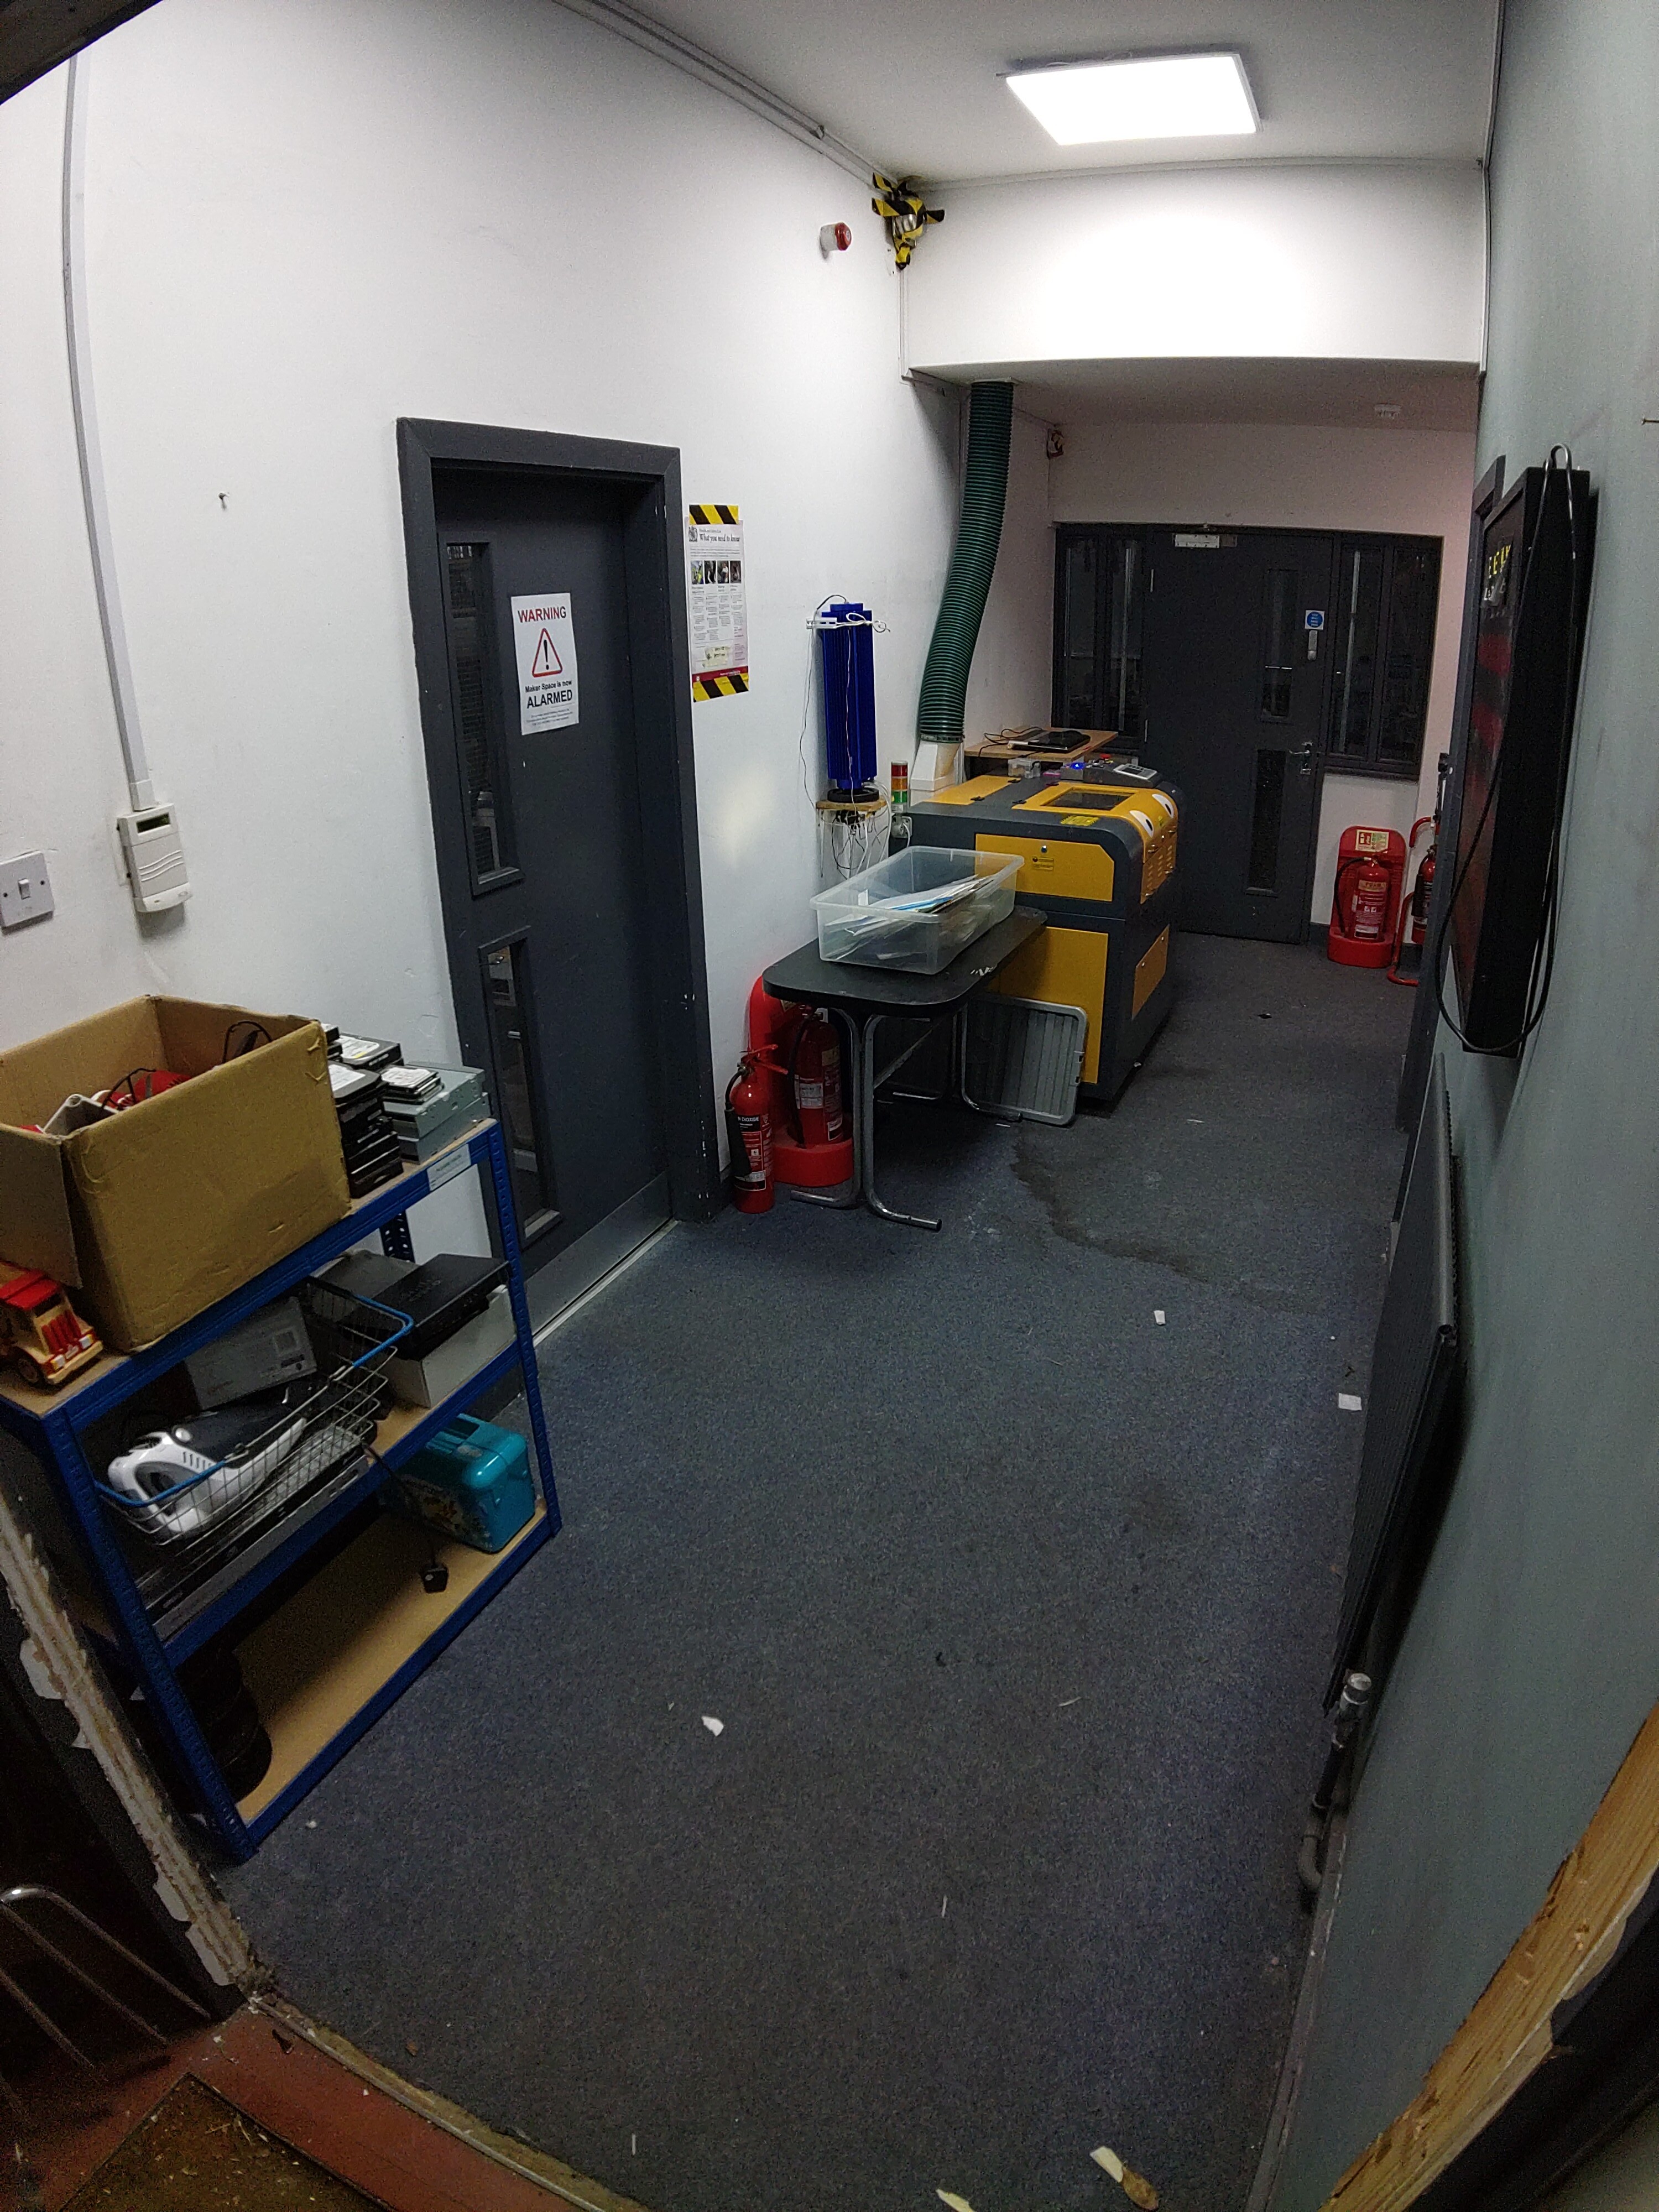
Ground Floor Corridor
As you step into this industrial haven, the corridor unfolds before you—a seamless blend of practicality and aesthetics. The heartbeat of this workspace, the corridor stretches like a silent river, connecting different realms within the building. It’s not merely a passageway; it’s a conduit of creativity and collaboration.
At one end of the corridor, behold the pièce de résistance - the laser cutter. Its sleek metallic frame stands like a sentinel, ready to transform raw materials into precision-cut masterpieces. The hum of the extraction adds a symphonic undertone to the corridor’s rhythm.
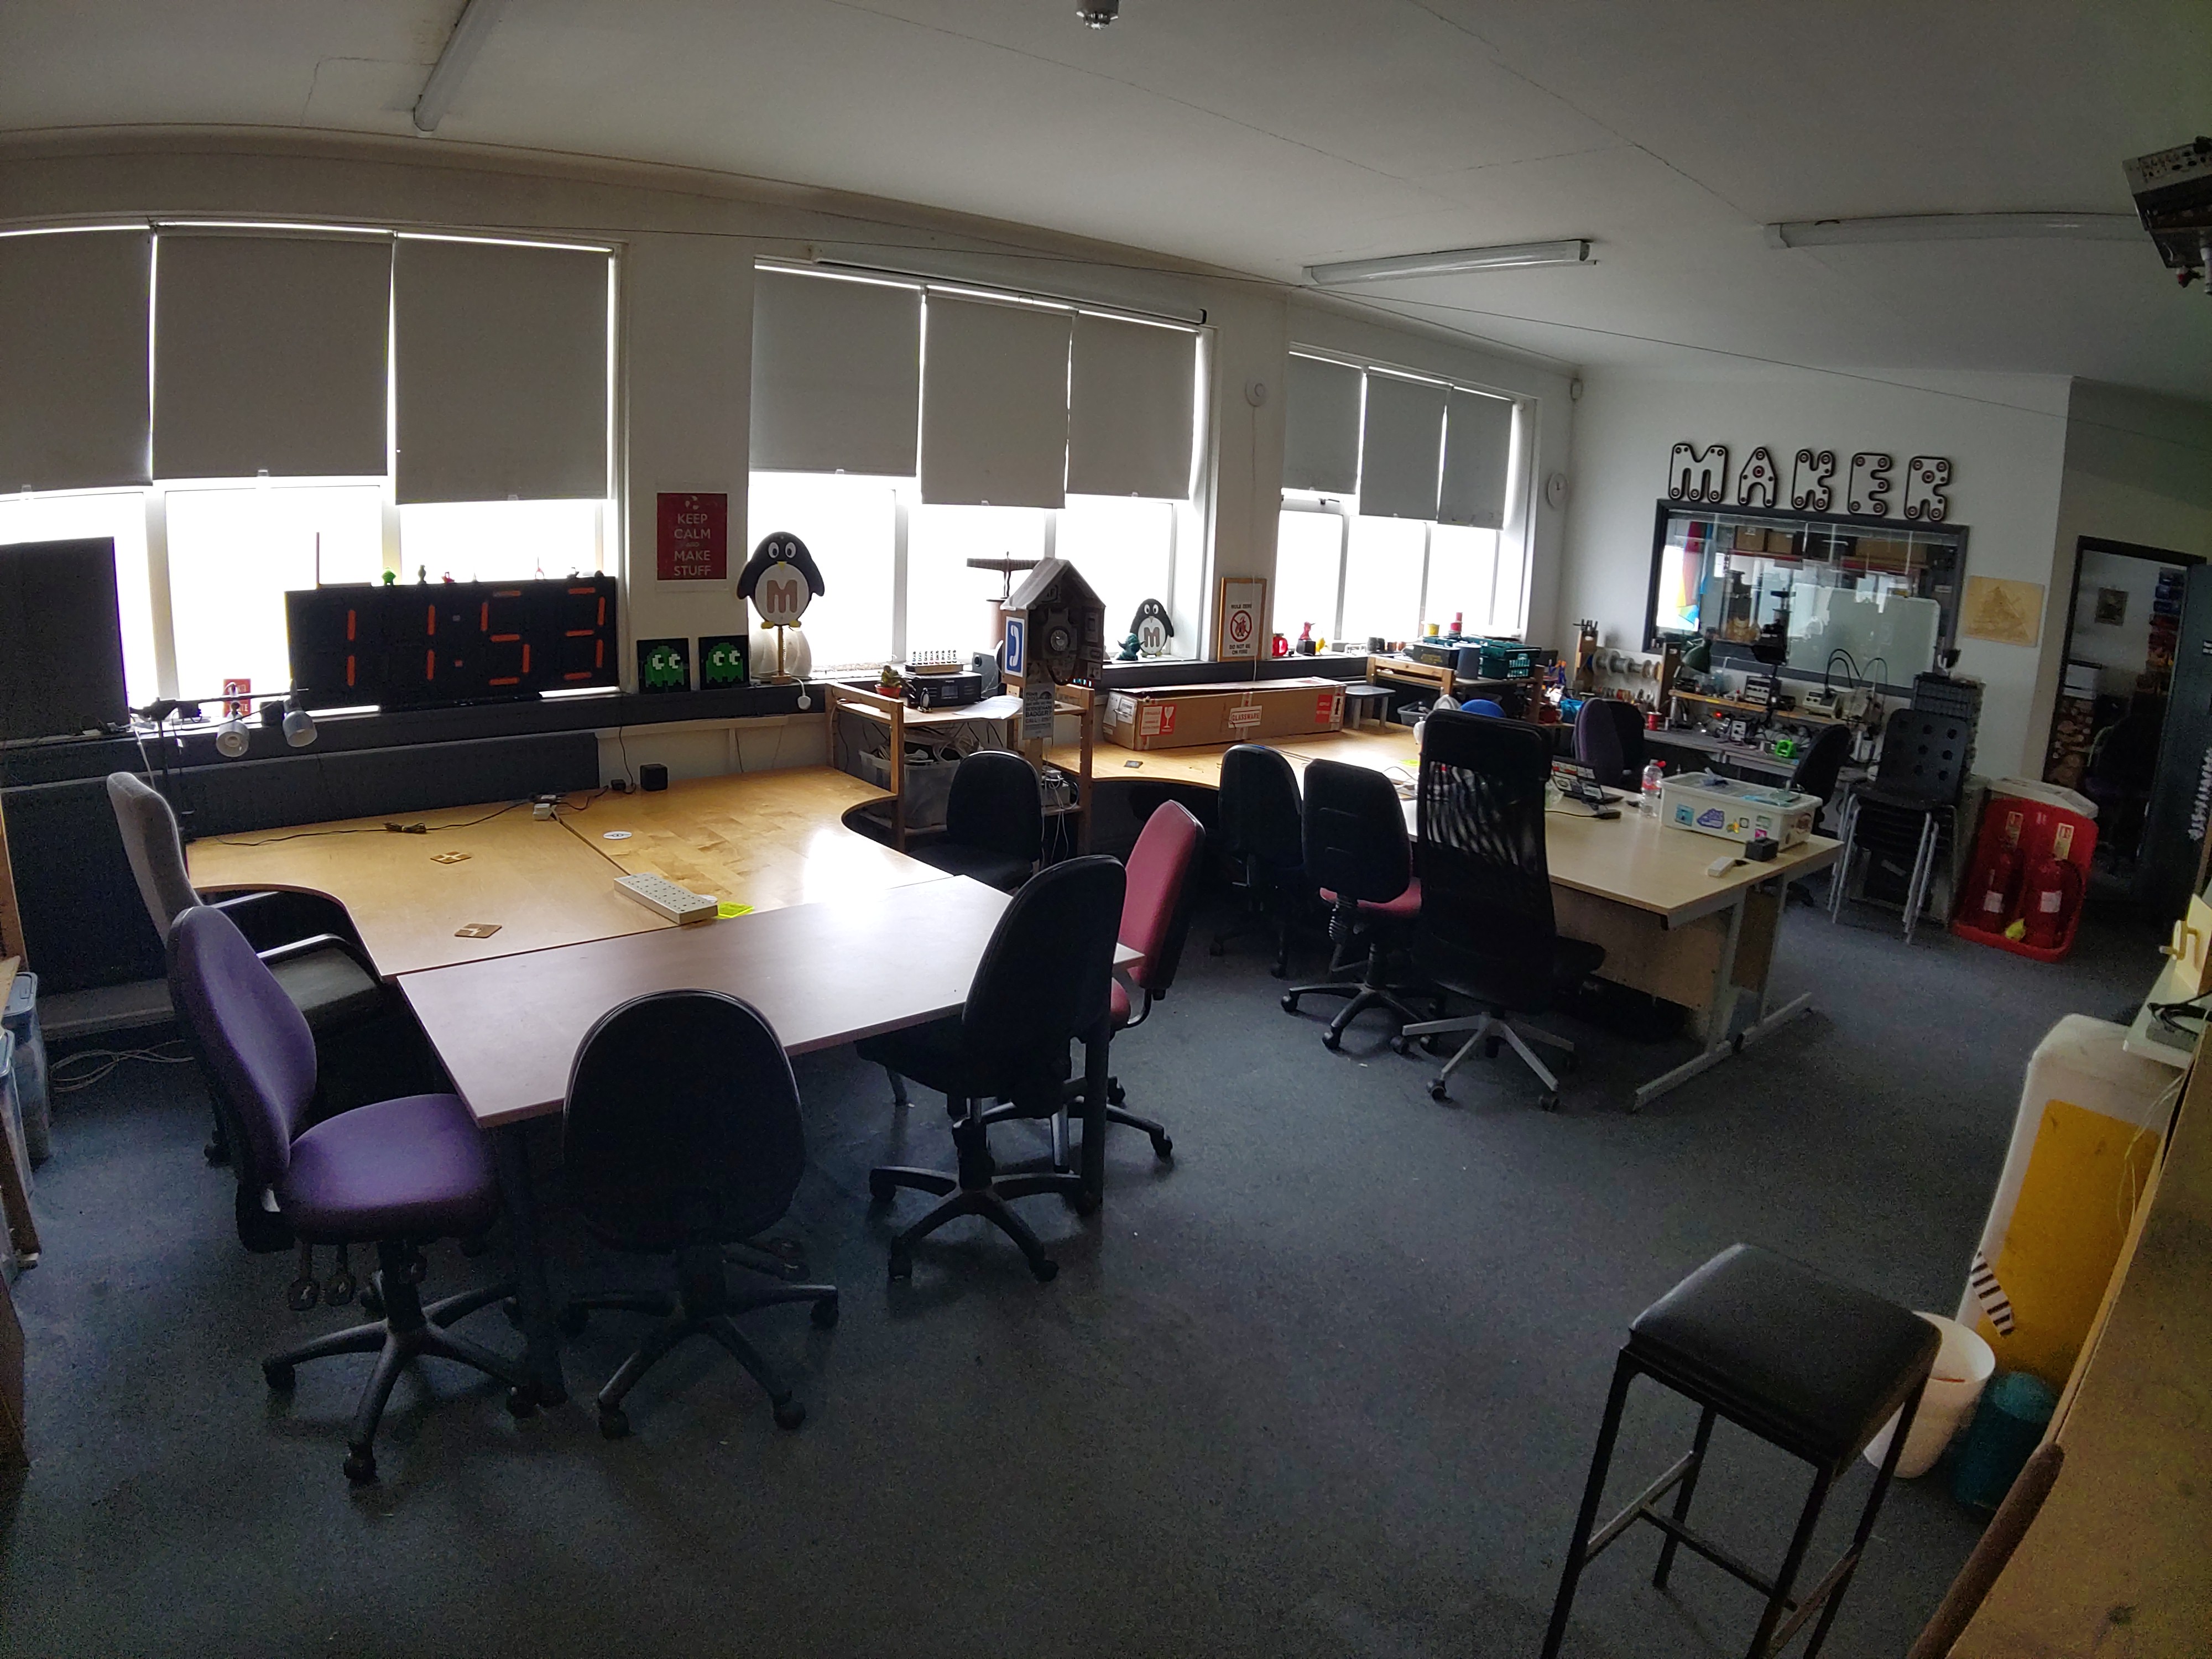
Ground Floor Workshop
Step into this vibrant hub of innovation, where imagination takes tangible form. Our main workshop is more than just a room - it’s a canvas for your wildest ideas.
Picture a symphony of activity. The main workshop sprawls across the floor, partitioned into multiple work areas. Whether you’re assembling a PCB or making tote bags, there’s a spot for your creative endeavors.
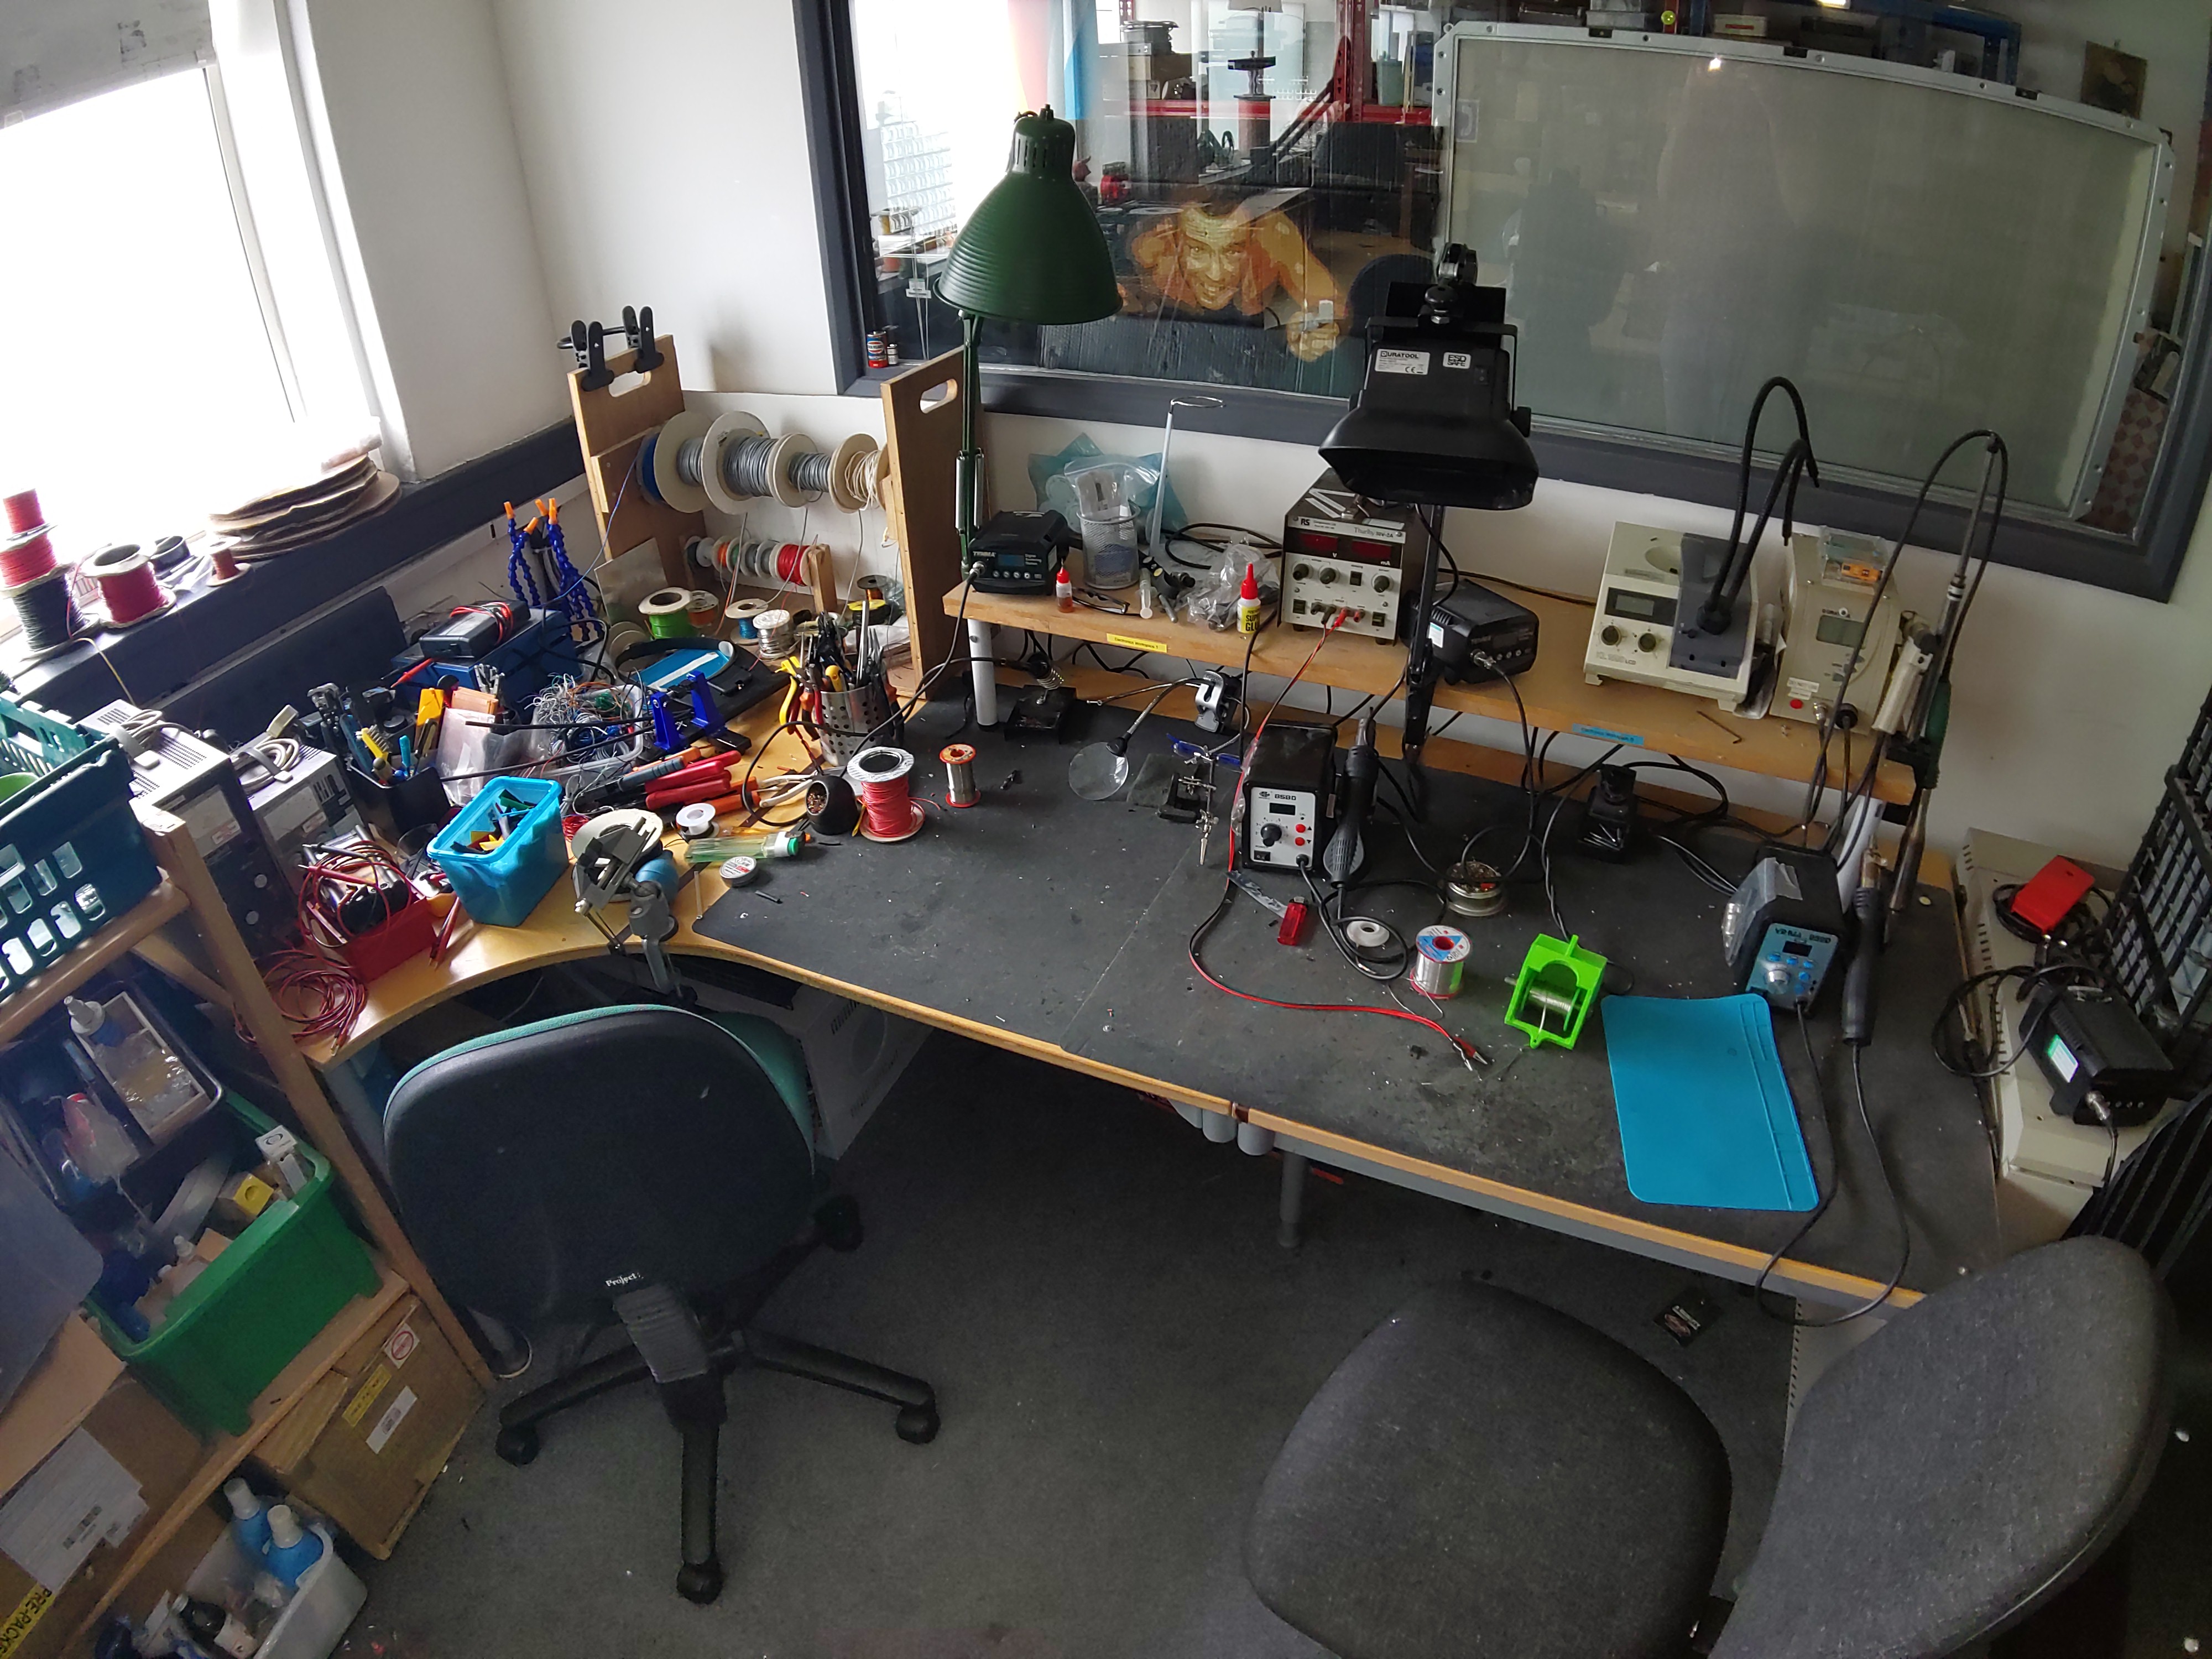
Our electronics workspaces, a place where wires tangle like ivy, components sprawl like fallen leaves, and soldering irons hum like caffeinated bees.
The soldering stations wear battle scars. Burn marks, flux residue, and tangled solder wicks - they tell tales of countless connections forged. The air smells of molten dreams and a hint of desperation.
Dive in, untangle wires, and let sparks fly. Who knows? Your next invention might emerge from this delightful chaos.
In our cosy goldfish bowl you will find several PC workstations - each a digital canvas awaiting your command. These machines hum with potential, their screens reflecting the glow of countless projects.
Currently we have two general purpose machines: one Ubuntu 24.04 and one Windows 10, and one dedicated CAD machine running Windows 10, where 3D models take shape, and blueprints come alive. Whether you’re designing a futuristic skyscraper or a whimsical teapot, these stations empower your vision.
Each wall of the room is clad in a labyrinth of industrial shelving. Each shelf cradles a universe of components, parts and tools.
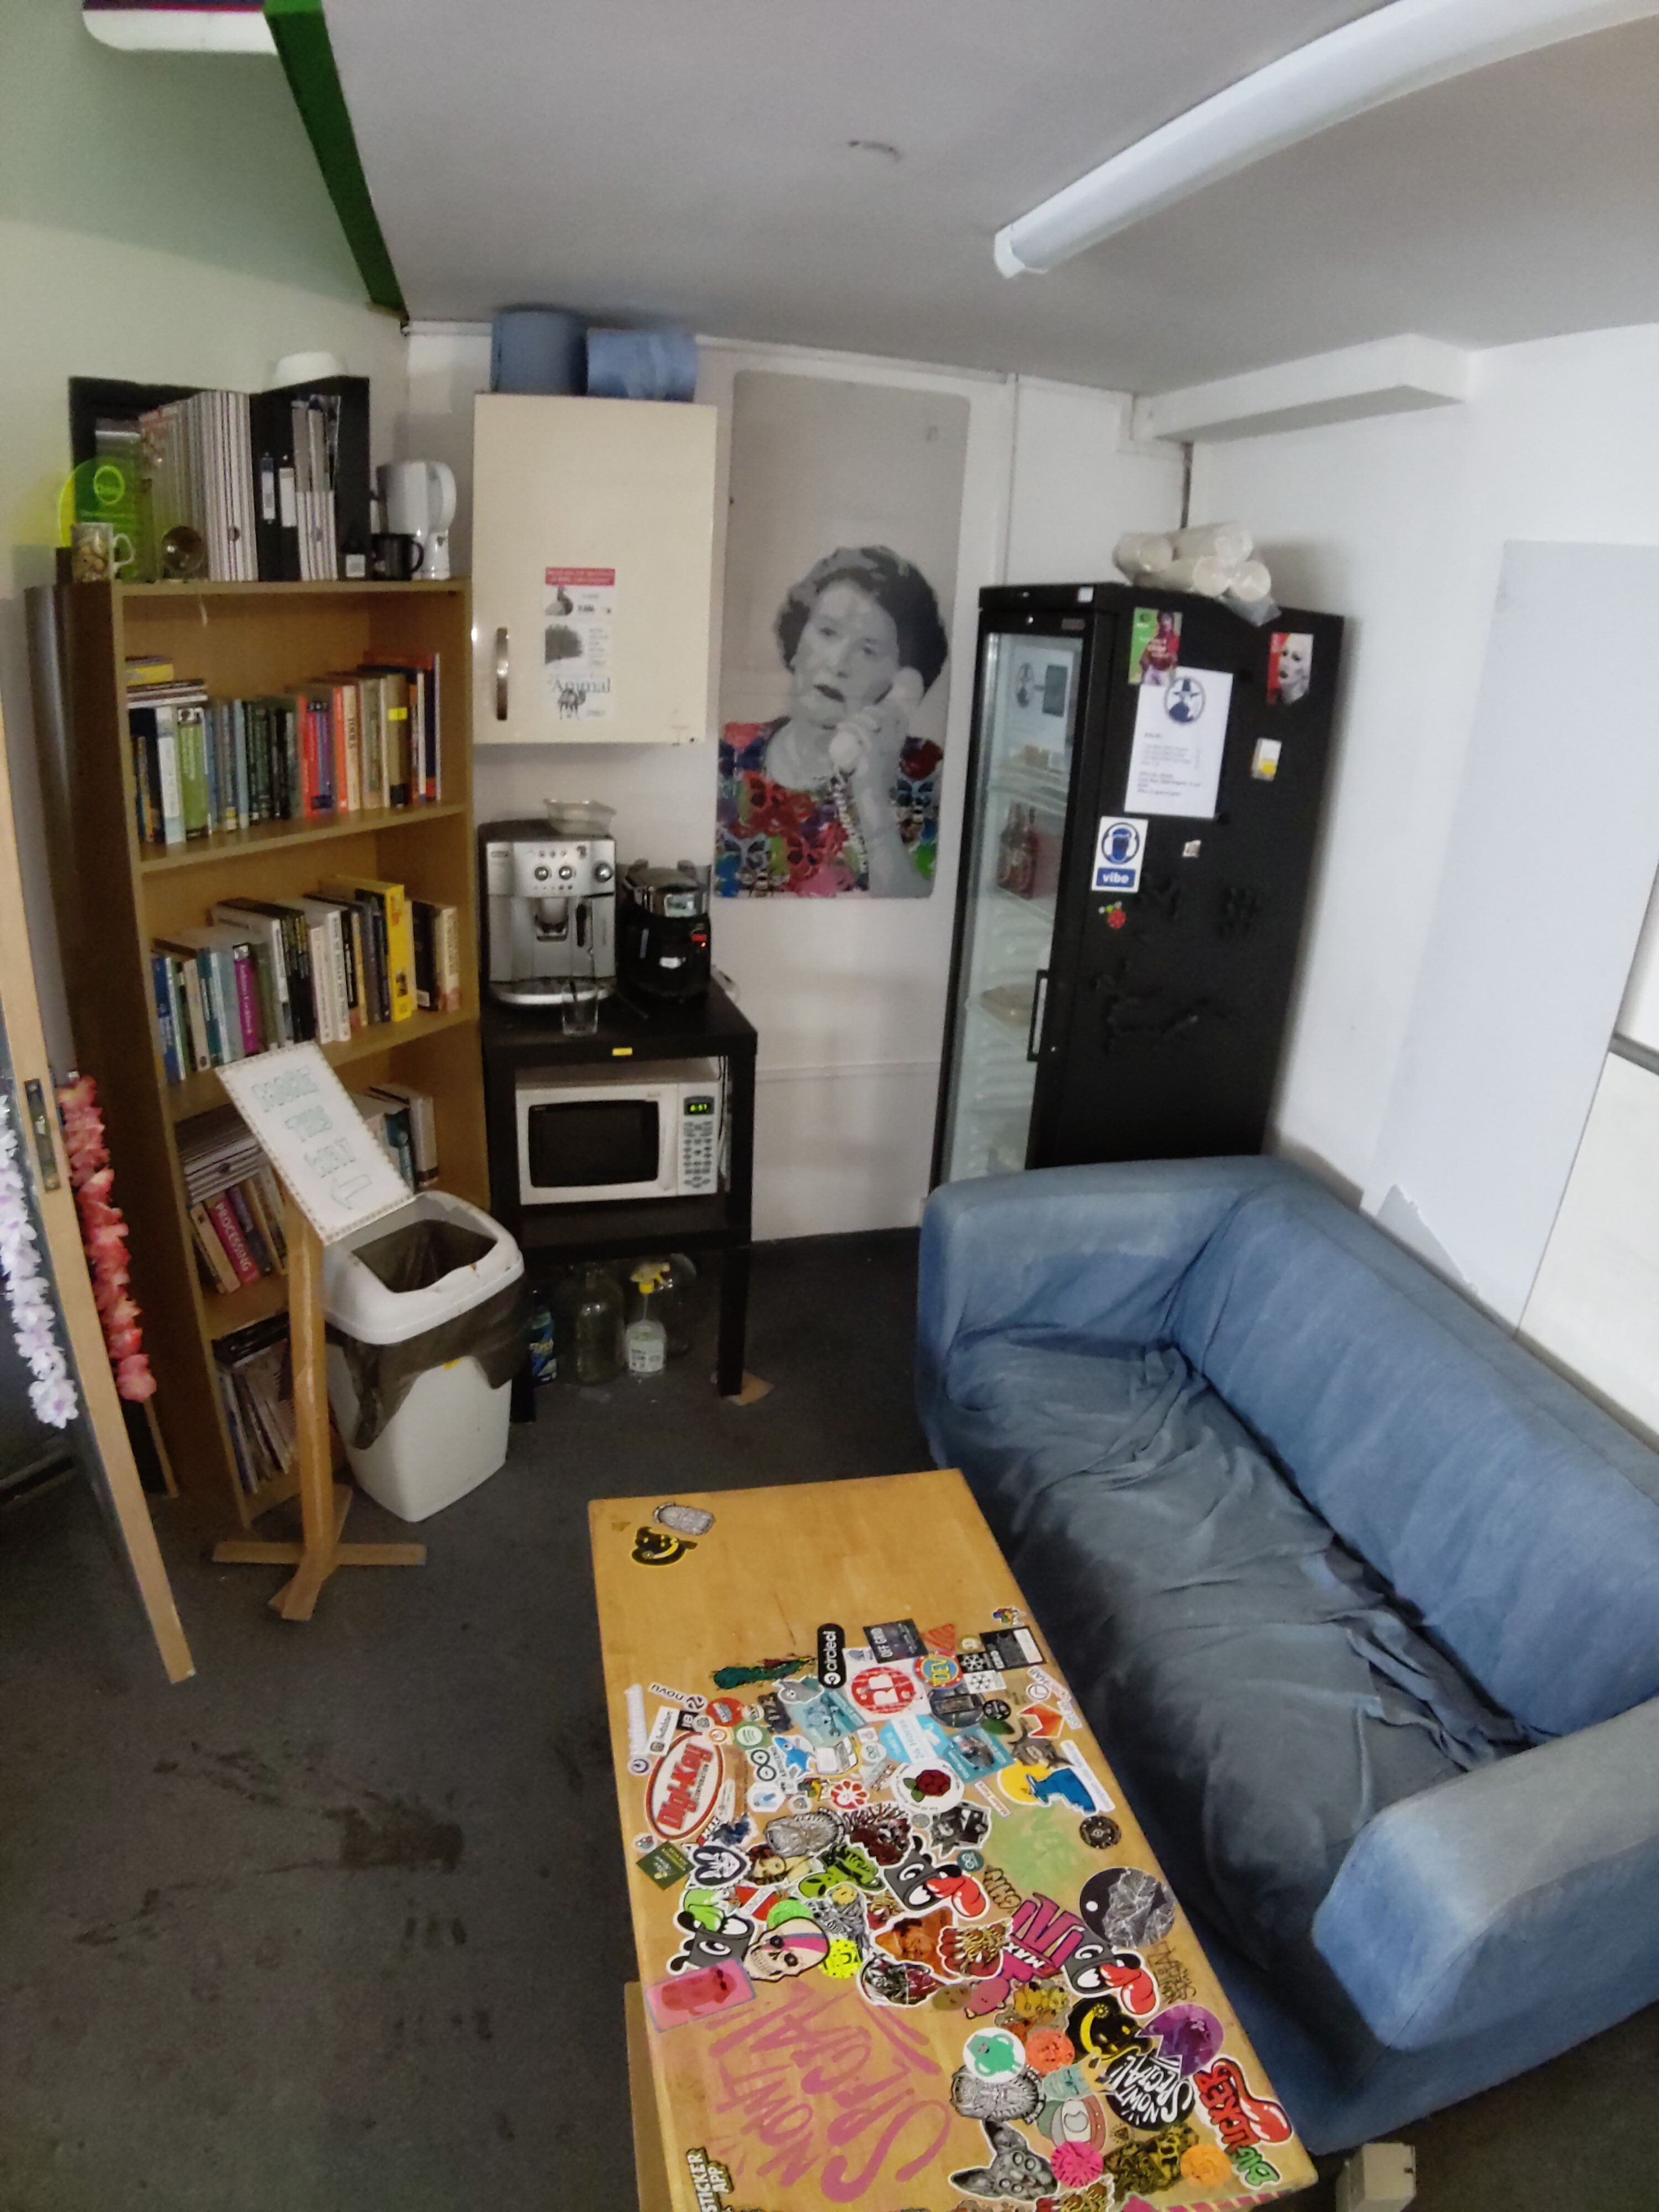
Welcome to the hackspace lounge, a tranquil corner where making takes a breather.
Behold at what some consider the most critical items in the space: our tea and coffee making facilities. The aroma of freshly brewed chai mingles with the robust scent of freshly ground beans. Choose your potion: tea or double-shot espresso? Both enjoyed from the Royal Doulton with the hand-painted periwinkles.
Nestled against the wall, our plush sofa beckons. Sink into its embrace - a refuge for tired hackers and dreamers alike. Whether you’re pondering the next steps for your current project or just need a power nap, this sofa cradles your thoughts.
Open the fridge, and you’ll find a treasure trove: cold brews, artisanal sodas, and perhaps a rogue slice of leftover pizza. It’s like Narnia, but with more caffeine. But please note some items belong to members or cost money if you’d like to consume them.
The bookcase stands tall, its shelves sagging under the weight of knowledge. Dusty hardcovers, dog-eared paperbacks, and a few mysterious tomes - they’re all here.
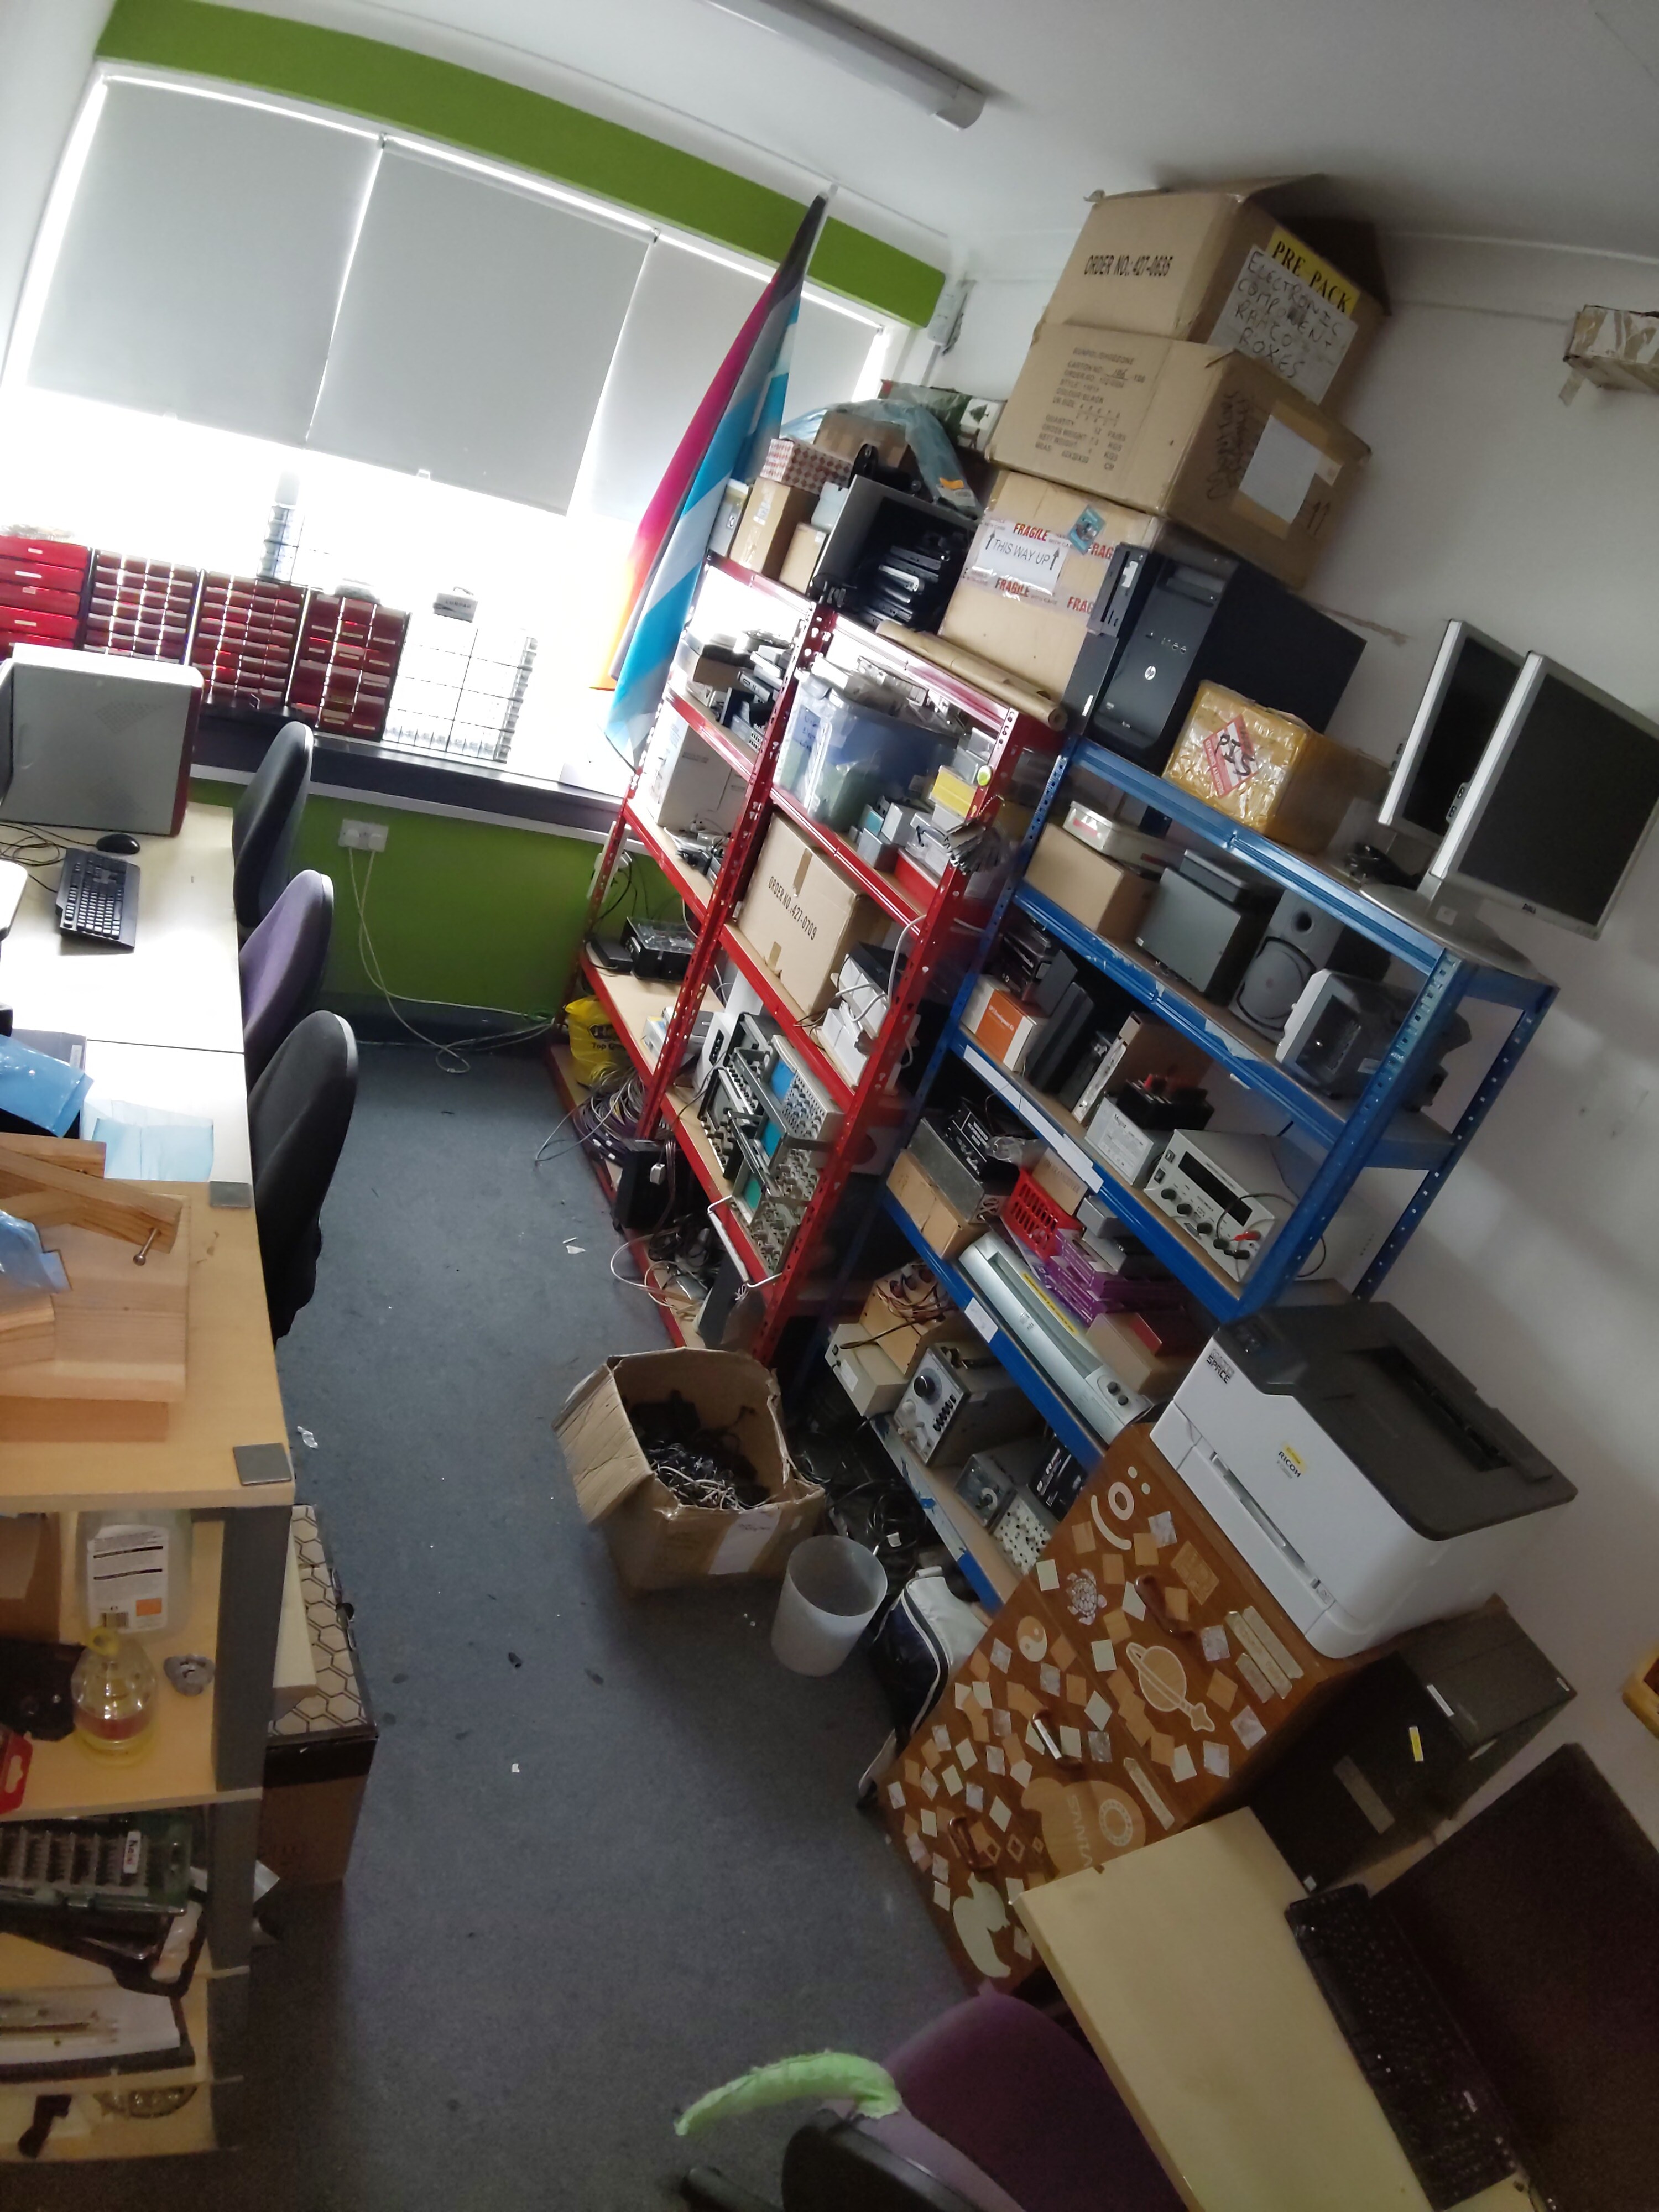
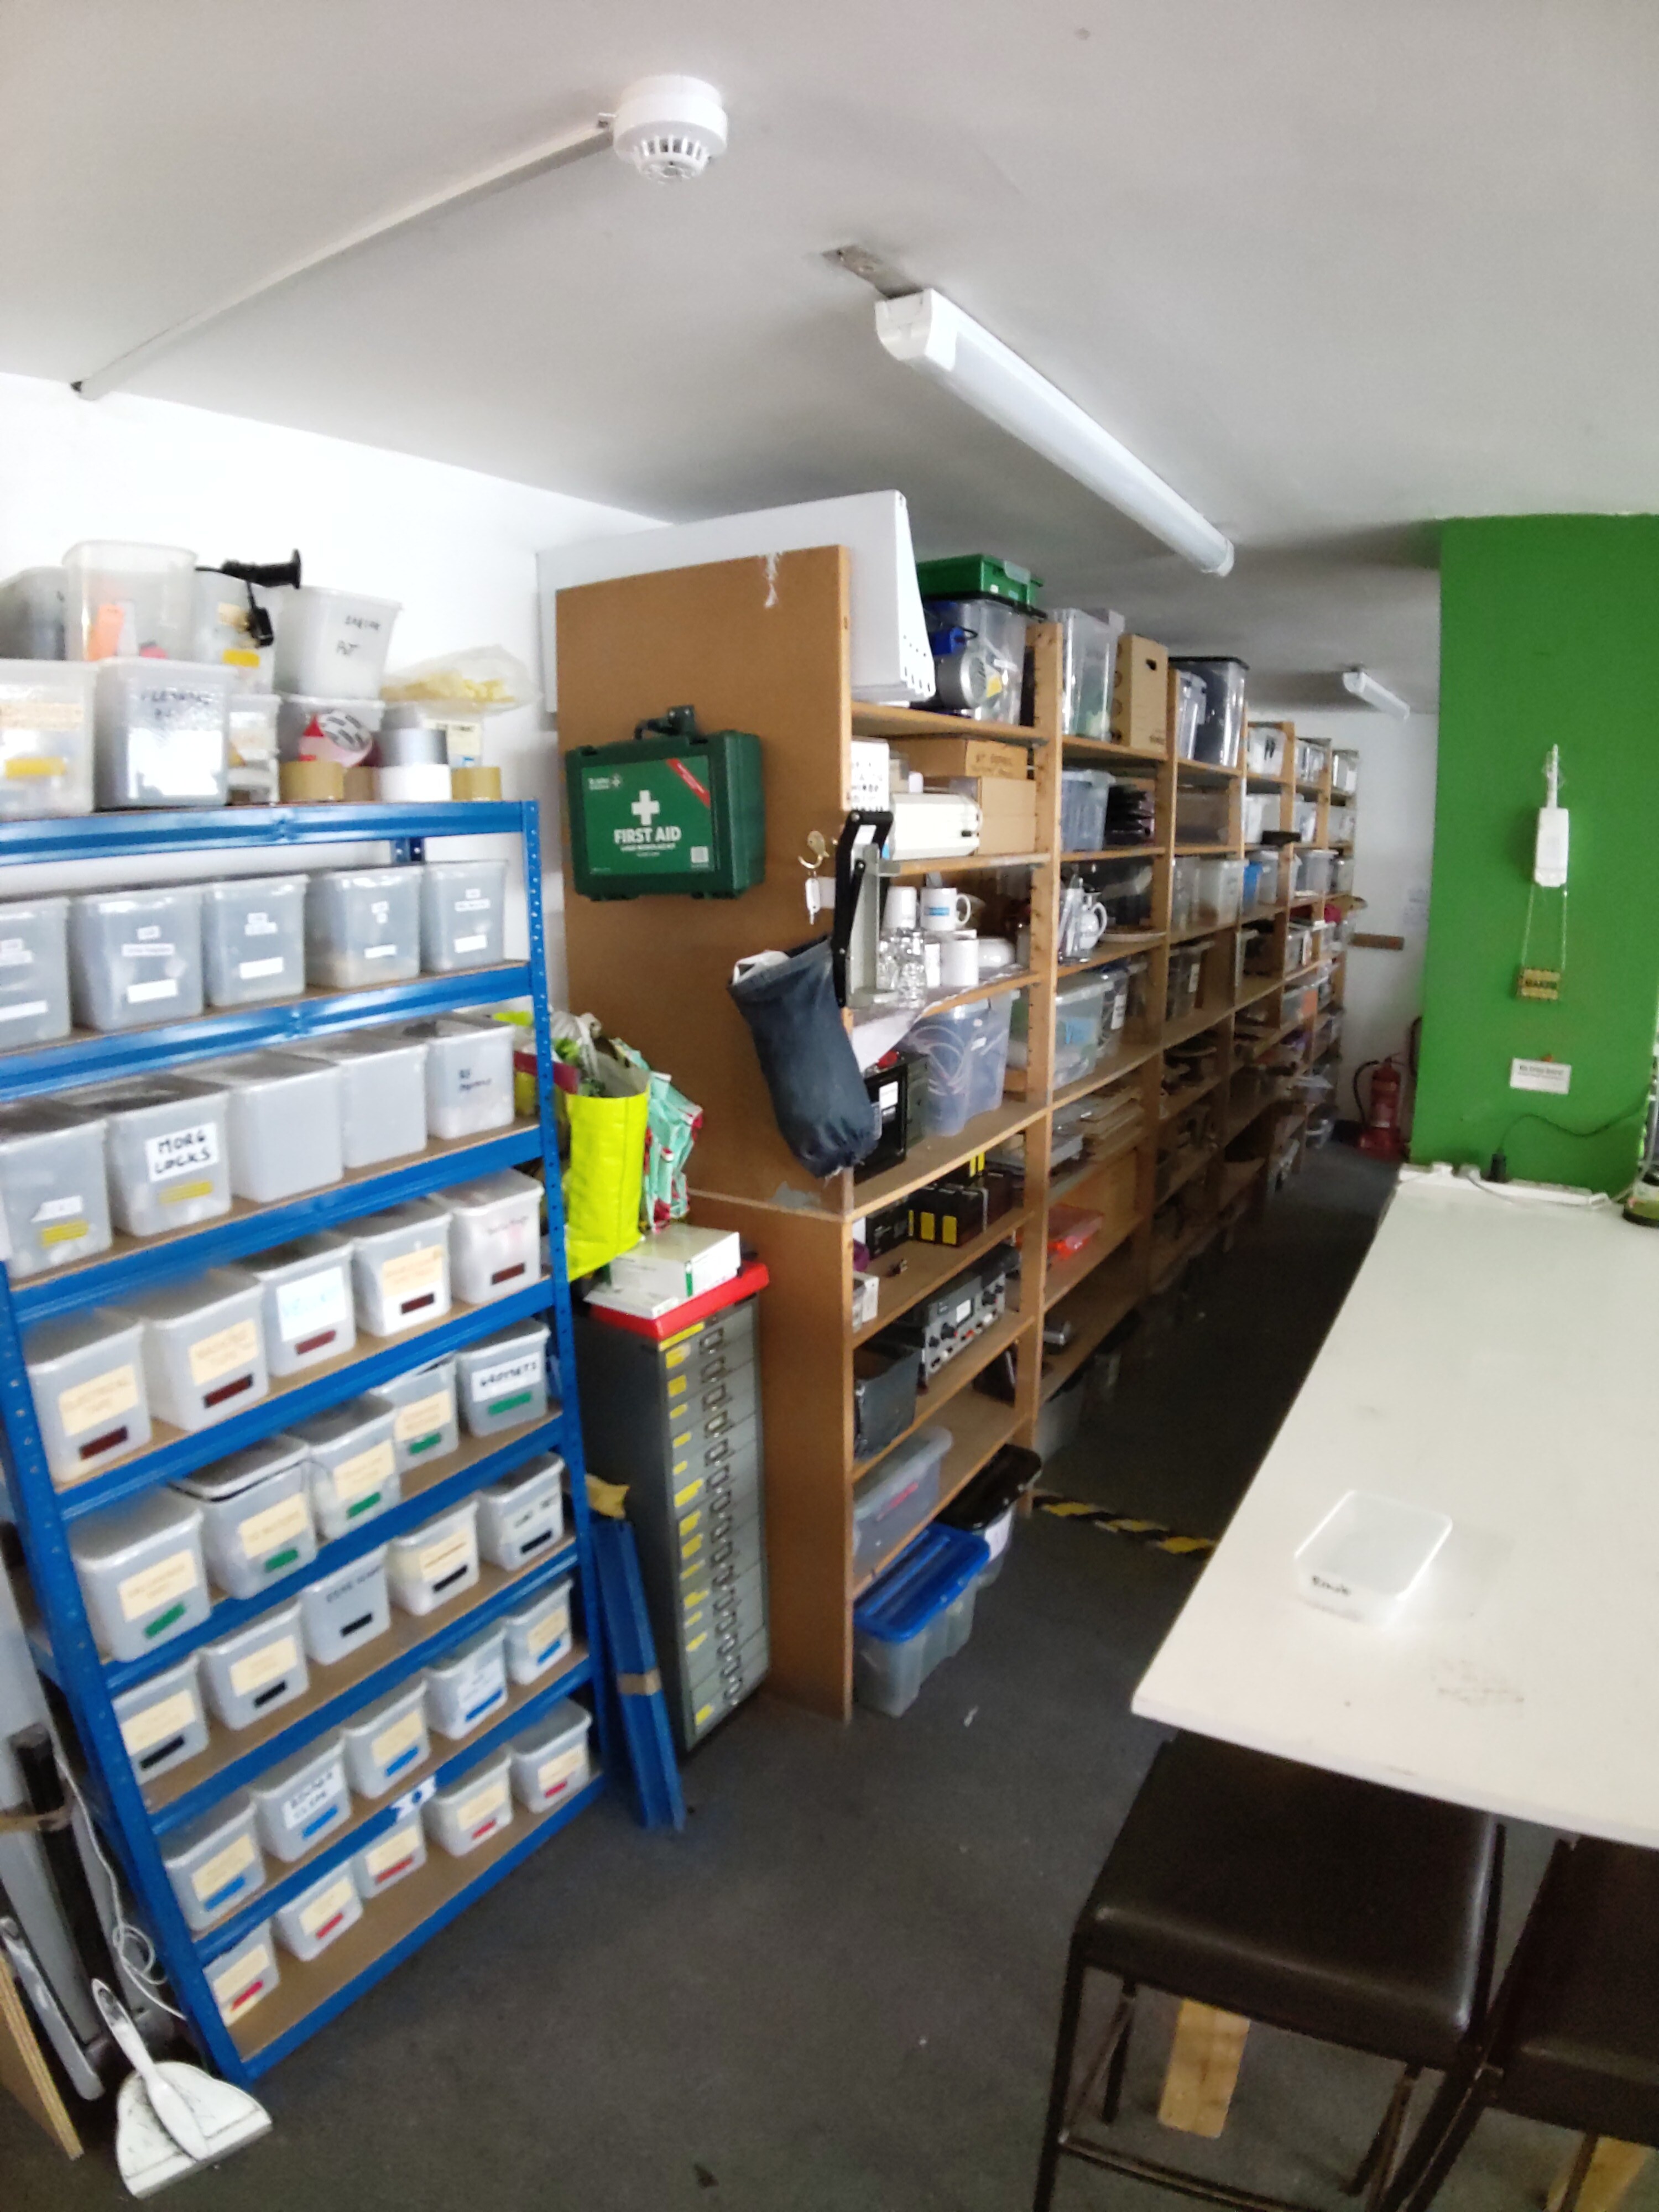
The storage wall is a vast expanse of shelving, stretching from floor to ceiling, each unit brimming with a variety of tools, components, and materials. Every inch is utilized to its fullest potential, packed full of tools, parts and materials just waiting for the right project to come along.
The south side of this shelving is dedicated to storage for member’s personal items.
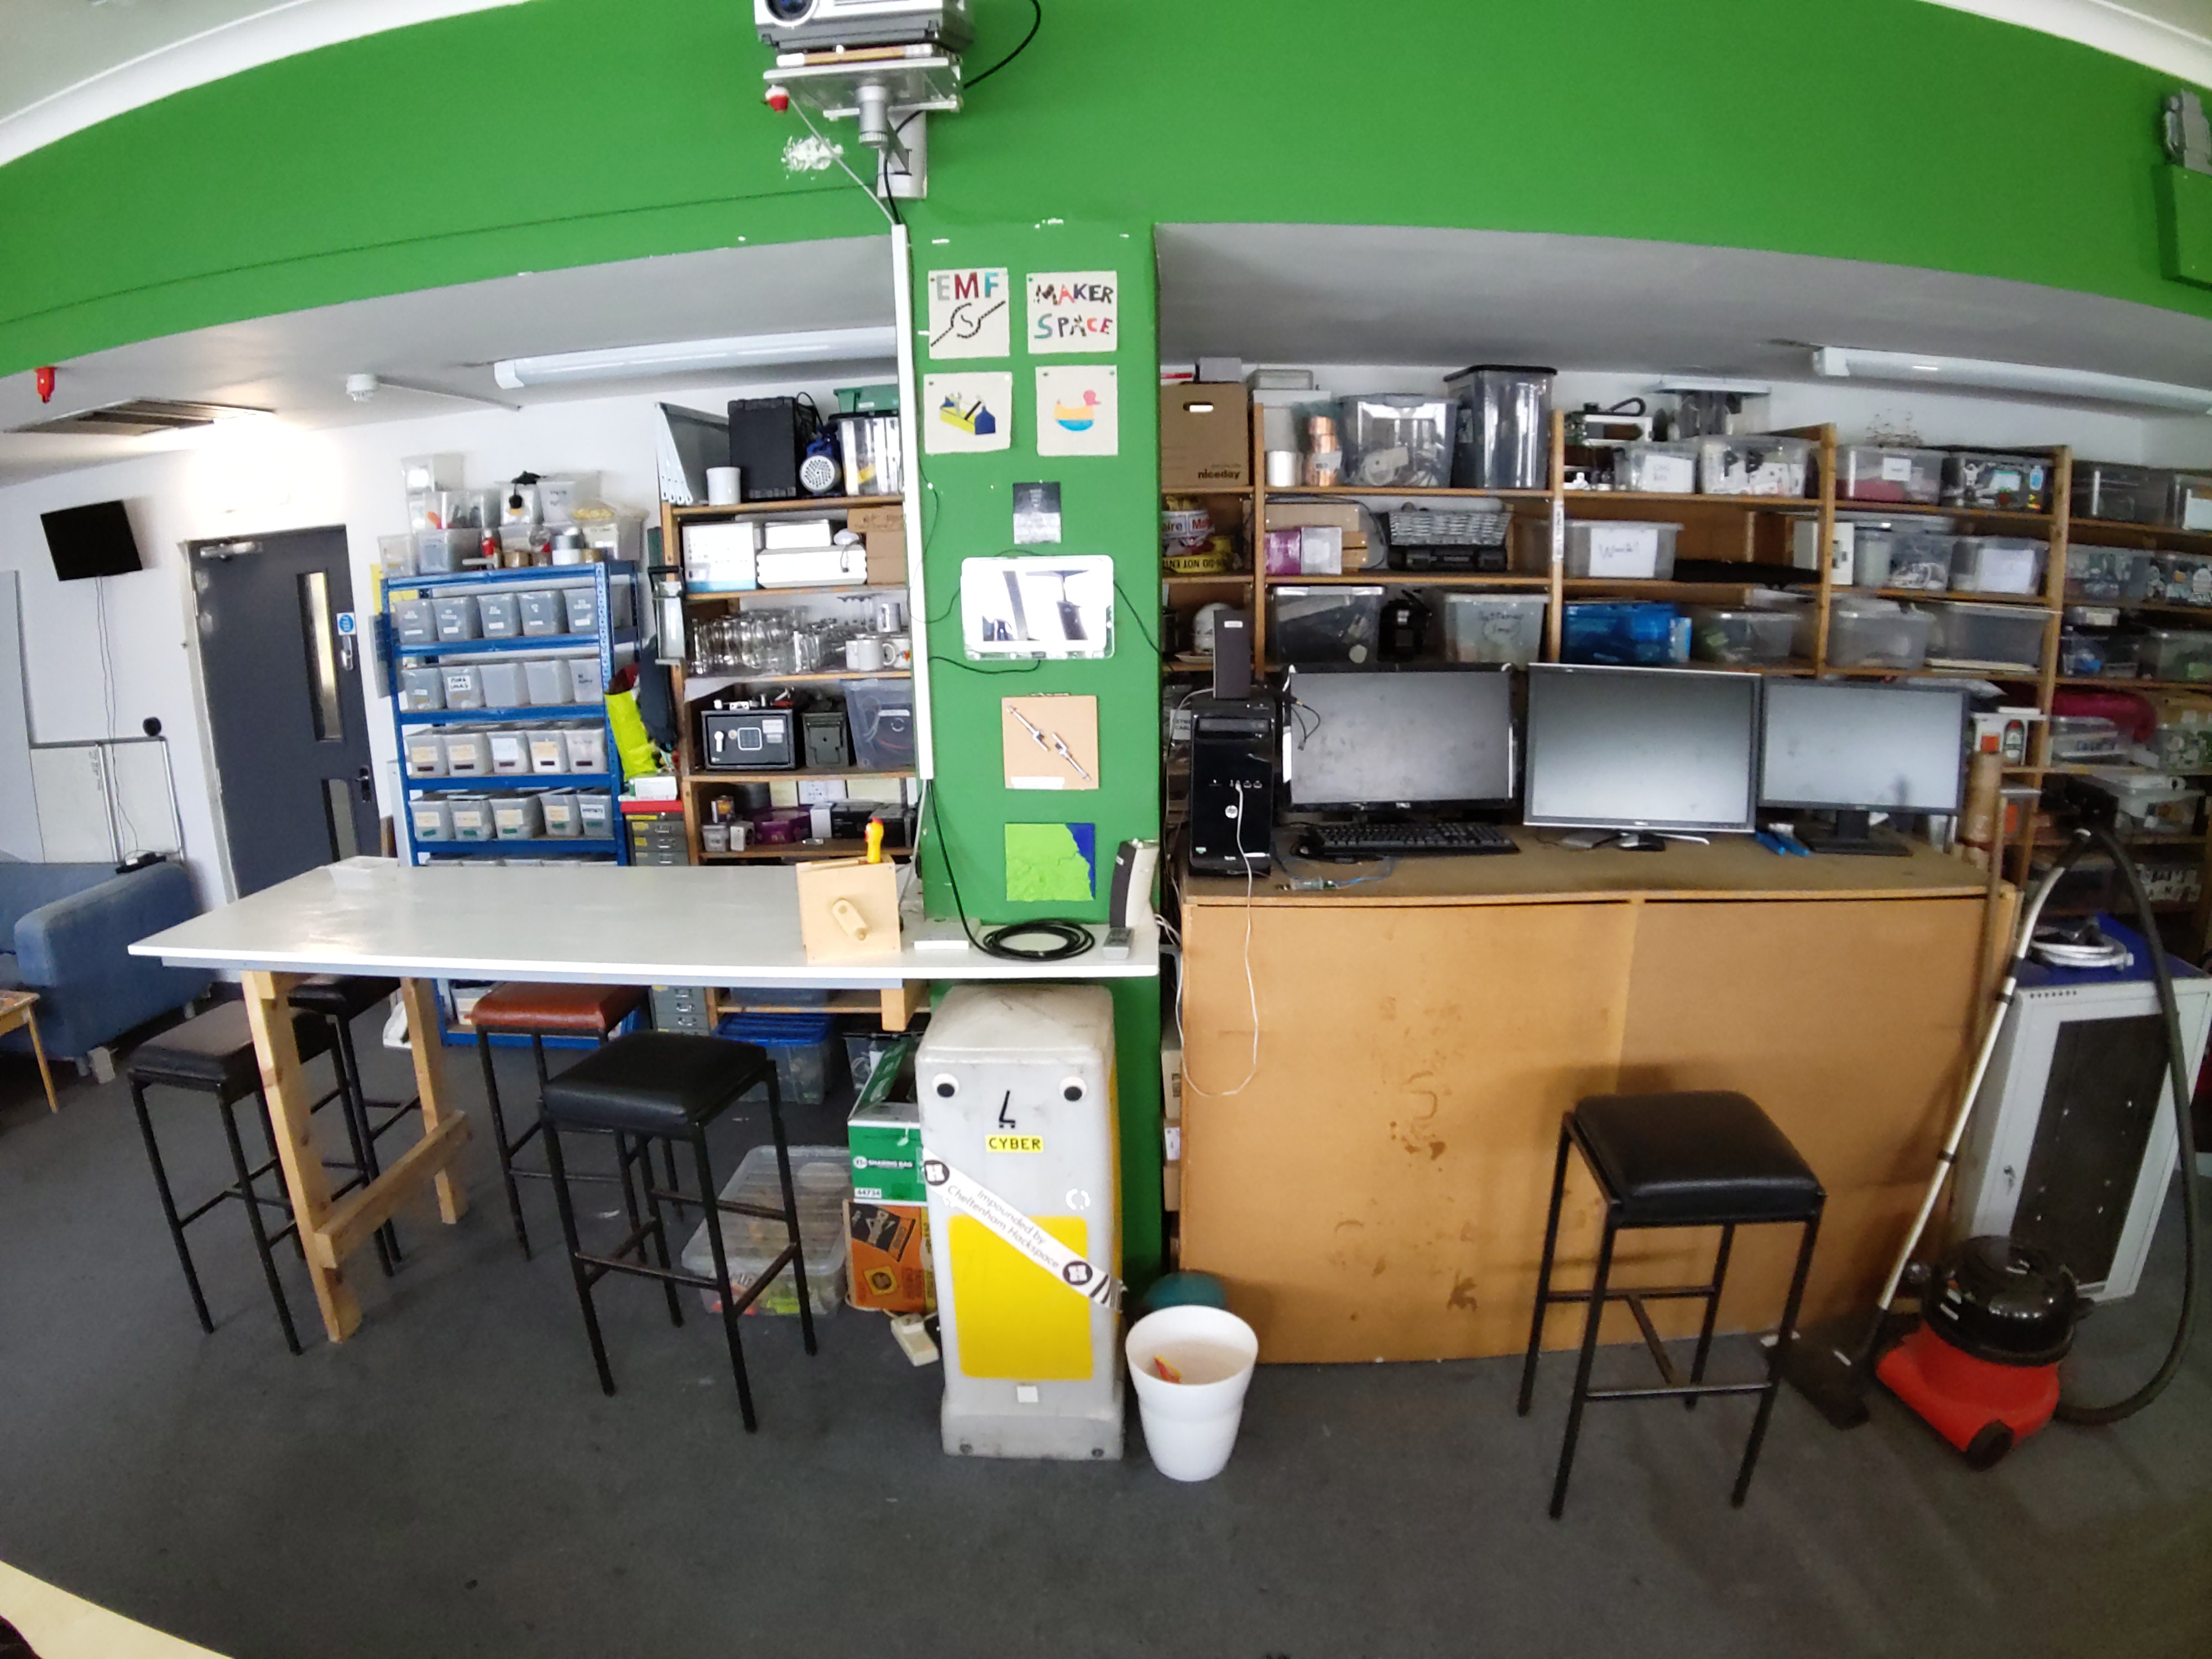
Welcome to the vibrant hub of creativity within this dynamic hackspace: the breakfast bar. This inviting space is designed to foster collaboration and provide a comfortable spot for members to create and connect.
The breakfast bar table is a sleek, modern fixture, crafted from high-quality materials that blend functionality with style. It’s spacious surface offers ample room for enjoying a quick snack, tinkering on a project, or engaging in lively discussions about the latest projects and ideas. The bar stools, with their ergonomic design, ensure comfort during those longer brainstorming sessions.
Strategically located within the hackspace, this area is bathed in natural light, creating a warm and welcoming atmosphere. The surrounding decor is thoughtfully curated to inspire creativity, with vibrant artwork and innovative designs adorning the walls.
Whether you’re taking a break from a challenging project or simply looking to network with fellow makers, the breakfast bar table area is the perfect spot.
Adjacent to the breakfast bar is the cutting-edge communication hub within the hackspace: the amateur radio setup. This area is meticulously designed for enthusiasts and hobbyists who are passionate about radio technology and communication.
This amateur radio setup is more than just a collection of equipment; it’s a gateway to a world of communication and exploration. Whether you’re a seasoned operator or new to the hobby, this space is designed to inspire and support your passion for radio technology.
Step into this exceptional amateur radio setup and experience the thrill of global communication right from the heart of our hackspace!
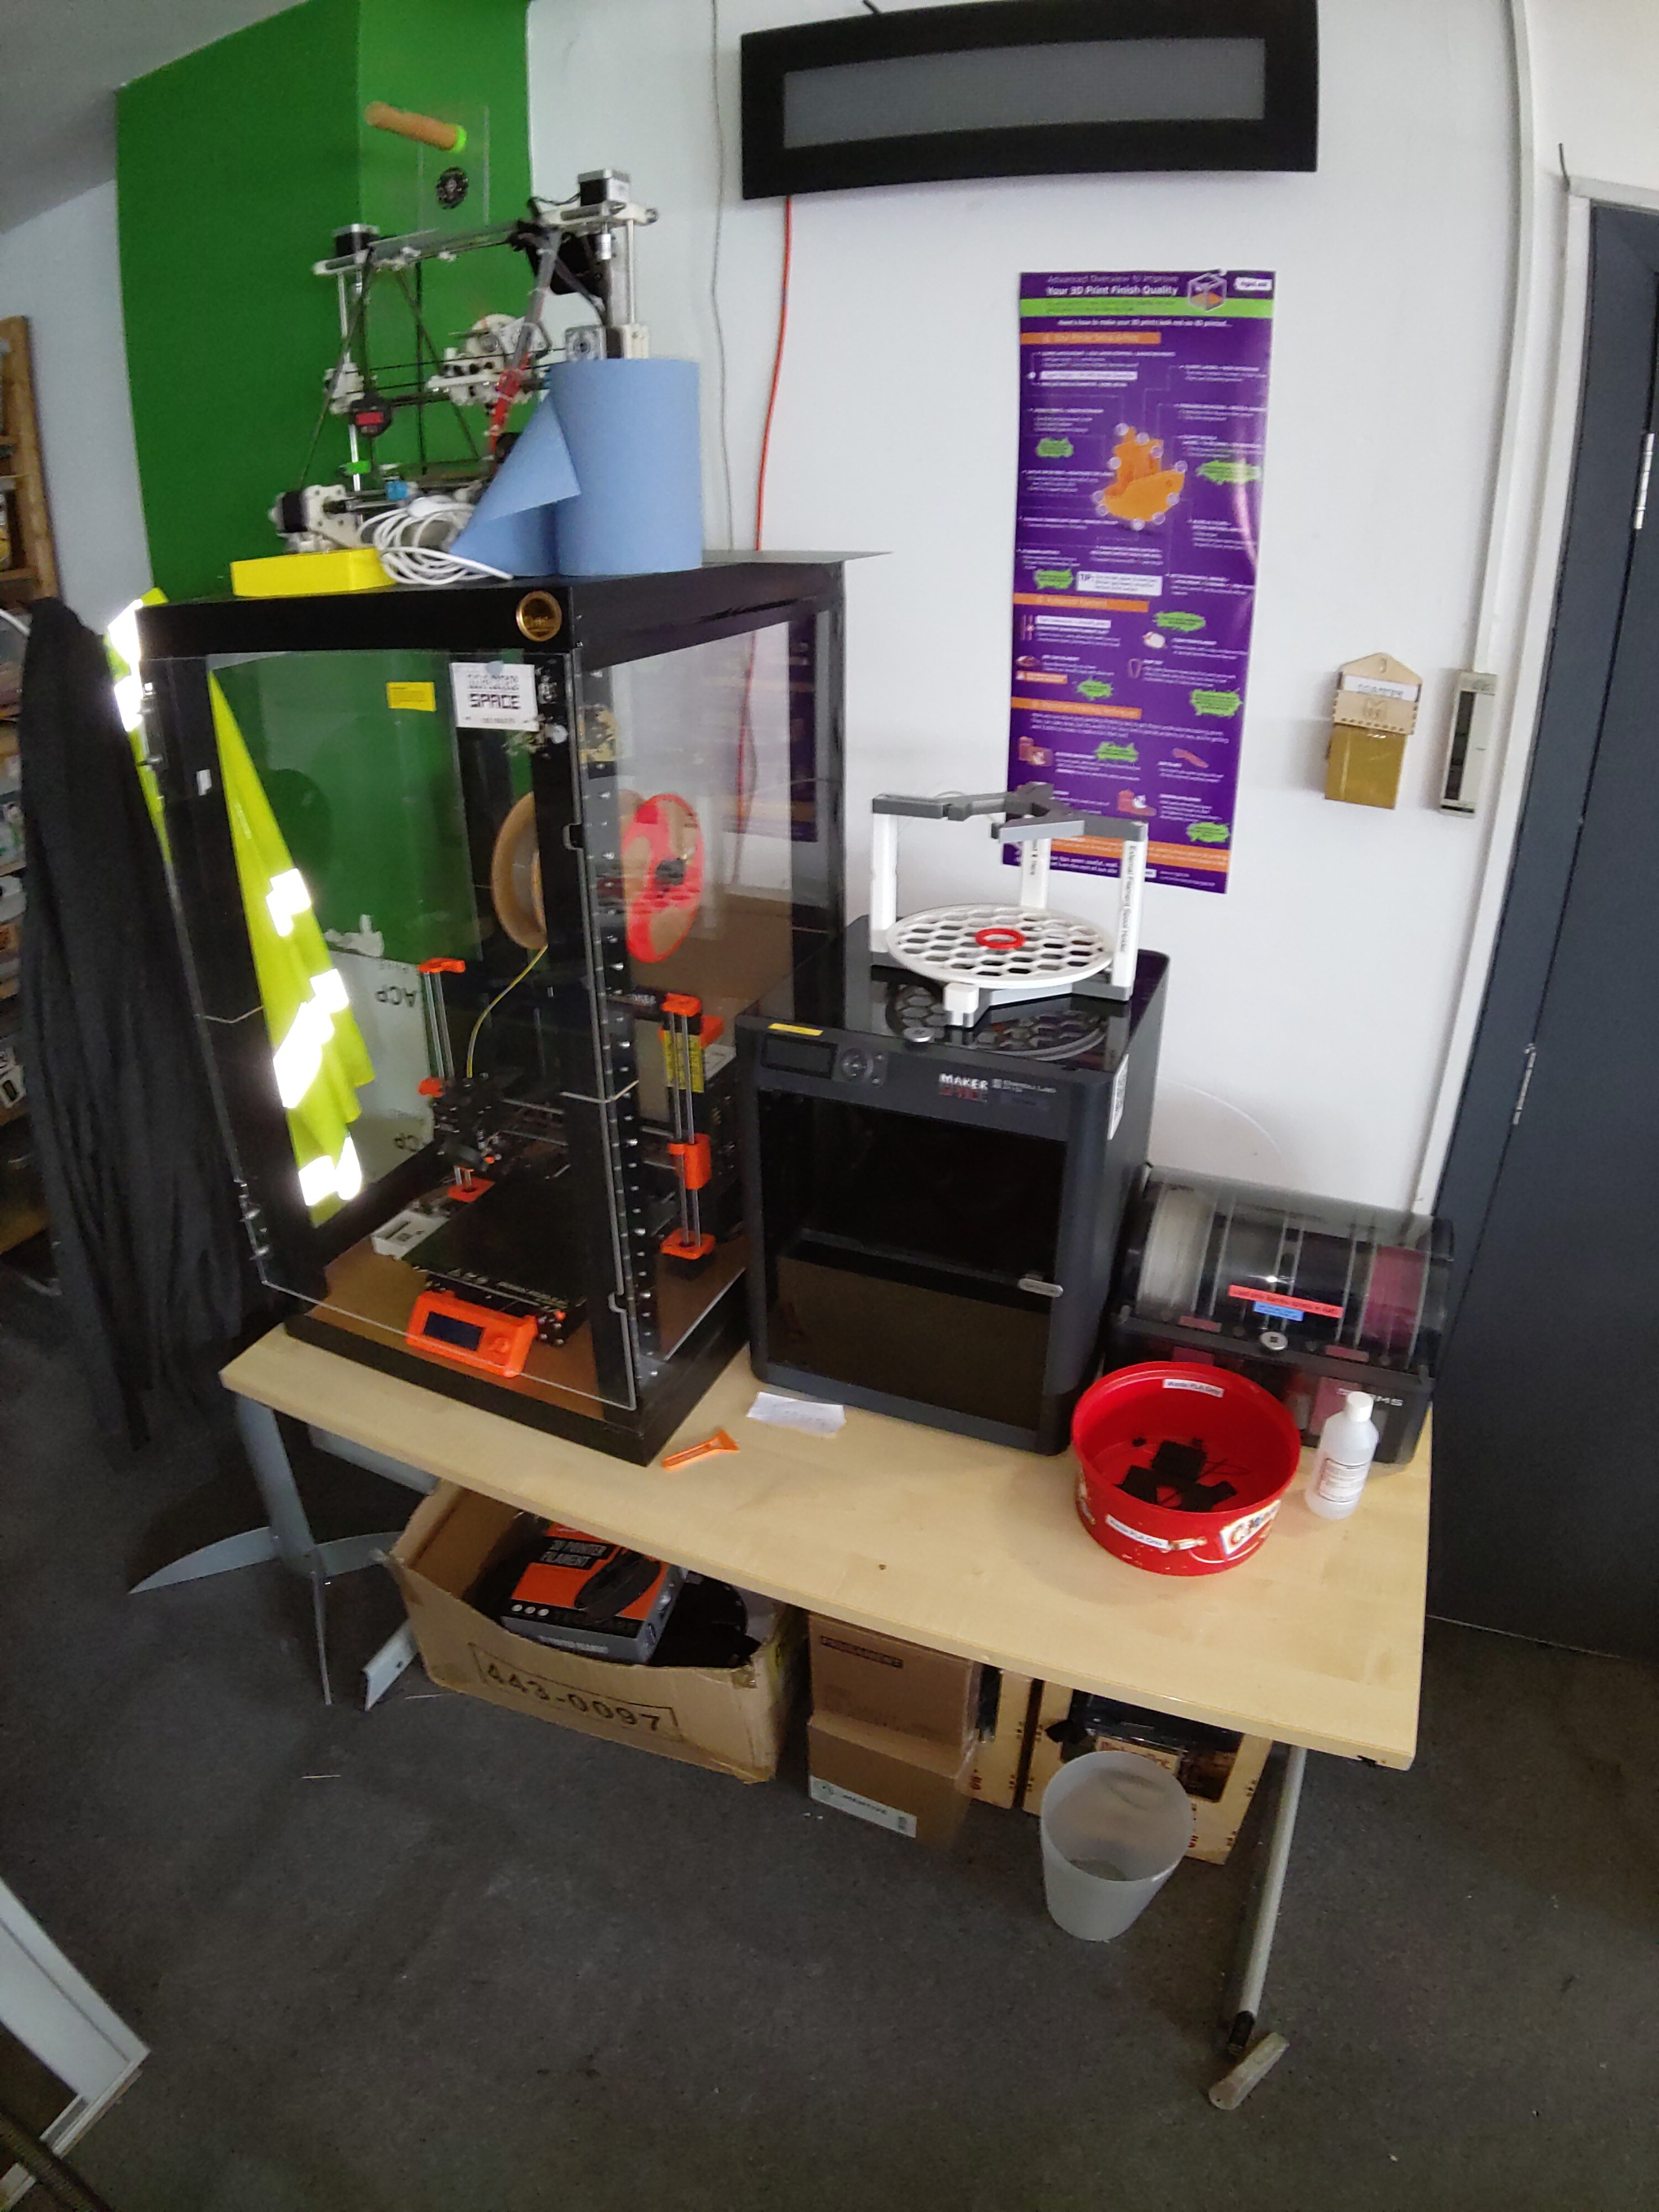
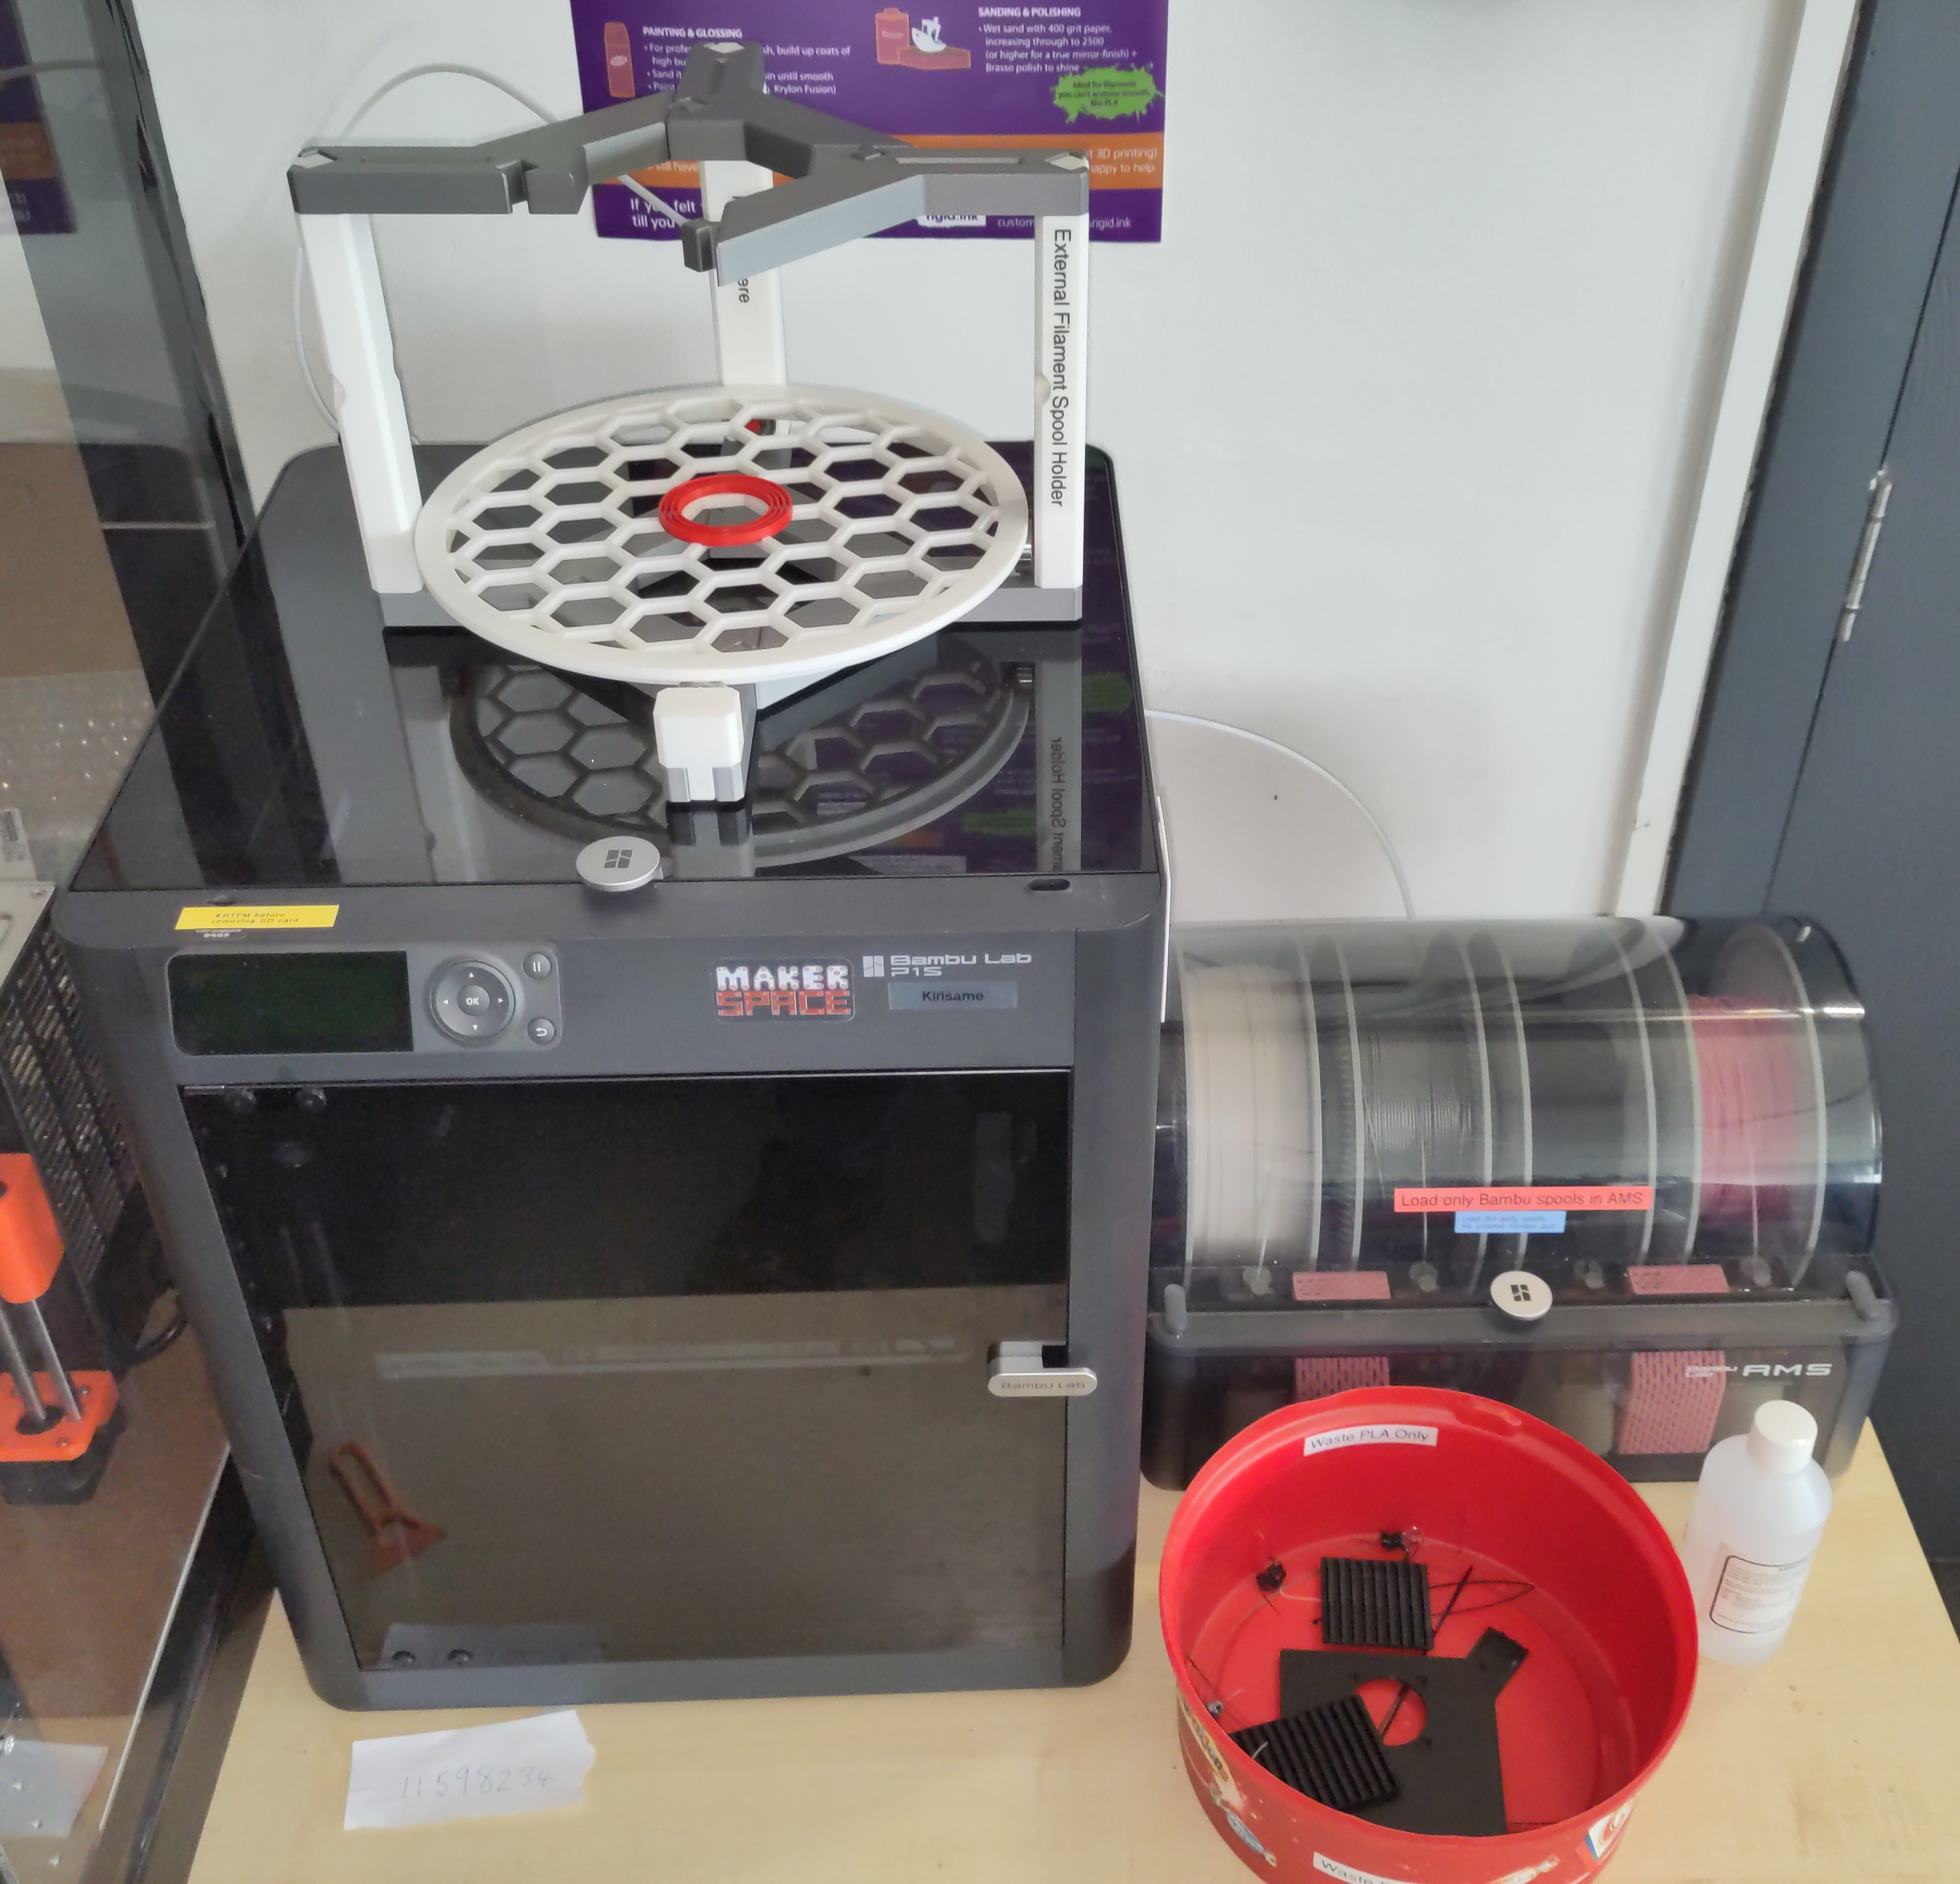
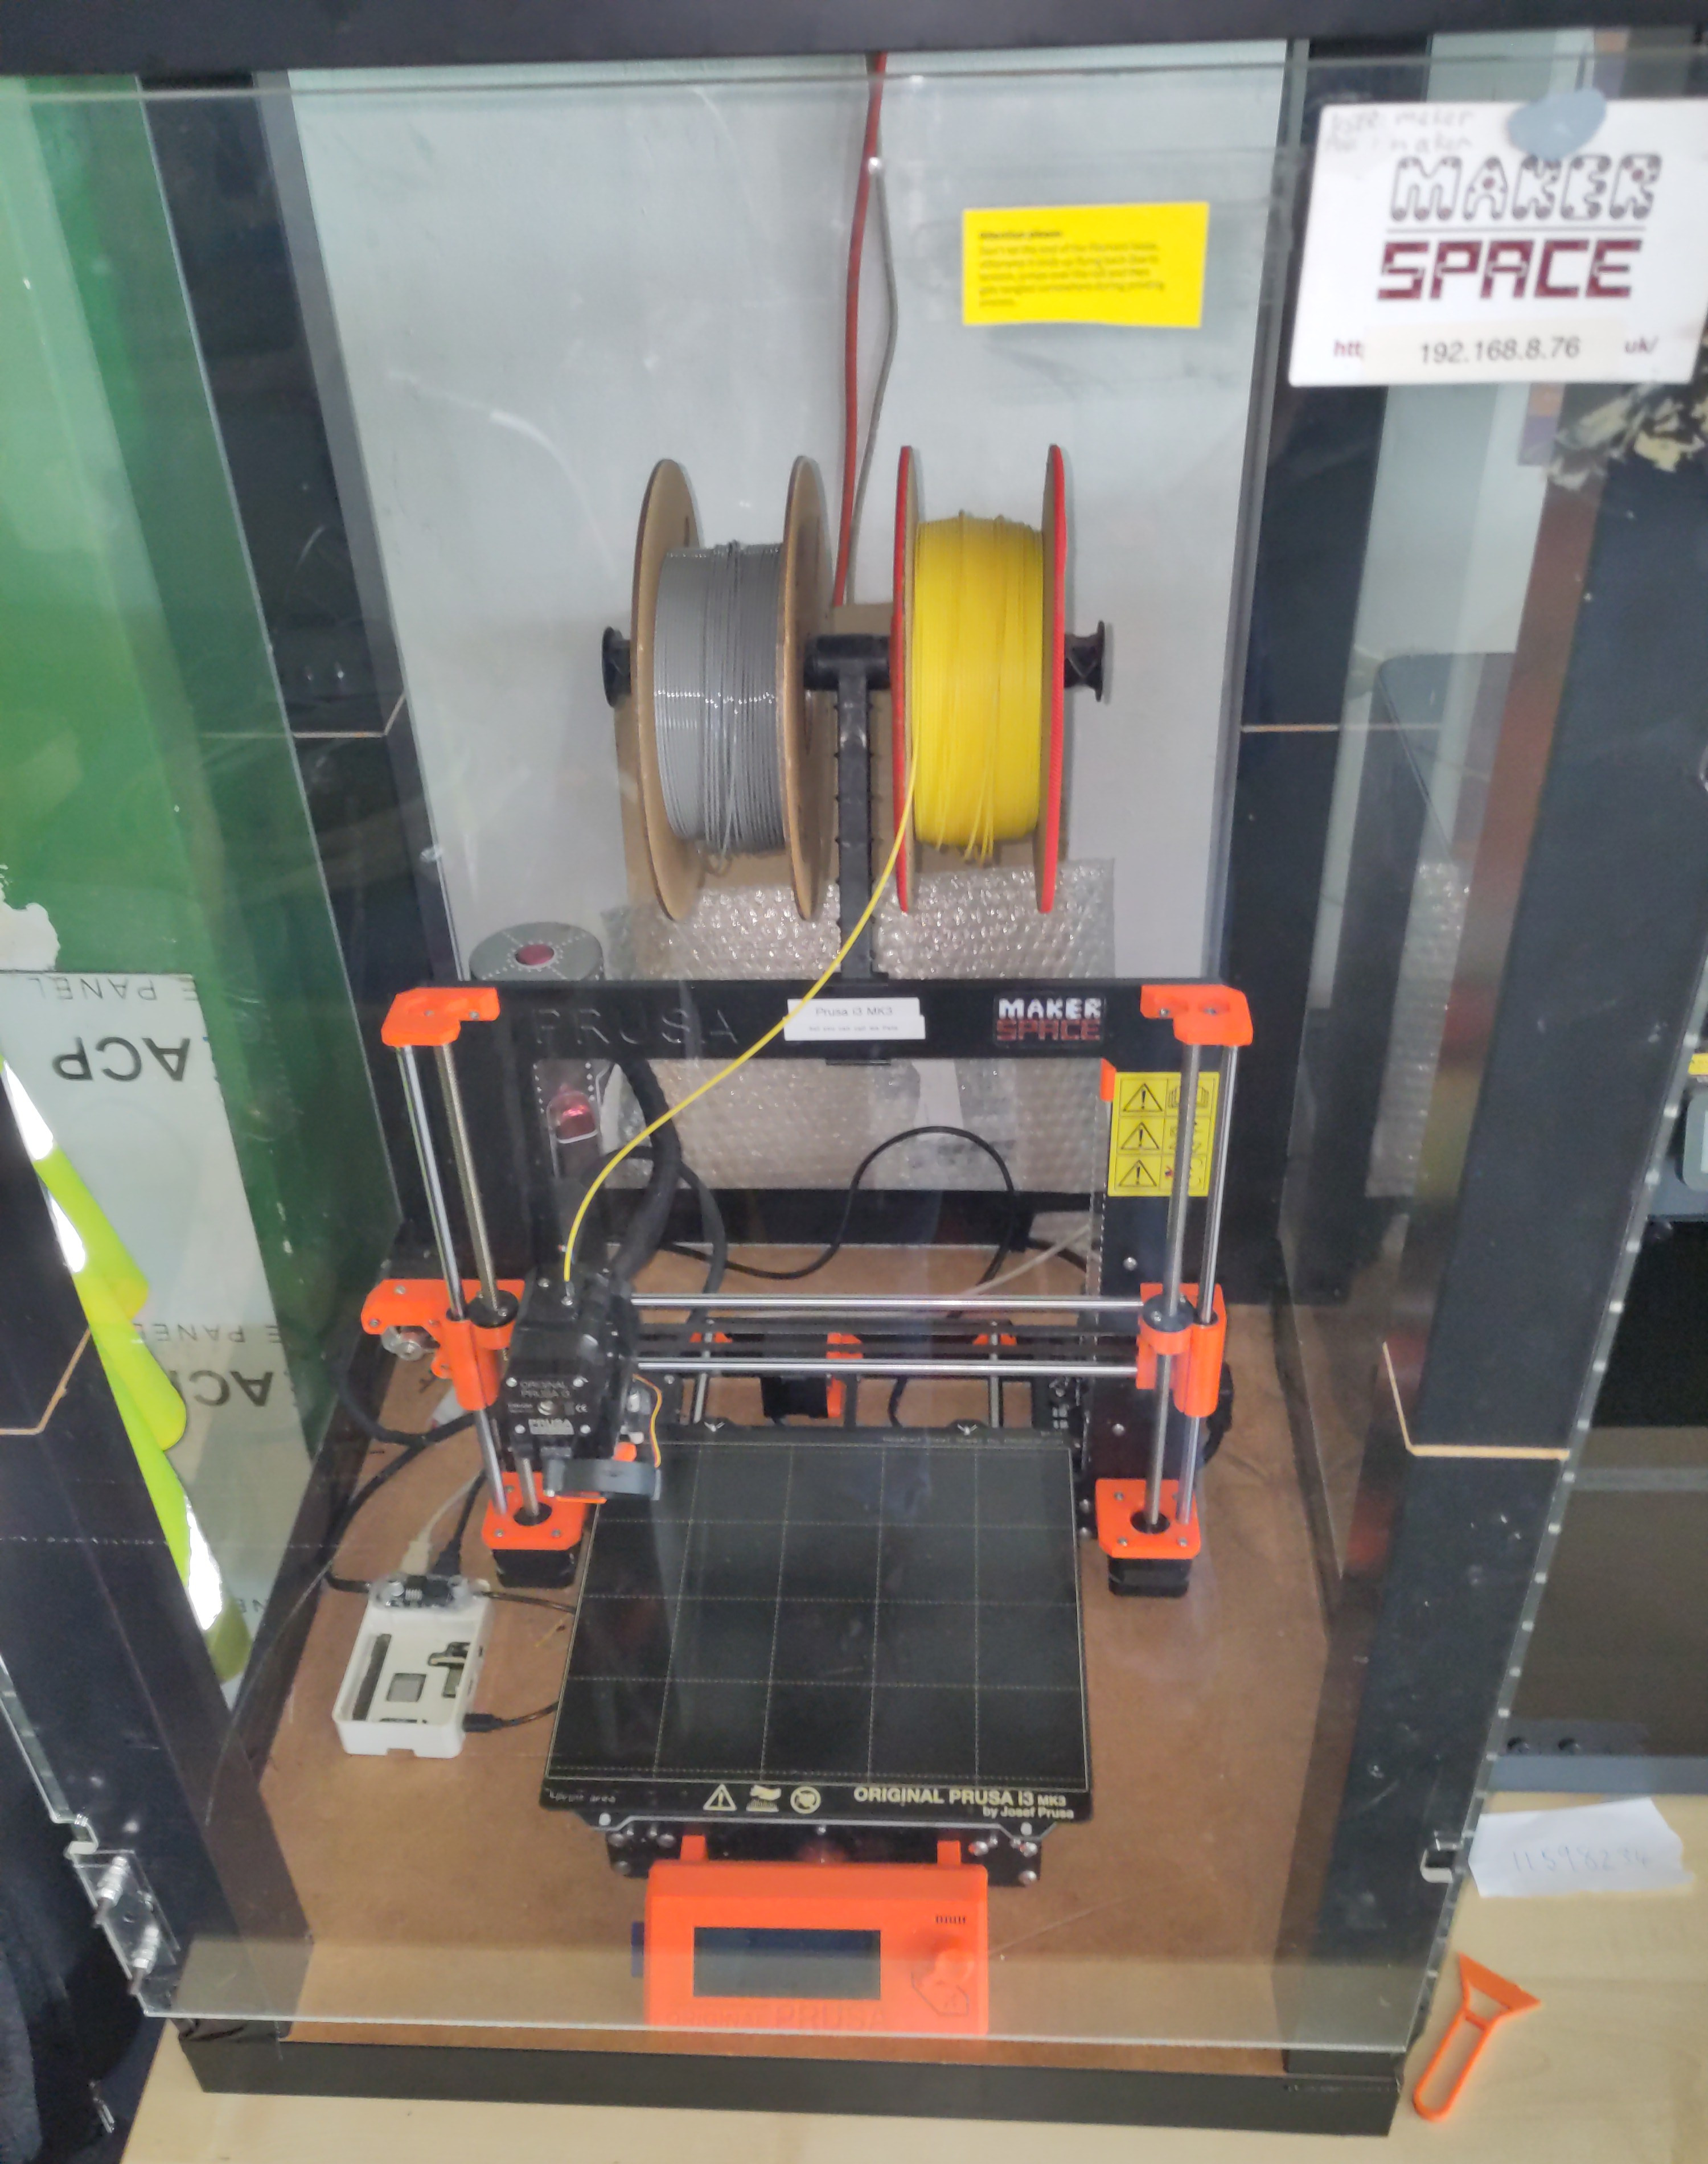
Here we have our 3D printing station. This area is a dream come true for any maker, featuring top-of-the-line equipment that promises precision and reliability.
To the left, you’ll find the renowned Prusa MK3. Its user-friendly interface and reliable performance make it an indispensable tool for both beginners and seasoned professionals.
Complementing the Prusa MK3 is the cutting-edge Bambu Lab P1S. This advanced 3D printer is celebrated for its speed and versatility, capable of producing high-quality prints in a fraction of the time. With its sleek design and state-of-the-art features, the Bambu Lab P1S is perfect for those looking to push the boundaries of their creativity.
The 3D printing station is thoughtfully arranged to maximize efficiency and inspire innovation. Each printer is strategically positioned to allow for seamless workflow, with ample workspace for preparing and finishing prints. The station is well-lit and equipped with all the necessary tools and materials, ensuring that every project can be executed to perfection.
South Basement Workshop
Welcome to this unique and versatile basement workshop. This exceptional space is a haven for woodworking enthusiasts, offering a comprehensive array of tools and equipment to bring your creative visions to life. The workshop boasts a generous floor plan, providing ample room for multiple projects and collaborative work.
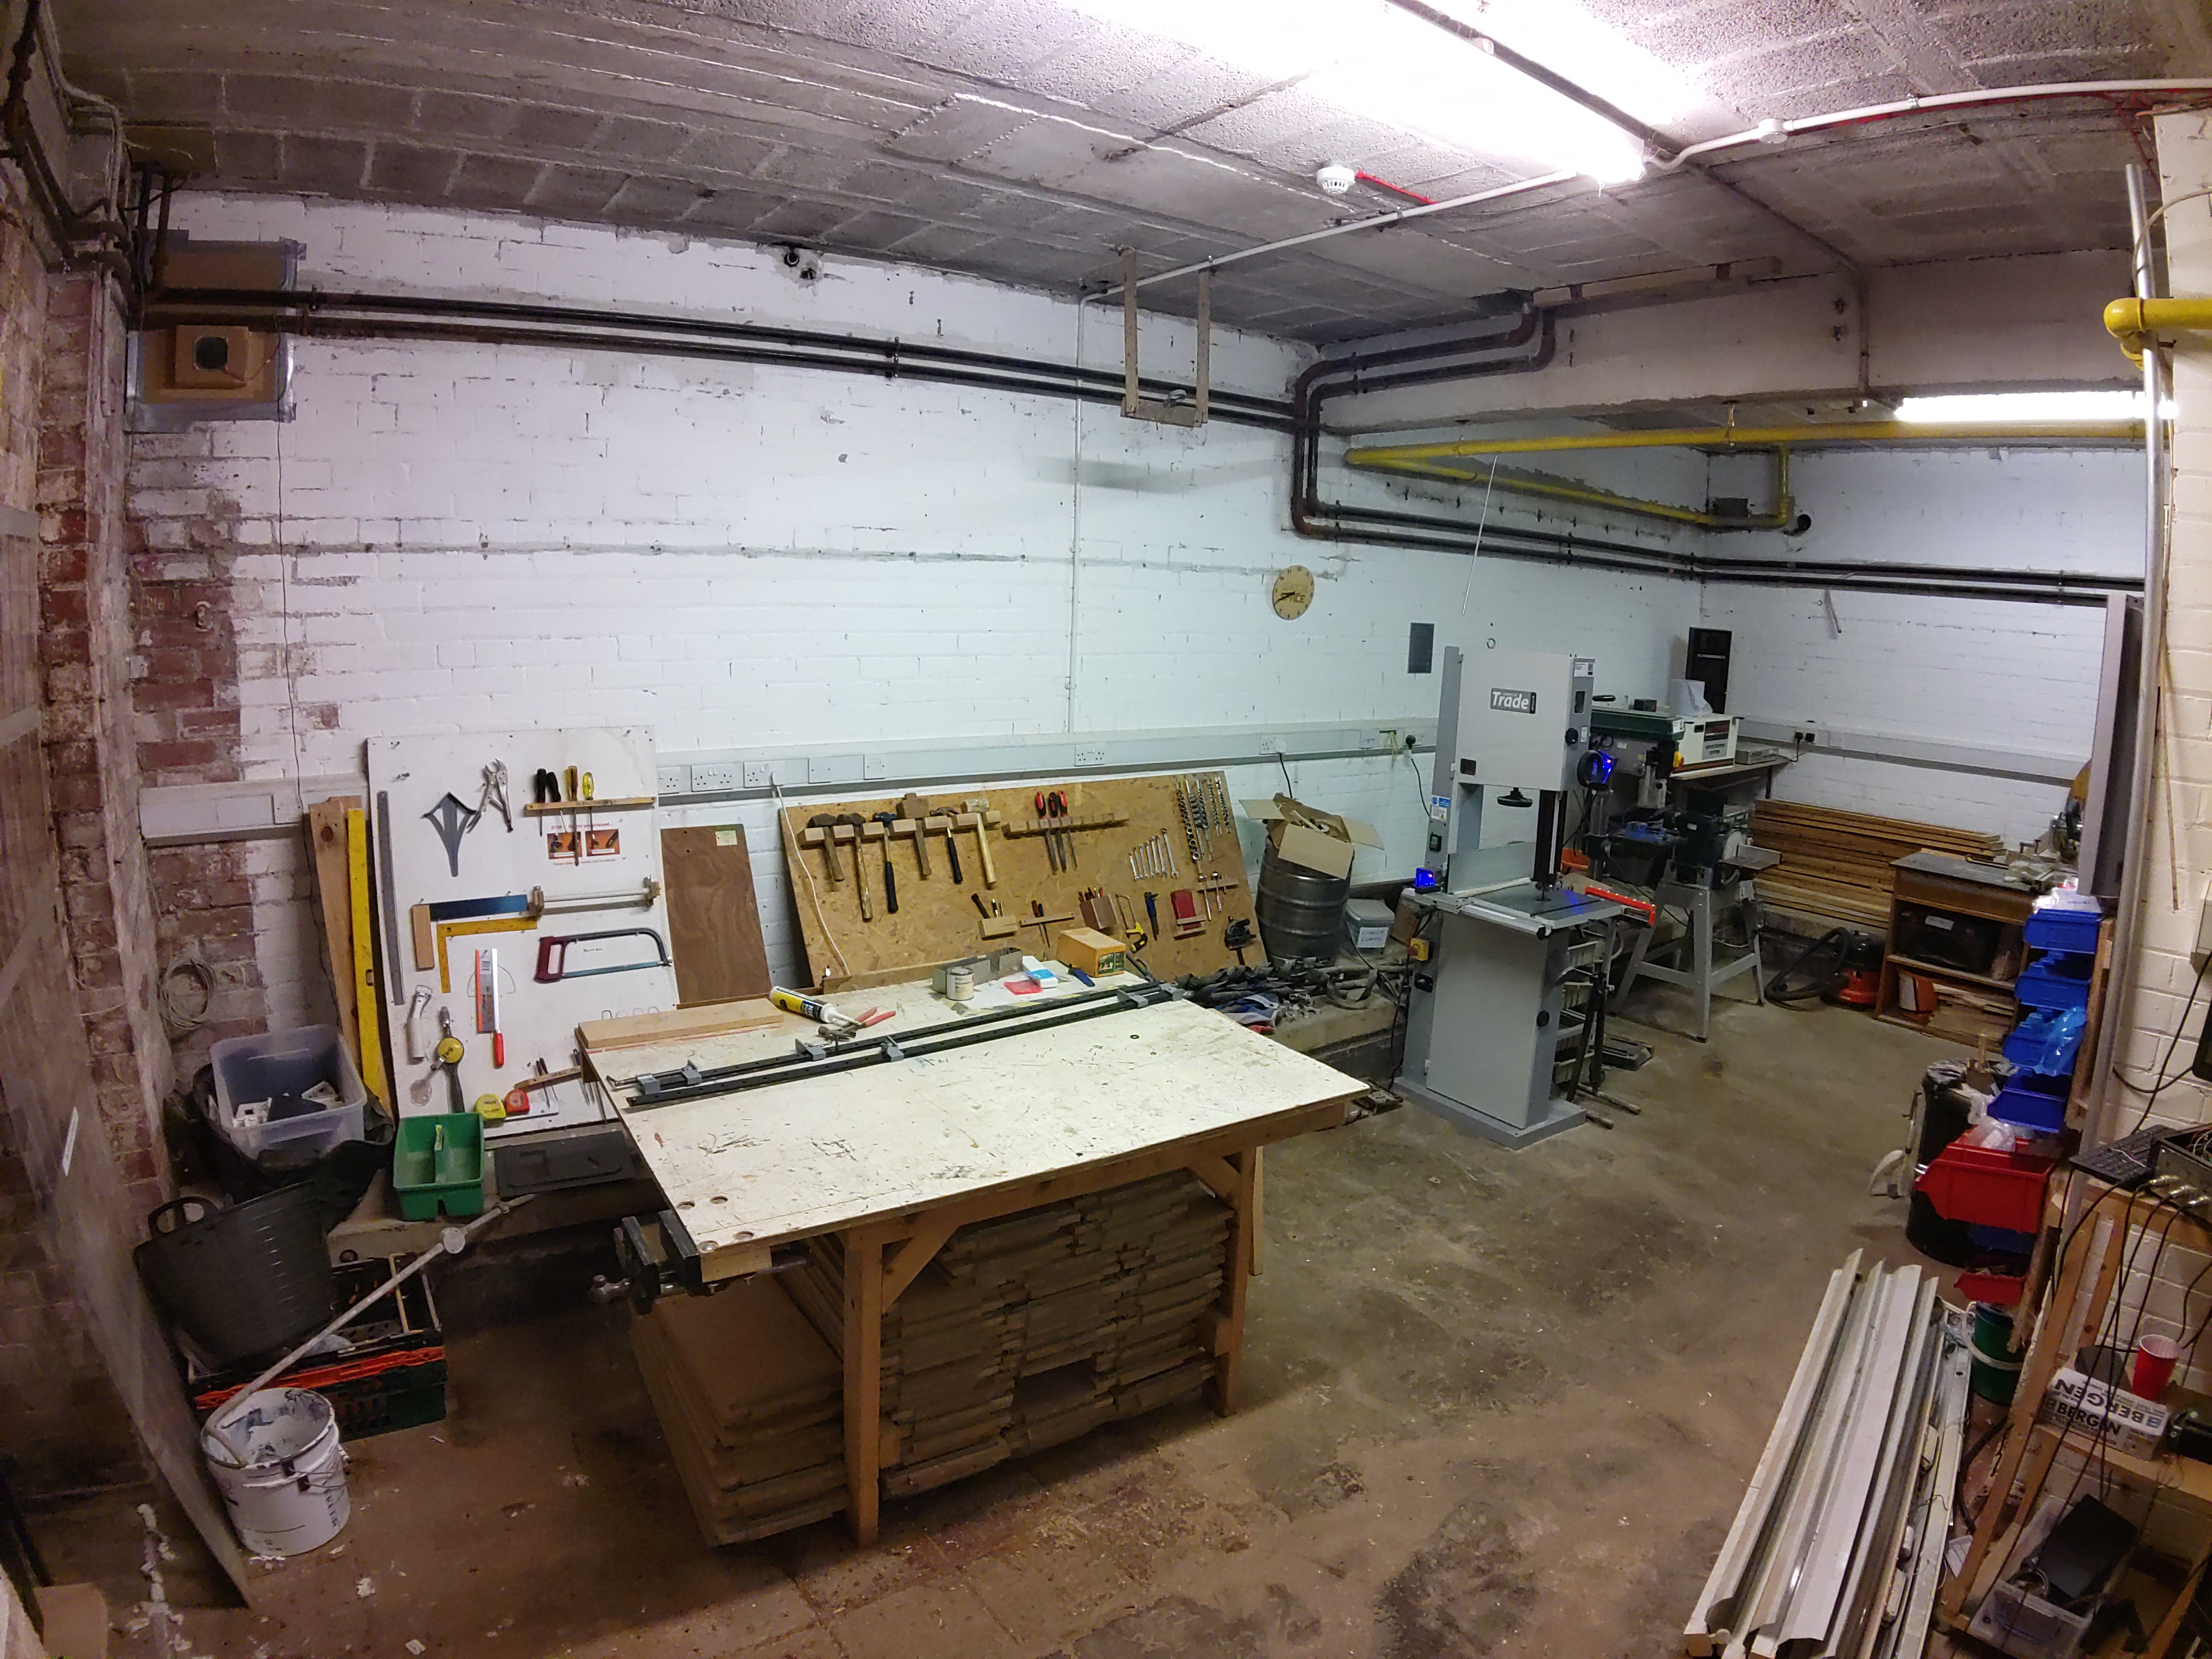
Here, we present a non-functioning CNC milling machine, awaiting the touch of a skilled hand to restore it to its former glory. The machine boasts a solid and durable construction, designed to handle heavy-duty tasks once operational.
The plastic bins harbor an orchestra of fasteners. Hex nuts, wing nuts, carriage bolts—they jostle for attention. And the washers? They’re like tiny time-traveling saucers, ready to stabilize your contraptions.
This well-equipped work area is a dream come true for any maker, featuring an impressive array of machine tools designed to bring your projects to life. All tools are maintained to the highest standards, ensuring precision and reliability for every project. The work area is thoughtfully organised, with clear pathways and designated zones for each type of machine, promoting a smooth and efficient workflow.
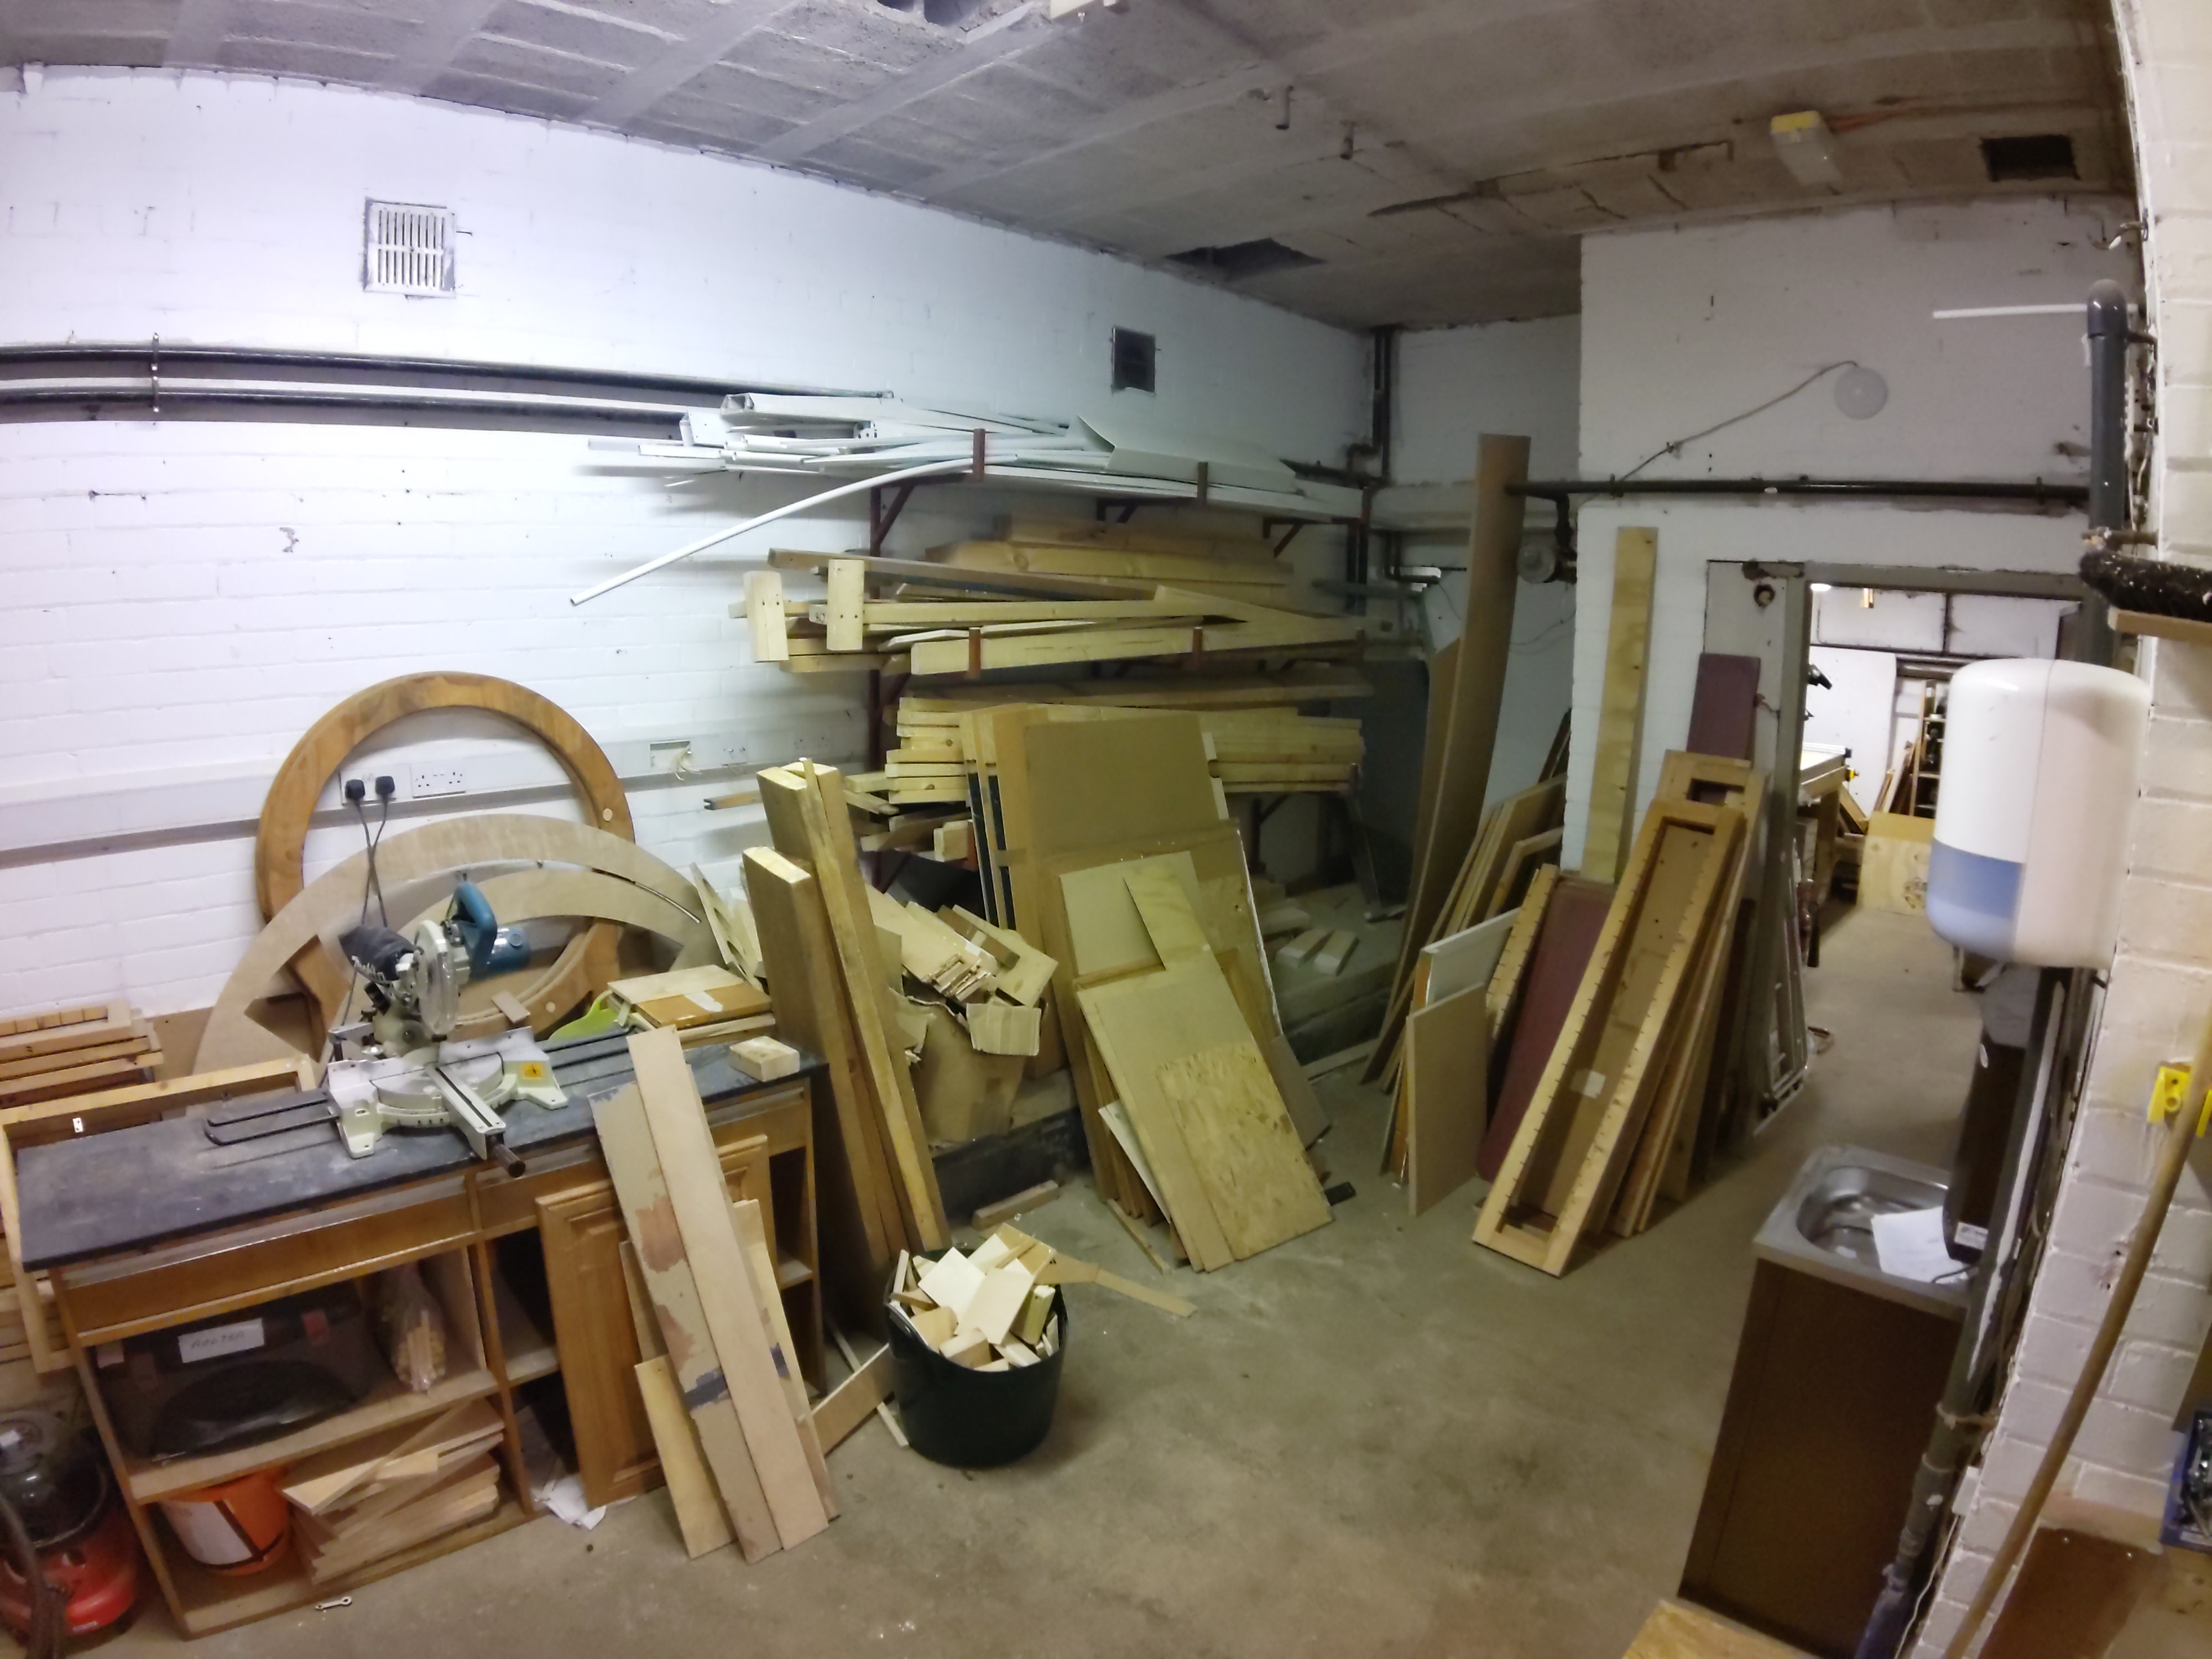
In the corner you will find our wood and pipe storage area. This dedicated space is designed to cater to the needs of woodworking enthusiasts, ensuring that all materials are stored efficiently and safely. The area boasts a variety of storage solutions, including vertical racks, horizontal shelves, and custom bins, accommodating wood of all sizes and types.
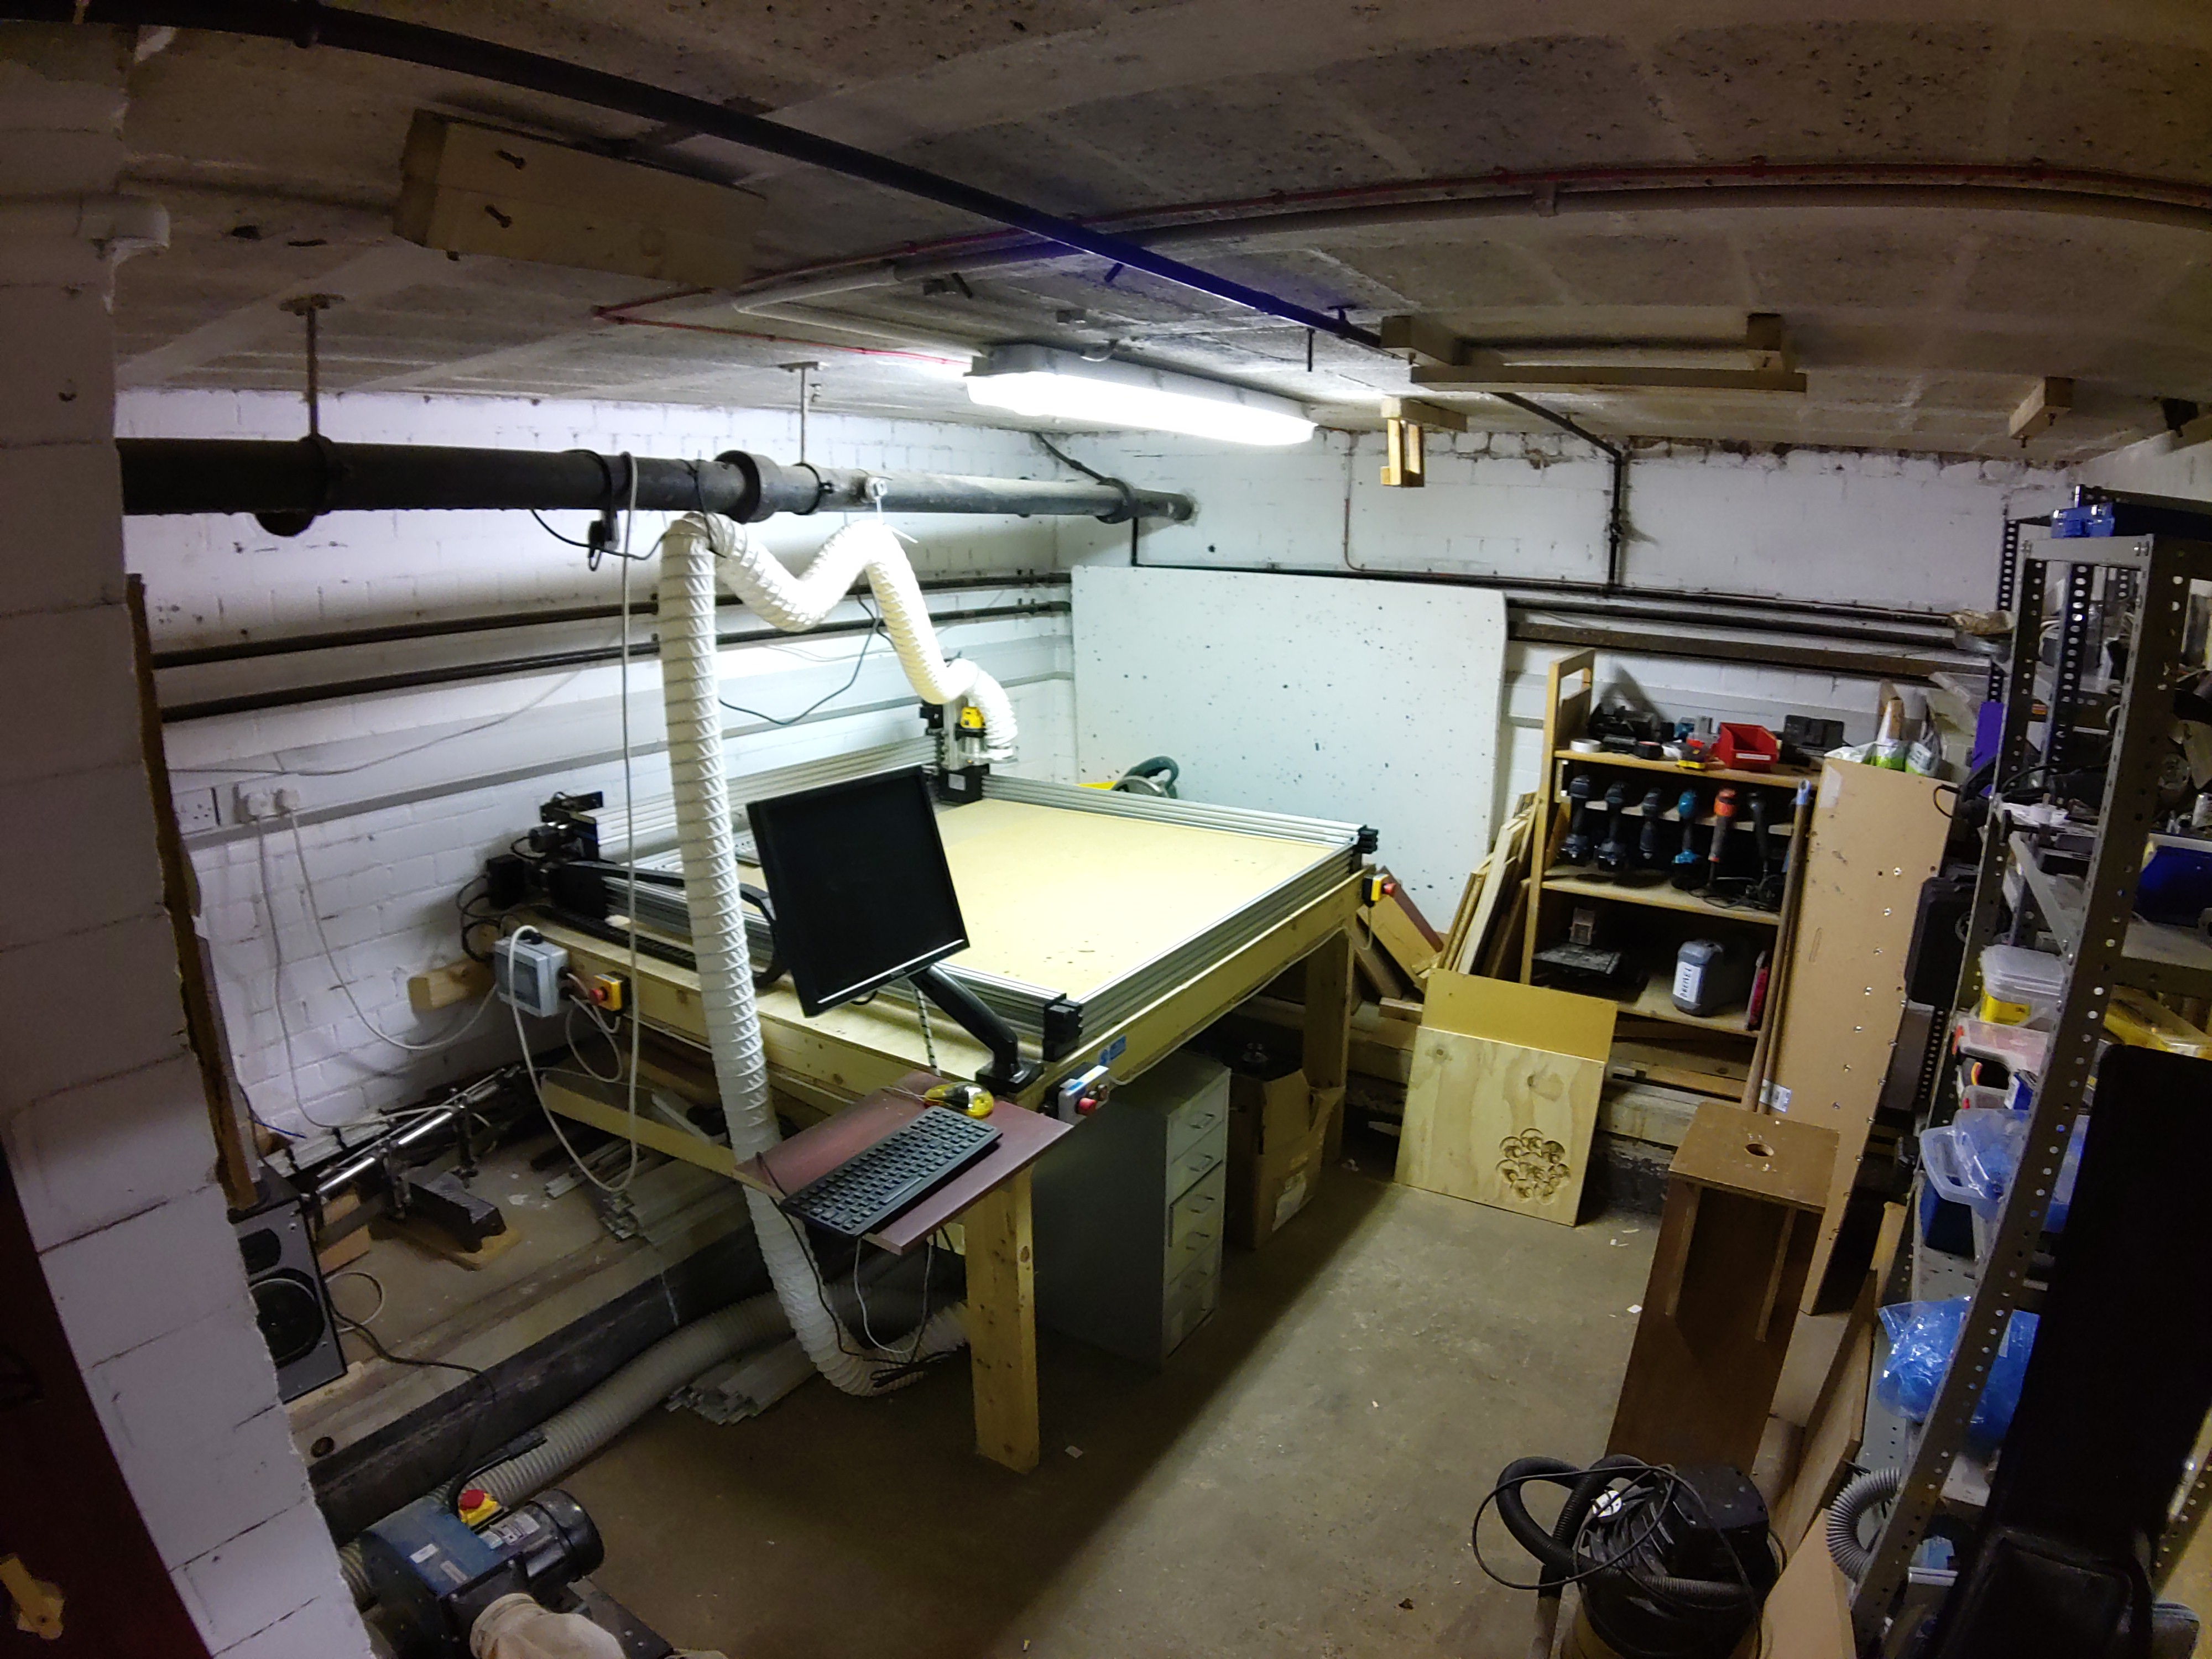
North Basement Workshop
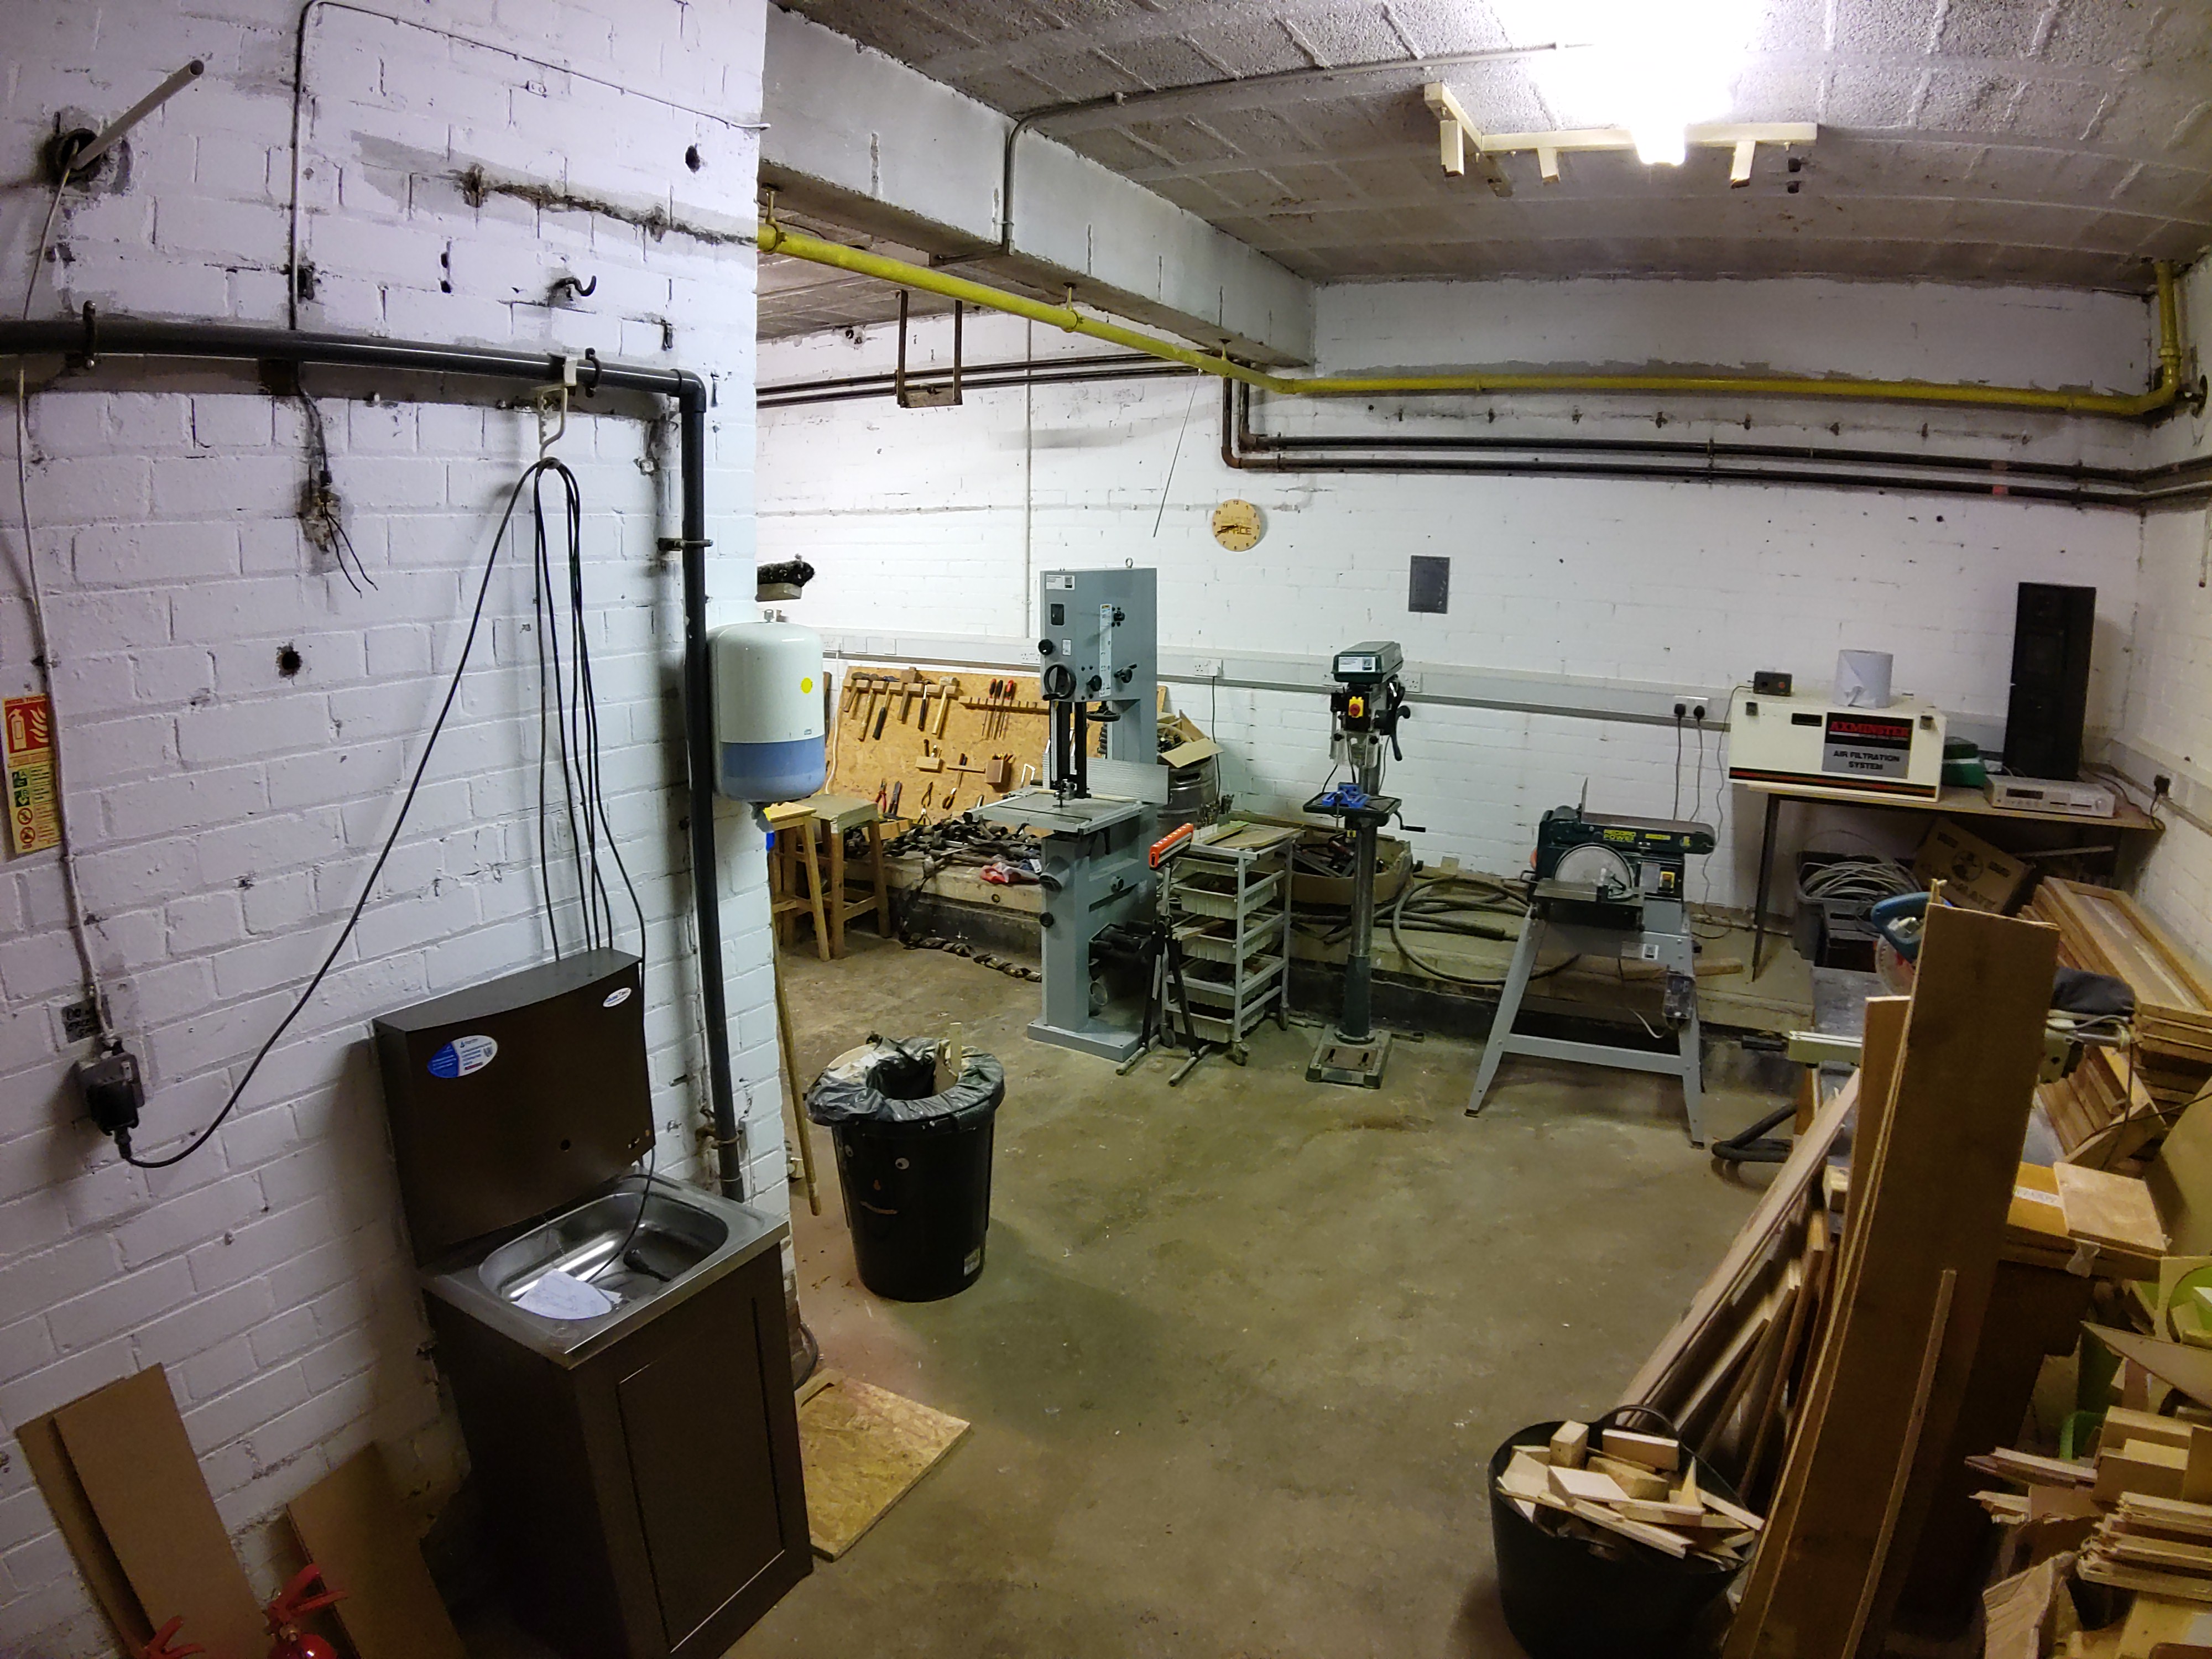
Welcome to the cutting-edge corner of the basement workshop, where innovation meets precision. This dedicated area features the highly sought-after Workbee CNC router, a must-have for any serious maker or woodworker. The Workbee CNC router is the centerpiece of this corner, known for its accuracy and versatility. It’s perfect for intricate carvings, precise cuts, and complex designs. The intuitive control system and software make it accessible for both beginners and experienced users, allowing for seamless operation and creativity.
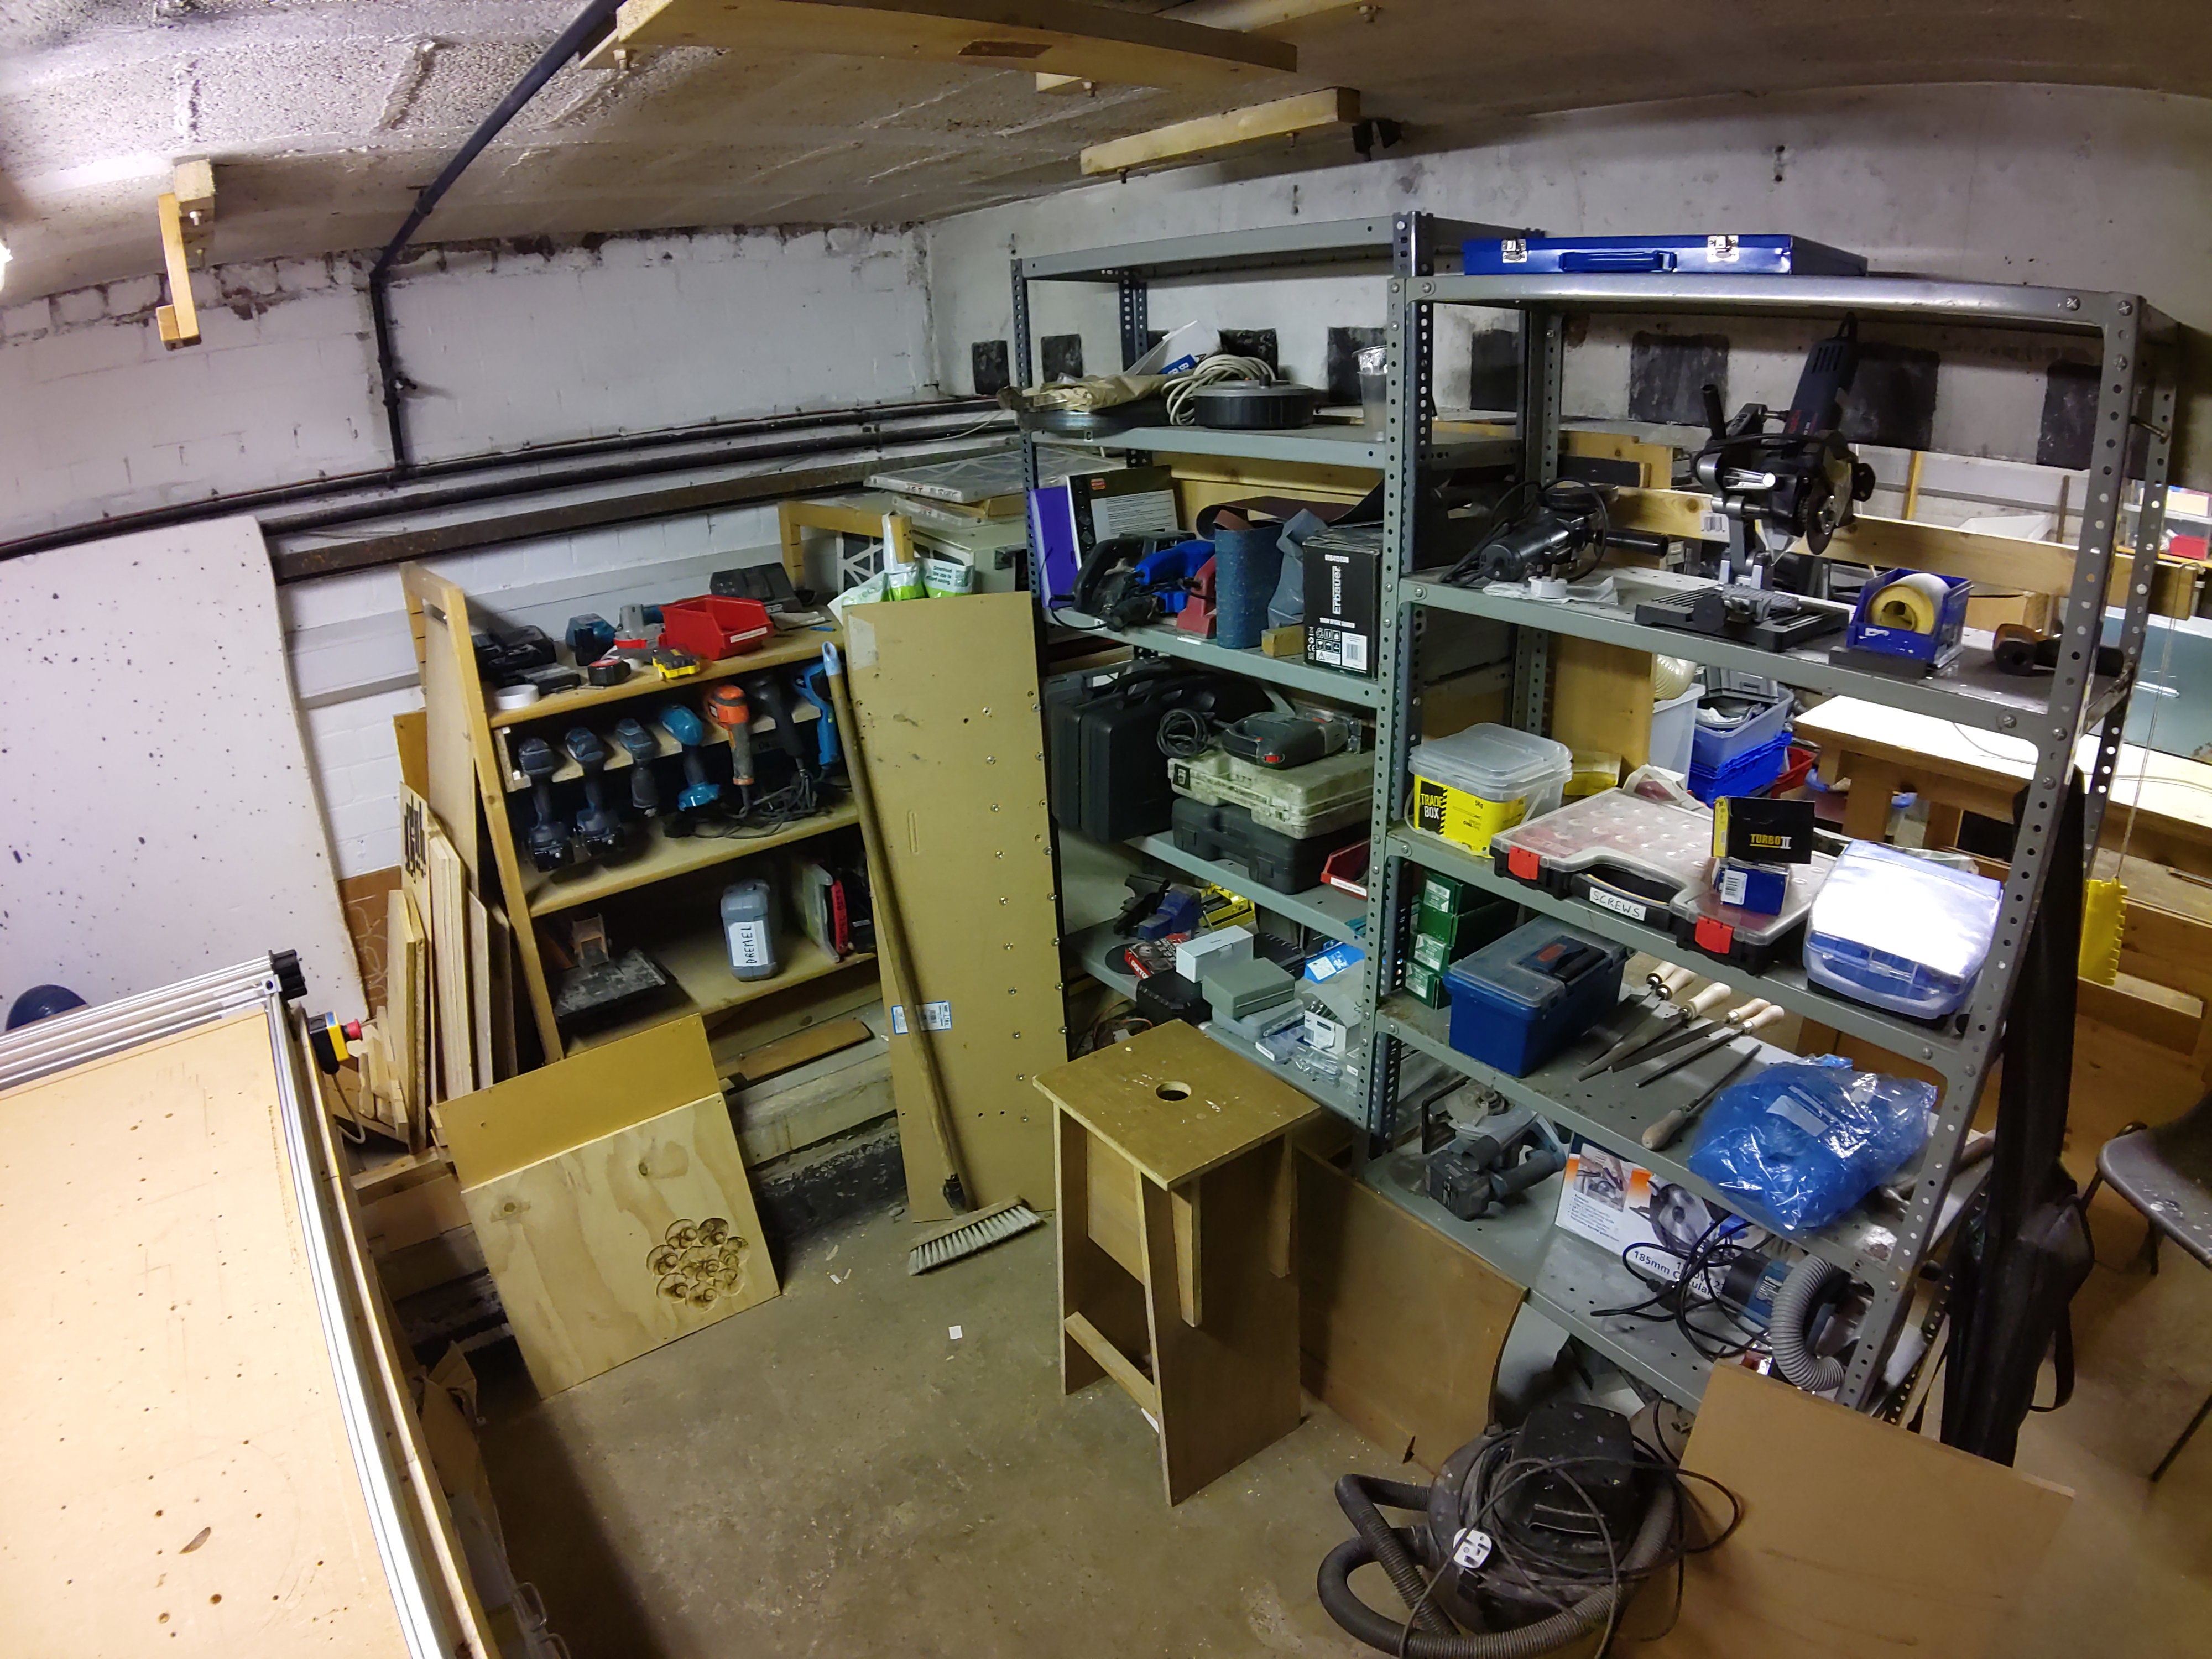
Welcome to the meticulously curated hand tool collection within our vibrant hackspace. This essential area is a treasure trove for any maker, offering a diverse range of tools that cater to all your crafting and repair needs. Tools are neatly arranged on shelves and in toolboxes, making it easy to find exactly what you need quickly and efficiently. As part of our hackspace, this collection benefits from the collective knowledge and experience of our members, who are always willing to share tips and techniques. Regular maintenance ensures that all tools are kept in optimal condition, ready for use whenever inspiration strikes.
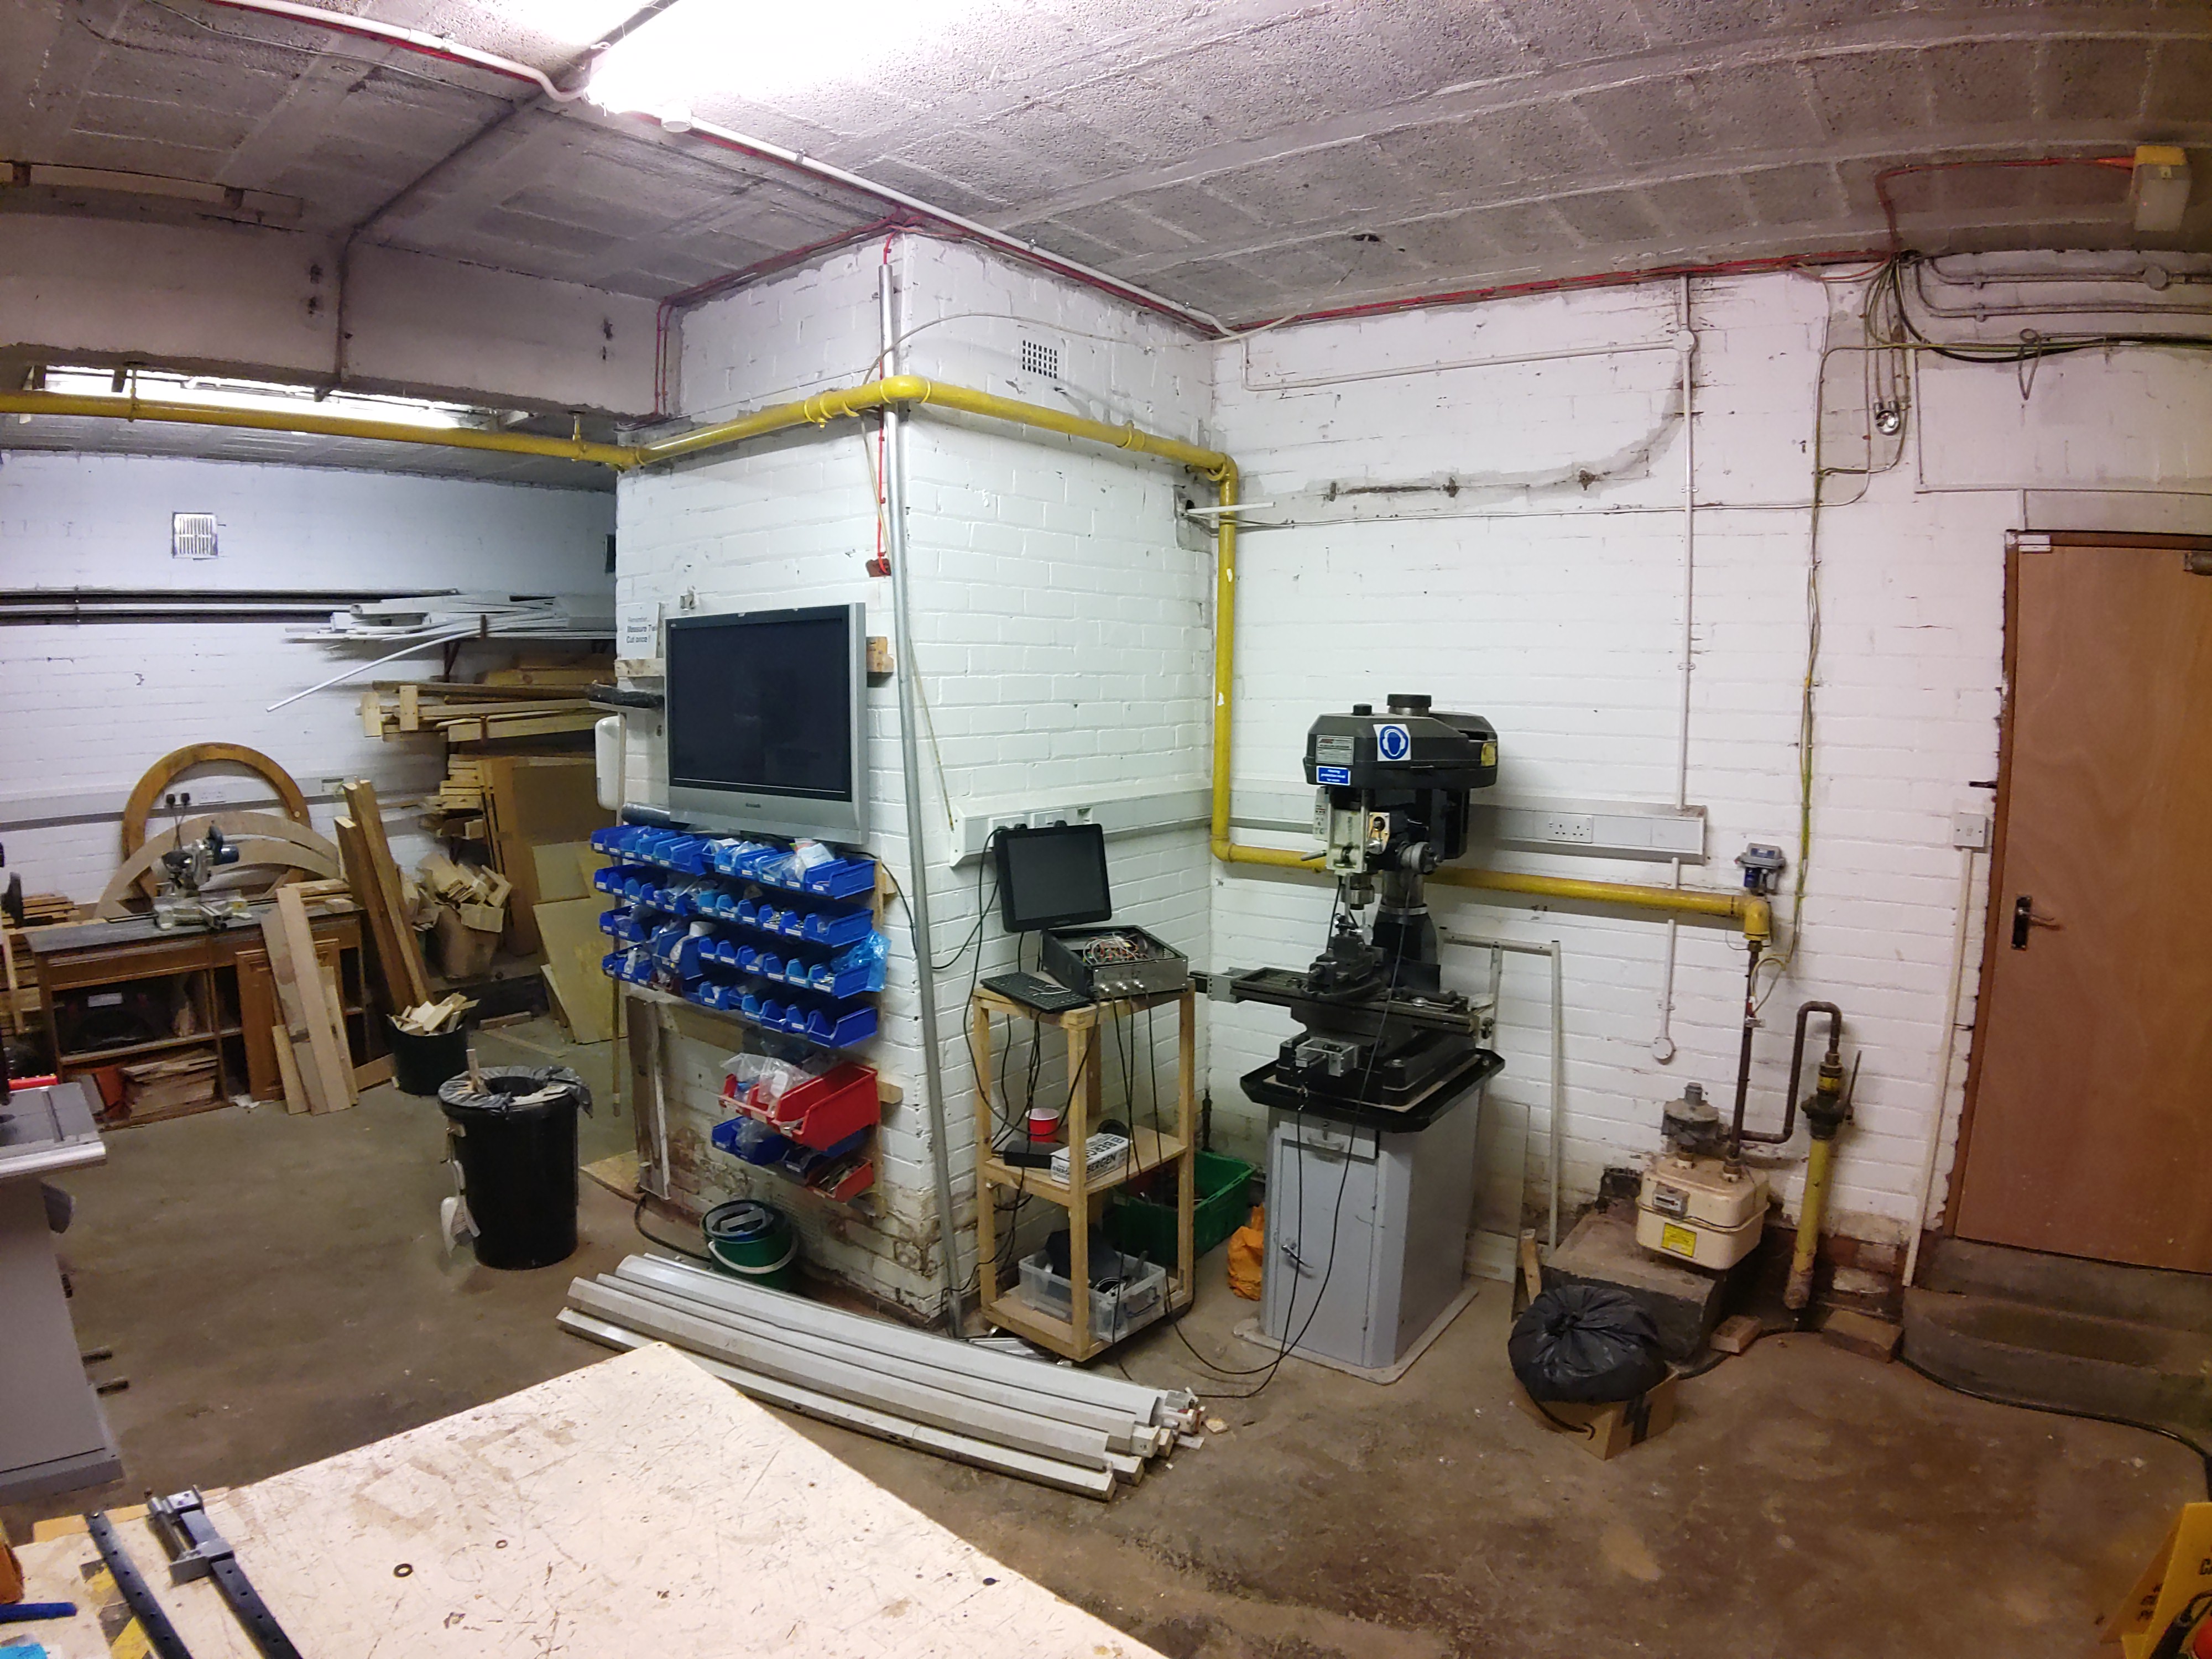
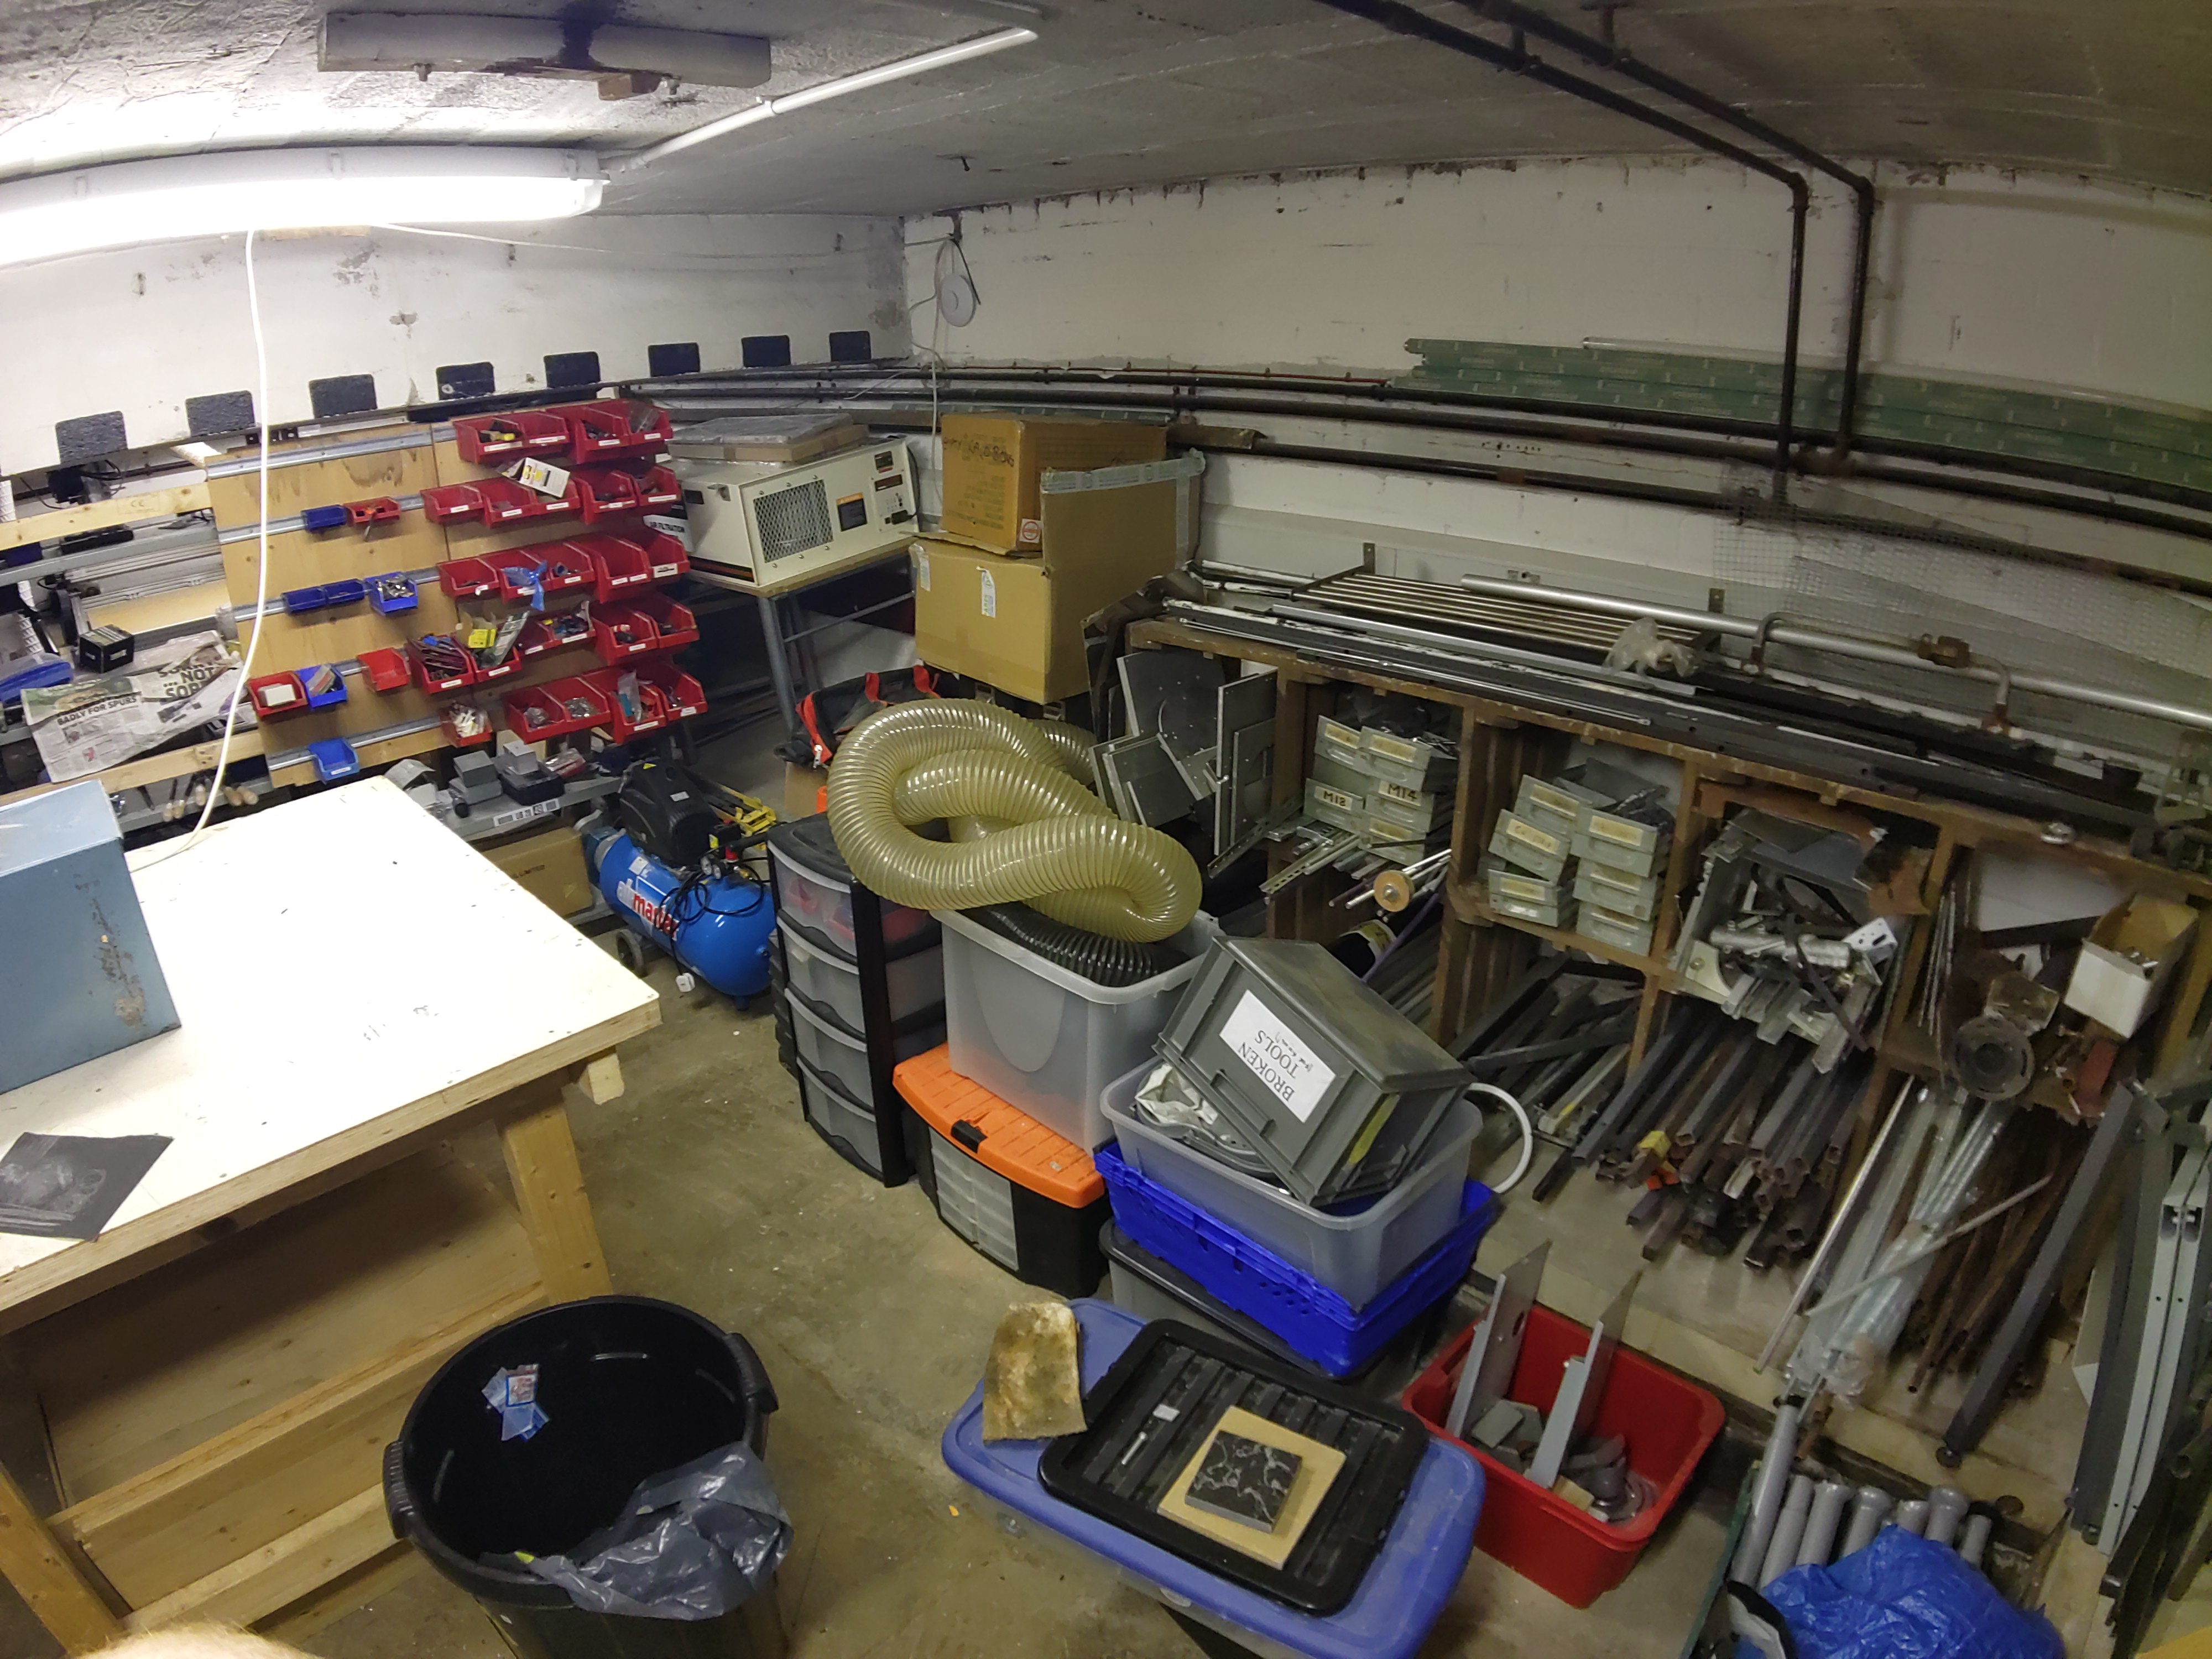
Welcome to the dedicated metalworking area within our innovative hackspace, a haven for metal enthusiasts and craftsmen alike. This well-appointed section is designed to cater to all your metalworking needs, featuring a top-of-the-line metal lathe as its centerpiece. The star of this area is a high-precision metal lathe, perfect for turning, facing, and threading a variety of metals. Its robust construction and advanced features ensure accuracy and reliability for all your projects. Alongside the lathe, you’ll find an array of essential metalworking tools, including cutting tools, calipers, micrometers, and more, all meticulously maintained for optimal performance.
Against the rear wall, you will find yet another of our storage areas. These sturdy storage shelves, strategically placed against the wall, are designed to keep your tools and materials neatly arranged and easily accessible.

Against the adjoining wall you will discover the metal stock storage. This dedicated space is designed to cater to the needs of metalworking enthusiasts, ensuring that all materials are stored efficiently and safely. Metals are neatly categorized by type and size, making it easy to locate the exact material you need for your project. Whether you require aluminum, steel, copper, or brass, everything is clearly labeled and accessible. Conveniently located adjacent to the main metalworking area, the metal storage section allows for quick and easy access to materials, streamlining your workflow.
At the center of this dynamic space stands a robust and versatile workbench, designed to be the focal point for all your metalworking projects. This workbench is built to withstand the rigors of heavy-duty metalworking, featuring a solid frame and a thick, durable work surface. Equipped with a high-quality vice, the workbench ensures secure clamping of materials, allowing for precise and stable work.
Using the Space
This section gives an overview of the day to day apsects of using Maker Space.
Member Storage
Member boxes
Each makerspace member is welcome to store their personal equipment/projects in a project box on the Member Shelves. These are situated in the ground floor workshop along the back wall.
You should use a 32 litre ‘underbed storage box’ with lid, so that it will fit neatly on the shelves. These are available from retailers like B&M (£5 or 2 for £8 as of 06/2025).
Larger items
We recognise from time to time people might need to temporarily have larger project items in the space when they are being worked on.
If you think this applies to you, you should ask via one of the communications channels before bringing in any project that doesn’t fit in your member storage box.
3D Printer Filament
Maker Space has a stock of filament that may be used for printing in the space.
The Maker Space filament stock
Any filament in the following locations is to be considered part of the Maker Space filament stock:
- in the cardboard box under the desk with the Bambu Lab printers on
- loaded in the AMS of either Bambu Lab printer (when no job is running)
- loaded in the external filament spool on Kirisame (when no job is running)
- loaded in the Prusa Mk3 or on its spool holder (when no job is running)
The current price for filament from the Maker Space stock is £0.012 per gram.
Accounting
- Your filament consumption should be taken from the estimation made by the appropriate slicer
- Should a print fail, you should pay the best approximation possible of the consumed filament
- There is not currently any centralised recording of print jobs, you are expected to do your own accounting of your consumption
- Payments to the space should be clearly indicated that they are for filament
Donating filament
Members may donate filament to the Maker Space filament stock, in which case the following rules apply:
- the filament must be suitable for use in the Maker Space printers and its material clearly identified
- the member who donated the filament may use it at zero cost
- all other members may use it, and pay the above rate to do so
Personal filament
Members may use their own filament in the Maker Space printers, in which case the following rules apply:
- filament should be unloaded when printing is complete
- filament should be kept in the member’s storage box or brought in as required (i.e. not left somewhere where it would be assumed to be part of the Maker Space stock)
Hack or Die
In the ground floor corridor there are a set of blue shelves; this is the hack or die. A treasure trove of random stuff looking for a new home.
Anything that is unwanted, yet not obviously rubbish can be placed here.
Anyone who would like the item, for whatever reason, may take it. Once an item has been taken, it cannot be returned, it is now yours.
Anything that has not been claimed in a reasonable amount of time (around a few weeks) should be disposed of appropriately.
Waste Streams
We produce some waste in Maker Space, this needs to be removed to keep the space tidy. The building does not have a commercial waste collection, so waste must be removed by members.
Disposal streams
General waste
There are several general waste bins throughout the space. Unless a bin is labelled otherwise, assume it is for general waste.
Anything placed in these bins will likely end up in landfill.
Common recycling
There are recycling bins near the door to the goldfish bowl in the main space. These are clearly labelled. Please READ THE LABELS, and put things in the correct state in the correct bins.
Wood
There is a box on the floor to the left of the laser cutter for wood waste. This is taken to a recycling centre and likely ends up in an incinerator.
Use this for scraps that are likely to no longer be of use.
E-waste
There is a box on the floor near to the common recycling bins in the main workshop. This is taken to a recycling centre and might be recycled to some extent, maybe.
This may be used for small items of e-waste created in the space. If you would otherwise throw stuff in general waste you may bring things in to be correctly disposed of if you are not able to take them to an appropriate recycling centre yourself (but do not take the piss).
PLA
There is a red sweet box on the 3D printing station where scraps of PLA can be deposited and shipped away for recycling. Ensure only PLA goes into this container.
You may also drop unwanted or failed PLA prints into this box.
Batteries
There is a small tub near the common recycling bins that expired single use batteries can be left in. Should this tub be full, please take the contents to Tesco (or your major supermarket of choice) where they should have a bin to recycle them.
Other batteries (i.e. those you cannot take to a supermakret) should be taken home and disposed of yourself.
Anything else?
Anything not explicitly listed above that needs to be disposed of must be taken out of the space by whoever created the waste.
Reuse streams
Wood
There are several bins in the south basement workshop for wood scraps.
They are for scraps that may be of use for shims, sacrificial parts/supports, push sticks, paint stirrers, etc.
Please be reasonable about what will actually be useful, keep only things that have a realistic chance of being used and place other scraps in the wood disposal bin.
Laser suitable materials
There is a large box on the table next to the laser cutter where material offcuts that may still be of some use may be left.
Suitable scraps include:
- small sections which may be used for inductions
- moderately sized sections which may be enough for small jobs
- unusual materials that others may want to try before committing to purchasing
Again, be realistic about what is useful. Anything smaller than 40mm in any dimension is unlikely to be used (unless it is an unusual material).
Communications
There are various ways to communicate with members and the wider maker community, including the following:
Instant Messenger
Our IM platform of choice is Matrix.
How to join
A simple guide:
For a web based Matrix client (requiring no installation or anything else), go to: https://app.element.io
On Android and iOS, Element X is recommended.
If you are new to Matrix, and using Element in a web browser.
- Create an account (see this guide)
- Sign in
- Follow the matrix.to link for our space here
- Join the space and any rooms that you may be interested in
Maker Space Member list
There is a members list all members are subscribed to during the sign up process. Ask if you are a member and have not already been added.
It is used to discuss around, make decisions about the space operation and notify of updates to machine maintenance and the space in general. As a member, you are expected to keep an eye on emails on this list as they may contain important information about the space.
Please Note: Emails to this list are vetted. Please do not attempt to send marketing material to this list.
North-East-Makers list
This is a list for the wider community, not just Maker Space members. North-East-Makers List for discussing anything related to making.
Please Note: Emails to this list are vetted. Please do not attempt to send marketing material to this list.
Equipment
Here you will find an overview of the equipment available at Maker Space.
Larger, more complex or more significant items are listed, by area, below. A more complete, yet with less information, list of things we have can be found here.
Equipment is typically listed with a list of responsible person(s). These people are who you should seek advice of with regards to induction requests, reporting faults and discussing alteration/upgrades. Do not attempt to modify or repair a piece of equipment without prior discussion/approval/understanding of the people responsible for the equipment in question.
Access controlled equipment
Certain items in the space are fitted with RFID access controllers. These ensure that only members who are sure of their own competence in using a specific piece of equipment can use them.
In order to gain access to a piece of equipment, a responsible person for that machine will have to verify that you are sure of how to operate the equipment safely. More information about the skills and knowledge you will be required to demonstrate can be found on the page for that machine.
Ground Floor Corridor
Ground Floor Workshop
South Basement Workshop
North Basement Workshop
Abridged Equipment List
This list serves as a more complete list of the things we have in Maker Space. It does, however, contain much less information than the pages for specific pieces of equiptment.
Some items on this may be deserving of a full equipment page. If you believe that to be the case for a particular item: well volunteered.
| Item | Approximate Location |
|---|---|
| Henry hoover | Ground Floor Workshop |
| EEPROM programmer | Ground Floor Workshop - goldfish bowl - right hand shelves |
| Spare monitors | Ground Floor Workshop - goldfish bowl - right hand shelves |
| Bench power supplies | Ground Floor Workshop - goldfish bowl - right hand shelves |
| More bench power supplies | Ground Floor Workshop - solder station |
| Even more bench power supplies | Ground Floor Workshop - goldfish bowl - right hand shelves |
| USB microscope | Ground Floor Workshop - goldfish bowl - right hand shelves |
| Various network switches | Ground Floor Workshop - goldfish bowl - right hand shelves |
| Rigol oscilloscope | Ground Floor Workshop - goldfish bowl - right hand shelves |
| Label printer | Ground Floor Workshop - goldfish bowl - middle drawer under 2D printer |
Laser Cutter (Hoshiguma)
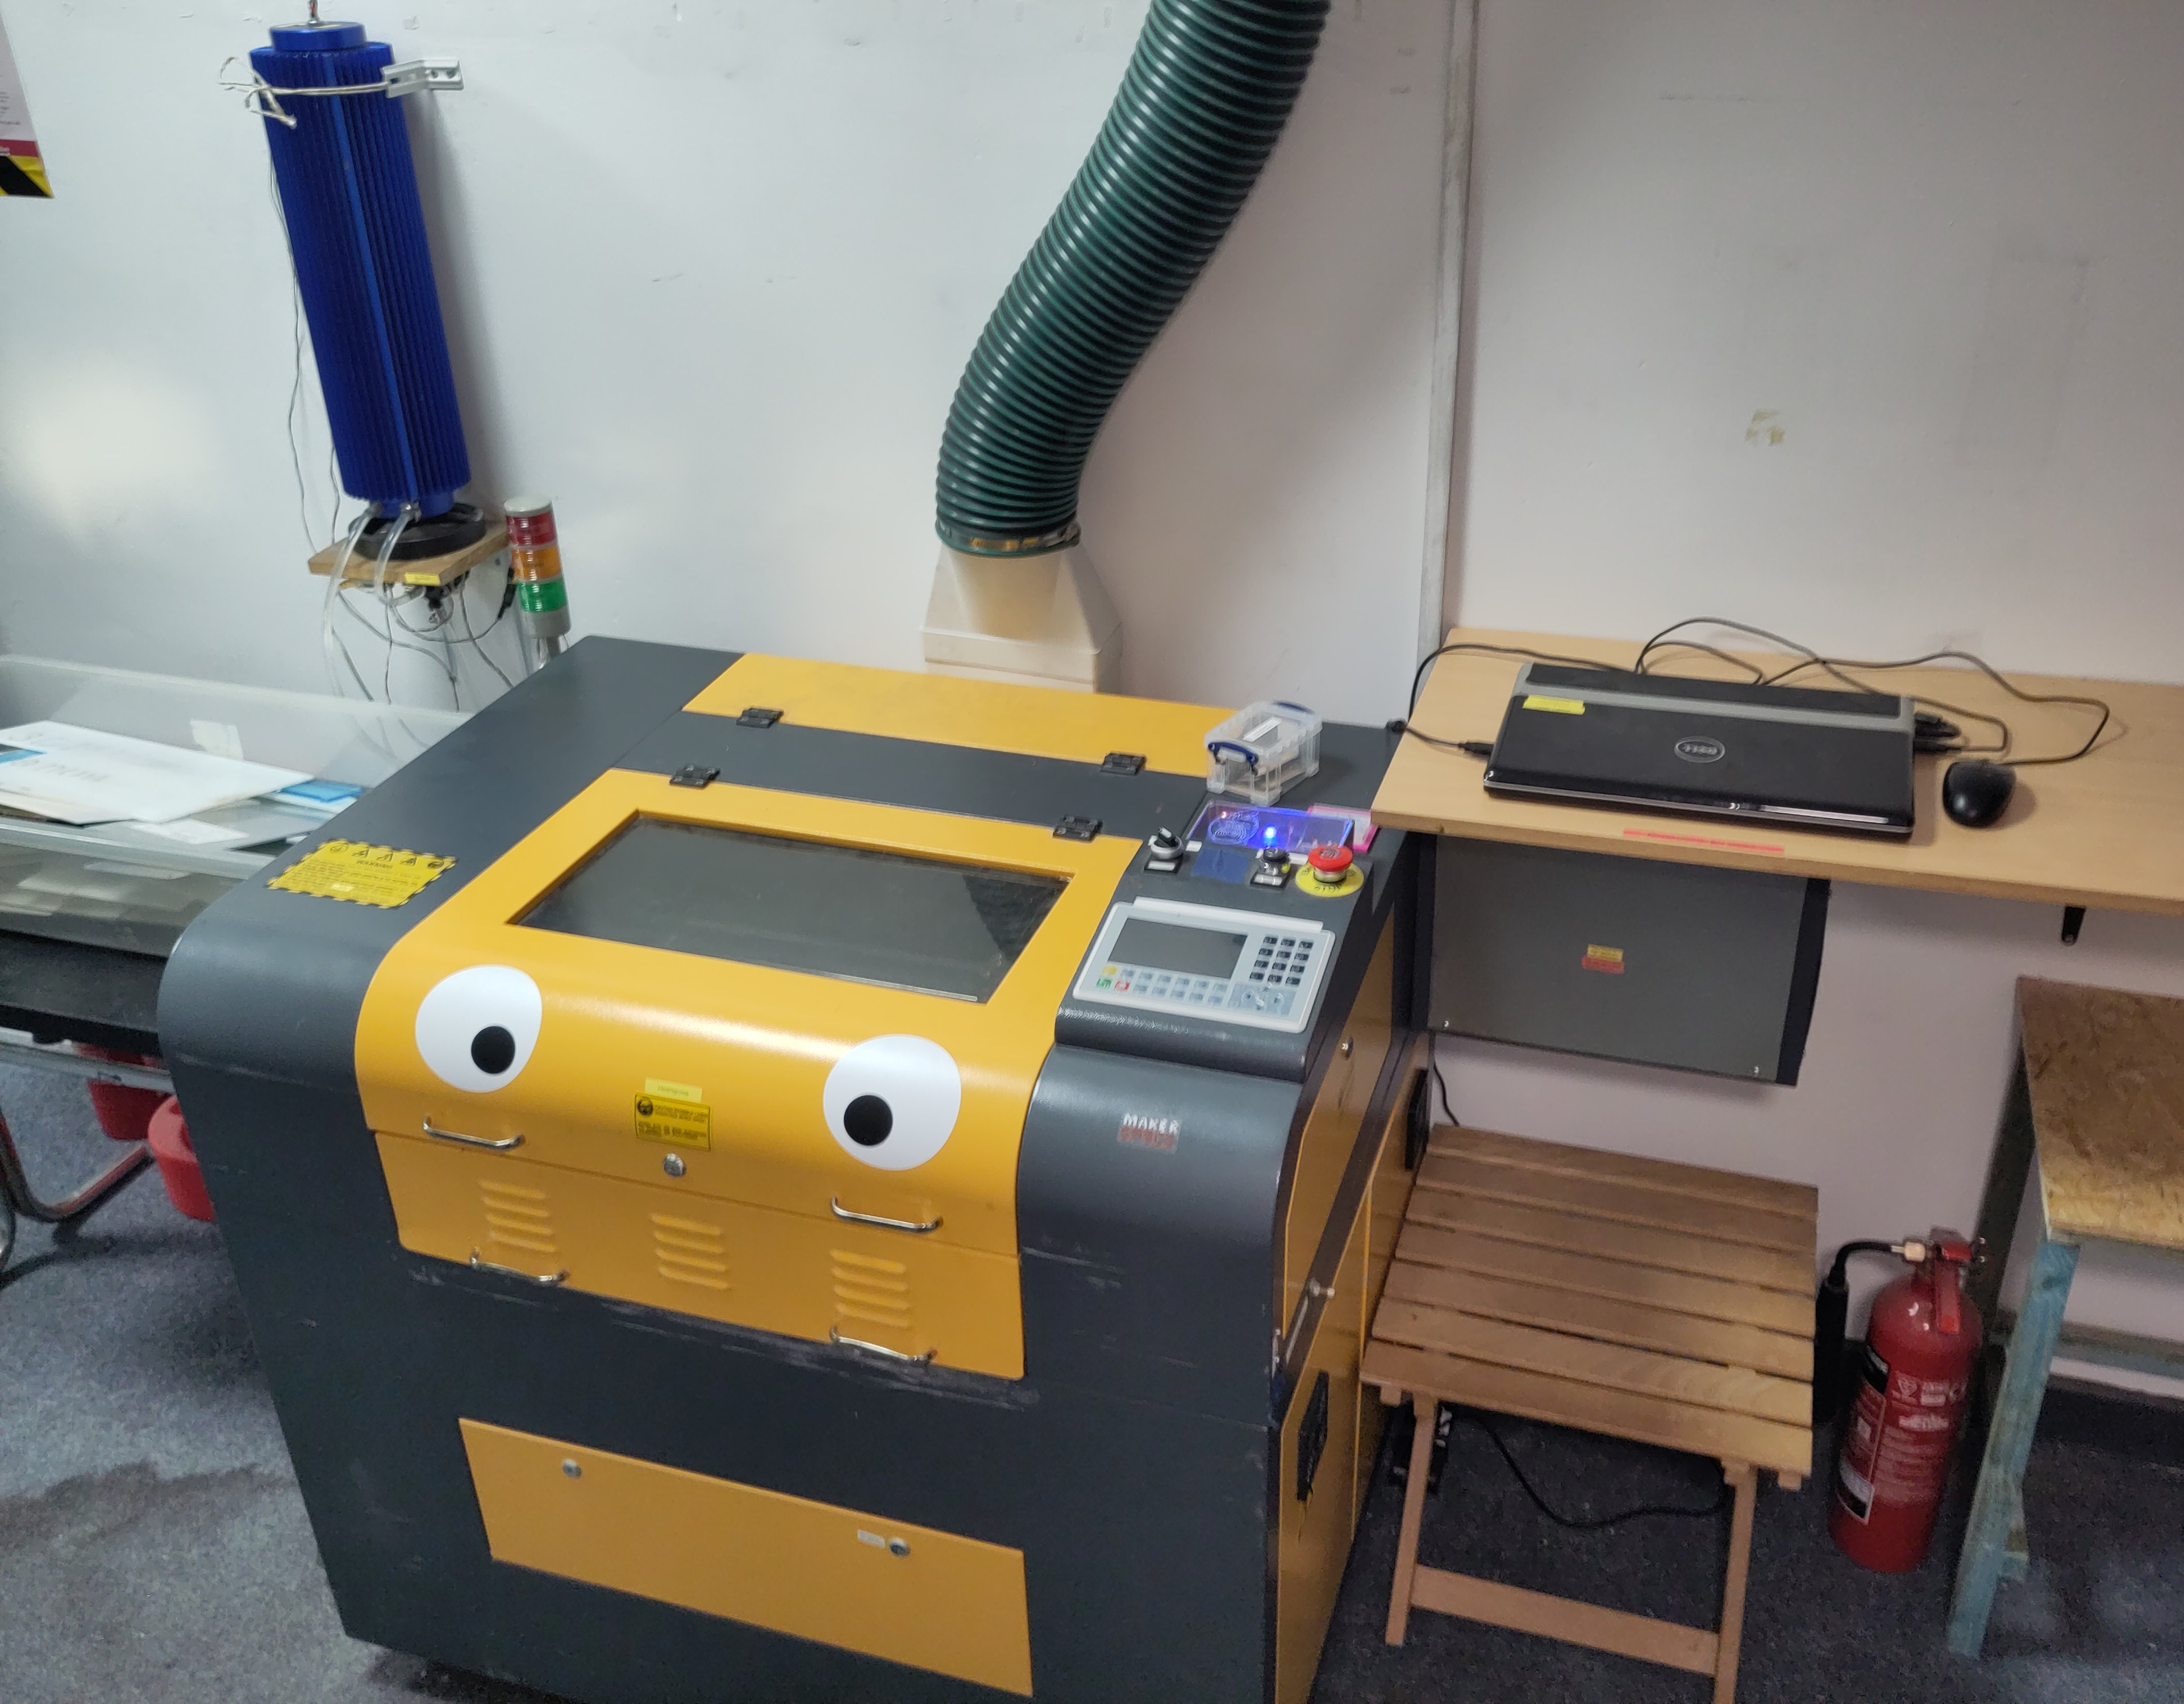
A laser cutter. It cuts stuff using a laser.
It has an 80W CO2 laser and a bed with a usable area of 580x380mm.
Essential Information
- Location: Ground Floor Corridor
- Responsible Person(s): Dan Nixon
- Induction Required: Yes
Usage notes
It is not permitted under any circumstances to leave this machine running unattended!
A list of compatible materials can be found here. A list of known good settings is available on the sheet next to the computer.
The currently fitten lens (F=50.8mm) should be good for cutting material up to ~10mm. If you want to try and cut something thicker, we do have other lenses. Ask Dan if you have a reason to need this.
To the left of the machine there is a small table. This can be used for material preparation, finishing and sorting of machined pieces. If you have machined anything particularly smelly, as a courtesy to other members, please do your finishing/sorting on this table and do not bring it into the main workshop.
In front of the machine/around the corner, on the black table is a waste bin for scraps that are no longer wanted but still potentially useful along with some 6mm birth plywood that is available to use. On the floor underneath this table is a bin for waste wood scraps that are not feasibly useful any longer. See waste streams for more details.
Troubleshooting
If any of the following happen, immediately stop using the machine, turn off both switched sockets on the wall behind/in between the machine and the cooler unit and let Dan know:
- illuminates all three status lamps at once
- leaks cooling water
- a collision involving a moving part of the machine
Induction checklist
- Turning on machine with fob, requirement for empty bed, emergency stop
- the requirement to operate emergency stop when sustained fire occurs
- Panel controls
- X/Y/Z axis motion
- motion mode (central d-pad button)
- pause/resume
- stop
- pulse
- escape
- fume extraction mode
- Note the fact that no other panel controls should be required under normal operation
- General PC use, mention that LightBurn is also available on the CAD PC
- LightBurn
- loading files
- assigning layers
- setting layer mode, speed, power, etc.
- layer order
- preview
- origin selection/settings
- frame
- Workpiece alignment and focusing
- Start/during/end of job processes, the requirement to attend the machine
- Turning off machine and PC
- Available materials and waste streams in vicinity of machine
- The need to keep the machine tidy
Statistics
For those who are curious, the following dashboards are available to show telemetry data from the laser cutter:
Laser suitable materials
Materials that can be cut/engraved (largely taken from the London Hack Space wiki).
If you want to cut a material which is not on the allowed list you must contact the maintainers through the members email list to ask permission.
Prohibited materials
- Anything that cannot, with reasonable confidence, be identified
- Cork (fire risk)
- Wood which isn’t explicitly laser-grade (laser contamination, fire risk, emissions)
- Food (laser contamination, fire risk, emissions)
- Body parts
- Plastics containing PVC (laser contamination, emissions)
- Plastics containing ABS (laser contamination, fire risk, cyanide emission)
- Fibreglass (laser contamination, fire risk, emissions)
- Circuit boards (laser contamination, fire risk, emissions)
- Polycarbonate (laser contamination, fire risk)
- All metal (except engraving anodized aluminium)
- Polystyrene (laser contamination, fire risk, emissions)
- Polypropylene (laser contamination, fire risk, emissions)
- HDPE (high-density polyethylene or polyethylene) (laser contamination, fire risk, emissions)
- Carbon fibre (laser contamination, fire risk, emissions)
- Shuttering ply (laser contamination, fire risk, emissions)
- Latex (laser contamination, fire risk, emissions)
- Leather, all. (laser contamination)
- Anything not explicitly allowed (either in the lists below, or by prior permission)
Allowed
Woods:
- Laser-grade MDF (max 8mm)
- Laser-grade plywood
- Birch ply (max 9mm)
- Poplar ply (max 9mm)
- Balsa wood
- Paper (cutting only)
- Card/Cardboard (cutting only)
Plastics:
- Thin Polypropylene sheet (<1mm)
- Acrylic (max 10mm)
- Foamcore (non-PVC variety)
- Correx (Genuine non PVC)
- Depron foam (Fire risk, must be closely monitored)
- EVA Foam (if real)
- Delrin (max 8mm)
Textiles:
- Cloth/felt/hemp/cotton (Not plastic-impregnated fabric)
- Polar Fleece
Engraving only
- Stone
- Ceramic tile
- Non-resinous wood IE hardwood
- Glass
- Anodised Aluminium
Setting up LightBurn on your own laptop
It is possible to use your own laptop for preparing jobs, however the PC next to the machine must always be used for running the machine. To do so, you will need LightBurn installed and licensed and the configuration for the laser cutter installed.
Process
It is assumed that you have not previously installed LightBurn on the target laptop. If you have then you more than likely do not need this guide, can download the device profile file from step 2 and go on your merry way.
- Install LightBurn from here.
- Download
device_profile.lbdev. - Launch LightBurn.
- Either activate the trial or purchase your own suitable license and activate that (see note below).
- When prompted to add a machine, import the file downloaded in step 2.
- You should now have a machine named Hoshiguma available, use this when you want to prepare or machine jobs on this laser.
License requirement
Hoshiguma uses a Ruida controller, so is therefore a DSP machine in the eyes of LightBurn.
You will need either a DSP or DSP + Galvo license, or purchase the DSP addon. If you are purchasing a license with the discount code (see below), you should purchase a DSP license.
LightBurn discount
We (Maker Space) have a code for discounted Light Burn licenses for members. If you would like one, ask the person who did your laser training.
Note that the license is only to be using with the laser cutter in Maker Space. Should you need to use other machines you should pay for a full license.
Bambu Lab P1S
Two Bambu Lab P1Ses, Hakurei and Kirisame. Very good, fast FDM 3D printers.
Essential Information
- Location: Ground Floor Workshop
- Responsible Person(s): Dan Nixon
- Induction Required: Yes
- Build volume: 256mm x 256mm x 256mm
| Printer | Nozzle size | LAN access code | Filament Options |
|---|---|---|---|
| Hakurei | 0.4mm | 22497498 | AMS compatible spools only |
| Kirisame | 0.4mm | 29623040 | AMS compatible spools or up to 3 Kg spools via top spool caddy |
Usage notes
It is not permitted to leave this (or any other) 3D printer running whilst Maker Space is unoccupied!
3D printer filament supplied by Maker Space must be paid for. See 3D Printer Filament for details.
Useful links
Induction checklist
- General info
- Filament availability, compatible filaments, price for Maker Space filament, options for using own filament
- The requirement to not leave the machine running unattended
- Do not remove the memory cards unless you want to get timelapse footage
- Start up procedure
- Power switch location
- Verify no obstacles inside printer
- Bambu Studio
- Initial setup (if appropriate)
- Adding our printers (use codes above, not the printer menu)
- Configuring a basic print job
- The requirement to ensure the AMS is synchronised
- Filament loading
- General filament handling, storage, the requirement to secure the loose end
- Loading via the AMS
- Loading vis the external spool
- Start of job
- The ability to skip full bed levelling
- Build plate cleaning
- Check for correct build plate seating
- The requirement to observe the start of job and first layer
- Fault handling
- Where to see fault codes in Bambu Studio
- The requirement to not attempt to maintain the printer
- End of job
- Removal of parts from bed
- Ensure printer is left clean, serviceable and powered off
Prusa MK3
A sort of OK FDM 3D printer.
Essential Information
- Location: Ground Floor Workshop
- Responsible Person(s): ?
- Induction Required: No
- Nozzle size: 0.4mm
Usage notes
It is not permitted to leave this (or any other) 3D printer running whilst Maker Space is unoccupied!
3D printer filemant supplied by Maker Space must be paid for. See 3D Printer Filament for details.
Octoprint is installed on a Raspberry Pi, which is capable of controlling and monitoring the printer over the network. The IP address to access the Octoprint interface is on a label on the front of the printer.
If you’d rather print from the SD card, you might find it useful to create a folder with your name for your files. Please remove any big files once you’re done with them to save clogging the card up (same goes for Octoprint).
PrusaSlicer is generally the most straightforward way of slicing your files for printing, as it has a pre-made and tuned profile for the MK3.
If you don’t know how to use a 3D printer, or if you’re unsure of how to use the specific one in the space, please do ask someone before attempting to.
Duratool Desolder Station
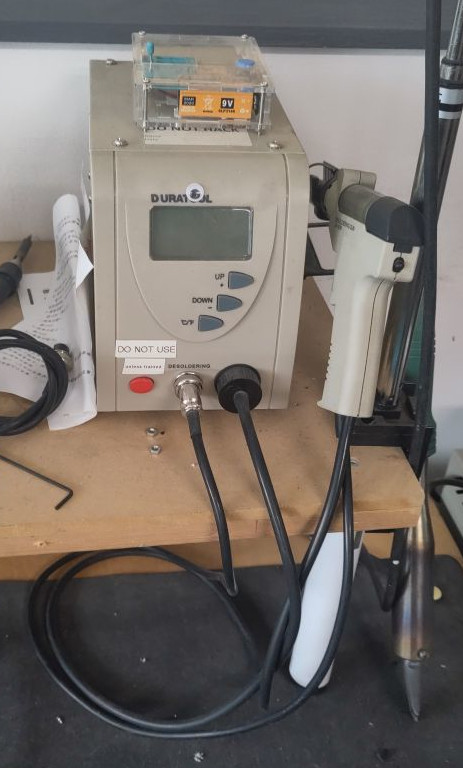
The Desolder Station is mainly for desoldering through hole components. It is particularly great at removing solder from plated through holes where the copper track is on both sides of the board and the hole itself is also metal.
It may have other uses, but no it is not designed to suck anything but solder. It is also not that ideal for surface mount, as the components can end up heat damaged or sucked up and jammed inside the nozzle!
Essential Information
- Location: Ground Floor Workshop
- Responsible Person(s): Jon Davies
- Induction Required: No
How to use the tool
- Press the red power button on the front of the base
- Set the ‘C/F’ temperature mode to Celsius
- Start with a temperature setting of 350c (The iron will take a few minutes to get up to temperature - be patient) :)
- Place the hole of the iron over the joint to be desoldered
- Hold the iron still for two seconds (until the solder begins to melt)
- Waggle the iron side to side for two seconds (to thoroughly melt the solder)
- Press the trigger and continue to waggle for a further second (The air pump activates and draws away the solder)
- Remove the iron from the solder joint (Solder has now gone)
- Repeat steps 4 to 8 for several solder jionts
- Clean the iron tip in the tip-cleaning brass (Do this regularly to keep a clean healthy tip and a good thermal interface)
- Repeat steps 4 to 10 for your session
- Clean the tip one final time
- Stow the iron in the holder
- Turn off the power
Troubleshooting & Tips
Solder slow to melt (more than five seconds)
- For larger components, it may be necessary to increase the temperature to 375c.
- For ground planes, it may be necessary to increase the temperature to 400c
Loss of Suction
The filter in the iron/base has become clogged.
- Stop using the desoldering tool
- Stick a notice on the base to indicate the tool is in need of TLC
- Notify a maintainer
I am experienced and impatient!
Ok… you can speed up your desoldering session with an increased risk of component damage. Increase the temperature to 400c but work fast on large components and really fast on small components.
kWeld spot welder
The KWeld spot welder is ideal for welding up Lithium Ion Batteries (eg 18650) cells into battery packs.
Makerspace has the full mains powered version (donated by David Pye). It consists of the KWeld device, the kSupply PSU adaptor and the KCap supercapacitor bank to provide the power for spot welding.
It is capable of spot welding up to 0.3mm Nickel strips.
The space has a small amount of 0.2mm nickel strip, some spot-weldable battery tags as well as the paper discs to be fitted under 18650 cell ends to reduce the shorting risk when packs are assembled.
Essential Information
- Location: Ground Floor Workshop
- Responsible Person(s): David Pye
- Induction Required: Yes
Safety information
- Welding Li cells can cause fire - LiIon cells can combust if shorted or if damaged
- If you are not sure what you are doing, please get supervision/advice before using
- RTFM (read the manual) - link below in the Useful links section, before using the device
- Device generates very strong magnetic fields when welding. Do not use if you have a cardiac pacemaker or other implanted medical devices
- Use an appropriate pulse strength (in J) for what you are welding - be aware that LiIon batteries can explode if damaged
- Take safety precautions - eg bucket of sand nearby in case a battery becomes damaged and causes a fire
Useful links
kWeld user manual - PLEASE READ ME BEFORE USING DEVICE
kCap user manual - for troubleshooting
kSupply user manual - for troubleshooting
CNC Mill
The CNC mill is a RF30 clone round-column mill that has been converted from an Imperial manual mill to a CNC ballscrew conversion.
It’s a bit rough and ready in a few ways, and final commissioning is still in progress.
It is operated from the Mill PC using the gSender software. More details to follow on final commissioning
gSender settings backup here
Essential Information
- Location: South Basement Workshop
- Responsible Person(s): David Pye
- Induction Required: Yes
Axminster Bandsaw

An Axminster SBW4300B bandsaw.
Essential Information
- Location: South Basement Workshop
- Responsible Person(s): Ben Shaw, Dan Nixon
- Induction Required: Yes
Usage notes
The manual for this machine can be found here.
You will be expected to demonstrate the following competencies before gaining RFID access to this machine:
- Understand how the electronic brake operates and the need to let it do its thing after hitting stop.
- Have an appreciation for appropriate (goggles, hearing protection) and inappropriate (gloves) PPE when using the bandsaw.
- Know how to move the fence and change its orientation.
- Understand how to adjust the blade guides and the importance of not having them higher than necessary.
- Know how to stand when using the bandsaw (i.e. not leaning into it).
- Know to never be pushing material with your hand in line with the blade - always to the side, use a push stick etc.
- Understand appropriate materials to cut on the bandsaw - and inappropriate ones. Appreciate how to handle different materials (e.g. wear a mask for MDF and other dusty things).
- Know the appropriate types of cut which can be made on the bandsaw (OK for reasonably thick, reasonably long cuts, bad for tight corners - use the scroll saw).
- Understand the need to keep the blade tensioned, and know how to adjust the tension.
- Understand how and why to use the cross-cut sled (prevents binding on the fence when cross-cutting).
- Know to not start/stop the machine with the workpiece in contact with the blade.
- Understand how to cut thin materials - use a sacrificial board below to prevent tear-out.
- Know how to use dust/chip extraction when necessary.
Record Power Drill Press
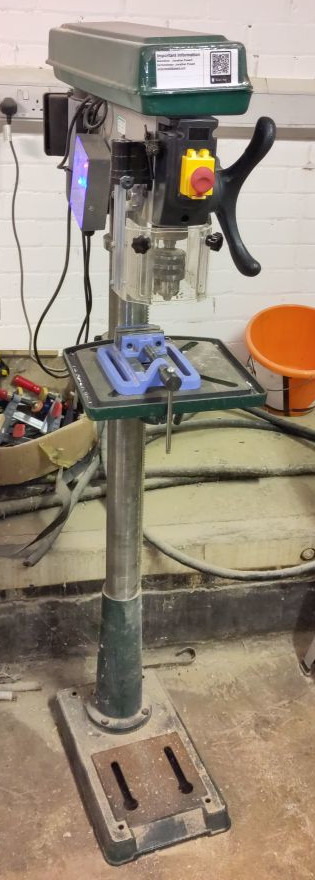
A Record Power DP58P floor standing drill press.
Essential Information
- Location: South Basement Workshop
- Responsible Person(s): Dan Nixon
- Induction Required: Yes
Usage notes
The manual for this machine can be found here.
You will be expected to demonstrate the following competencies before gaining RFID access to this machine:
- Understand the need for protective eyewear for operator and observers.
- Understand the need to protect byestanders.
- Be aware of the risks of wearing gloves while operating the pillar drill.
- Be able to change a drill bit.
- Understand what the guard is and the importance of using it (and that it disables the machine when flipped up).
- Be able to adjust table height and secure it.
- Understand the need for appropriate work holding (and scrap board underneath the work to avoid drilling the table etc.).
- Be able to use the depth stop .
- Be able to change belt speeds.
- Understand the need for different drill speeds.
- Understand the need to leave the drill in a safe and clean state for the next user.
A useful speed chart can be found here.
Record Power Belt & Disc Sander

A Record Power BDS250 belt and disc sander.
Essential Information
- Location: South Basement Workshop
- Responsible Person(s): Iain Yarnall, Dan Nixon
- Induction Required: Yes
Usage notes
The manual for this machine can be found here.
You will be expected to demonstrate the following competencies before gaining RFID access to this machine:
- Understand the need for protective eyewear for operator and observers.
- Understand the need to protect byestanders.
- Understand the safety implications of the belt and disc being linked.
- Be able to employ methods to prolong the life of the belt and disc.
- Understand which side of disc sander is safe to use.
- Be able to use the mitre fence on the disc sander.
- Understand how different parts of the belt can be used.
- Change orientation of the belt sander between horizontal and vertical.
- Adjust the tracking of the belt sander.
- Be able to clean the belt and disc.
- Understand the need to leave the sander in a safe and clean state for the next user.
- Understand the need to inform members and the maintainer if you consider the tool to be unusable/damaged or faulty.
Spare Parts
-
250mm Self Adhesive Sanding Discs: e.g. https://www.axminstertools.com/proxxon-self-adhesive-sanding-disc-250mm-80grit-ptk-5-477029
-
150mm x 1,220mm Sanding Belt: e.g. https://www.axminstertools.com/hermes-abrasive-belt-150-x-1-220mm-x-80-grit-110224
-
Belt Cleaner: e.g. https://www.axminstertools.com/axminster-abrasive-belt-cleaner-standard-210-x-40-x-40-310398
Makita Chop Saw
TODO
Essential Information
- Location: South Basement Workshop
- Responsible Person(s): Iain Yarnall
- Induction Required: No?
Workbee CNC Router
The WorkBee is a CNC milling machine that can cut, carve, and engrave. It’s a self-build machine using readily available parts like extruded aluminium rails, and a standard DeWalt Router, along with bespoke controller hardware and software.
Essential Information
- Location: North Basement Workshop
- Responsible Person(s): David Pye, David Papadopoulos, Tim Poolan
- Induction Required: Yes
Specifications
Kit
Ooznest WorkBee Z1+, consisting of mechanical elements:
- 1500x1500mm frame (Working Area: 1270x1270mm)
- Router Mount - DeWalt - 69mm
- CNC Dust Shoe
- Touch probe (https://learn.ooznest.co.uk/Guide/First+Project/243)
- Surfacing tool
Router
Dewalt Router D26200 Type 1 (2018)
Speed selection
| Dial Setting | Approximate RPM |
|---|---|
| 1 | 16000 |
| 2 | 18200 |
| 3 | 20400 |
| 4 | 22600 |
| 5 | 24800 |
| 6 | 27000 |
1-3 are appropriate for large diameter cutters, 4-6 are appropriate for small diameter cutters, softwoods, plastics and laminates.
Controller
WorkBee Control
What it can do
Workable materials
- Foams
- Plastics
- Wood
- Carbon Fibre
- Aluminium
Cutting feeds, speed, and depth
- 44mm maximum cut depth
- DeWalt spindle speed max 27,000 RPM, manually controlled by thumbwheel
- feed speed 0 to 5 millimeters per second
Essential Operation & Configuration Points
Main power (computer and controller)
Switch at the wall and 3 around the bed, including one next to the spindle power switches.
Spindle power
Switch on router and at front left corner of the bed.
Dust extraction power
Switch out the wall and on the blower itself.
Job calibration
This is about defining a workpath start point in relation to one corner of the extruded travel frame. It must be done at the start of every job. It involves homing the spindle at the rear right corner of the bed and then at a specific start point somewhere within the bed, usually near the front left corner. It is accomplished through the WorkBee GUI dashboard.
Plinth & frame alignment
This is an occasional check to ensure that the extruded gantry frame is square and level in relation to the basement floor. It needs to be checked periodically and if something is out of true, it needs to be adjusted by the maintainers.
Gantry speed (Feed Rate)
A given cutting tool (e.g. endmill) can be driven at different speeds depending on the material it is cutting. The speed of driving is often called the feed rate. In our case, the feed rate is the combined horizontal and vertical speed of the gantry. The movement of the DeWalt router is controlled by the WorkBee software, either according to a preprogrammed workpath, or manually via the Workee Dashboard.
The main factors in identifying suitable feed rates are a ratio of material, cutting faces, and spindle speed.
FR = RPM * T * CL
Where:
- FR = the calculated feed rate in inches or mm per minute.
- RPM = is the spindle speed of the router.
- T = Number of teeth on the cutter.
- CL = The chip load or feed per tooth. This is the size of chip that each tooth of the cutter takes.
Of these, Chip Load requires more careful consideration. Each type of material is associated with a range of chip loads. Foam and wood are generally lowest in the ranking of chip loads. Most tools datasheets specify a chip load assuming a depth of cut (DOC) equal to the tool diameter.2
RPM = FR/(T * CL)
Essential Competencies
- Router bits & collets appropriate for the task
- Material securing
- Understanding & working within tolerances
- Workpath design
Resources
- WorkBee setup and user guides here: https://learn.ooznest.co.uk/c/Original_WorkBee_Z1_Plus__Assembly_Manual
- Scrap wood in the South Basement
- 3-face clamp for curved/irregular shape pieces of working stock
Status
2024.10 Currently using improvised wasteboards. There are a pair of MDF boards that nearly span the bed, but they are warped, by as much as 6mm across the width. Warping may be due in part to basement humidity, and while there are water-resistant wasteboard materials available, we have not seen a use case for a full size sheet. For the time being, we are making smaller wasteboards to suit the jobs we’re doing. Software File transfer
Potential improvements
- GCode viewer
- https://learn.ooznest.co.uk/Guide/WorkBee+Control+Overview/22 Step 7
- https://learn.ooznest.co.uk/Guide/First+Project/243 Step 10
Metal Lathe
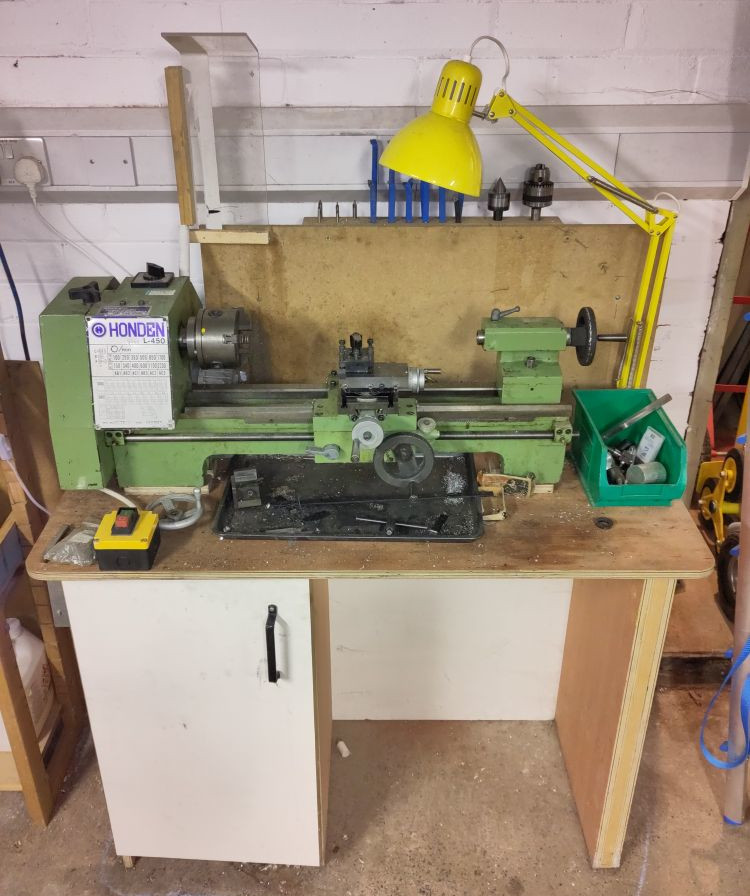
We have a small “Model Engineers” style lathe generically known as a 9x20 (swing x length between centres). It is capable of good work but as with many lathes in this class the lack of rigidity makes it prone to chatter if your cutting speed and/or tool sharpness isn’t spot on.
Although classed as “Metal Turning” lathe it can be used to turn plastics and wood (making dowels out of scrap wood or plastic inserts/wheels are a couple of non metallic possibilities).
Essential Information
- Location: North Basement Workshop
- Responsible Person(s): Malcolm G
- Induction Required: Yes
Resources
The manual for this machine can be found here.
A guide to replacing the bearings can be found here.
Ongoing Refurbishment
The lathe was acquired second hand and as such is been subject to semi continuous refurbishment although it is left in a usable condition whenever possible. Maintenance completed to date includes:
- Addition of guard
- Headstock rebuild and bearing lubrication
- Tailstock rebuild
- Saddle/slide rebuild and adjustment of gib strips
- Tool rack
- provision of general use set of tools
- addition of magnetic base to dial indicator to enable centring of work in the 4 jaw chuck
- Refurb/balancing of large grinder to facilitate lathe tool sharpening (see separate article on bench grinders)
- Replacement of idler and intermediate pulley bearings
- Motor aligned so that toothed belt stays in position and low speeds are available
- Replacement of custom electrics with a standard NVR/stop switch
Remaining issues:
- the mounting table lacks rigidity and it is suspected mounting on a solid block (e.g. paving slab) might reduce chatter
- procurement of a fractional horsepower 3 phase motor would allow installation of a variable speed drive with added advantage of faster stopping time
- fabrication of jig to enable sharing of boring tools from the milling machine (one exists but is the wrong diameter)
Possible enhancements (only if there is a critical mass of interest)
- Addition of a headstock shaft encoder and stepper motor drive to the lead screw would allow flexible screw cutting
- Digital Read Out (DRO) on bed and cross slide
Essential Skills
Ideally we need to establish a larger core of members who are both competent and confident in the use of the lathe including essential skills:
- Understanding how to work safely and avoid danger
- Understanding the limits of the lathe and how to look after it
- Understanding the most common machining techniques
Typical techniques most people will need to know would include:
- methods of mounting materials (chuck types / faceplate use)
- drilling (including use of centre holes)
- use of tail stock centre for longer jobs
- appreciation of cutting speeds
- tool selection / sharpening
- typical cuts (e.g. facing / boring etc)
Spare Parts
- Toothed Belt 170XL050: e.g. https://simplybearings.co.uk/shop/p670999/170XL050-Major-Brand-Synchronous-Toothed-Belt-0.50-inch-Wide-17-inch-Length-85-Teeth/product_info.html
Large Bench Grinder
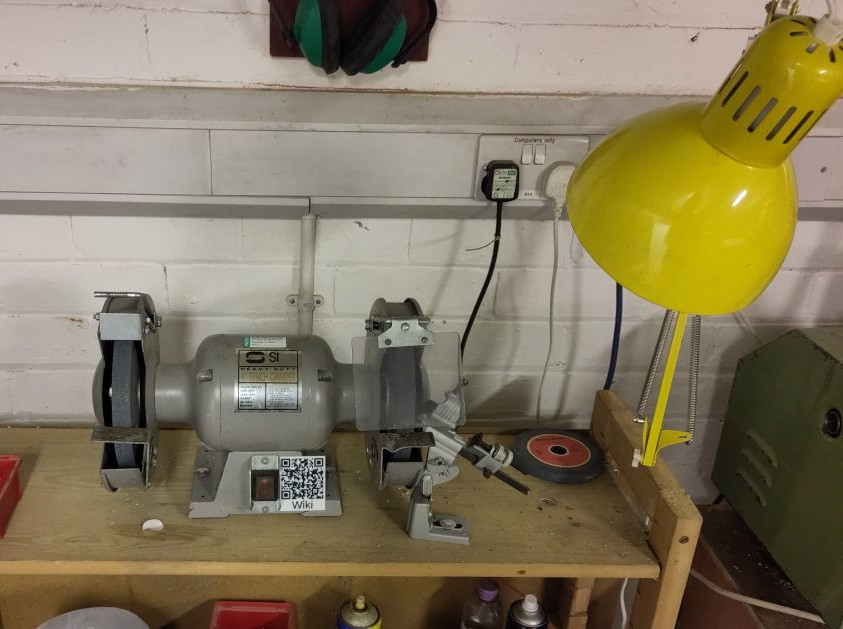
This is a medium size grinder with coarse and fine wheels.
It previously suffered from excessive vibration which has been largely solved by truing the wheel flanges and dressing both wheels
It is suitable for sharpening lathe tools and other steel tools.
Please DO NOT attempt to grind soft metals such as alloy, wood etc as this clogs the carborundum structure and can damage the wheels.
Also DO NOT routinely grind on the side of the wheels as this can lead to damage and potentially lead to a burst wheel (the only exception is the sharpening of twist drills using the drill sharpening jig).
Essential Information
- Location: North Basement Workshop
- Responsible Person(s): Malcolm G
- Induction Required: No?
Water
Sharpening / Grinding tools makes them hot and you will likely find a small “cup” of water near the grinder for dipping hot tools into.
Lathe tools can be abused somewhat, particularly when fashioning solid High Speed Steel into a tool but it is still good to dip them into water before they glow red.
Carbon steels such as screwdrivers and wood chisels require extra care with only the lightest of grinding between cooling in the water pot (this requires skill so please seek assistance).
Basic competencies for grinder use
- Appreciation of the criticality of using correct eye protection.
- Understanding of the types of material and/or tools which may be ground and temperatures.
- Understanding how to check wheels for signs of damage before use and which wheel surface to use.
Potential improvements
- Sturdier tool rests (the existing ones are very lightweight and the coarse wheel one has an annoying vee slot).
- Refurb of acrylic guards (these are somewhat opaque).
- Procurement of a wheel dressing tool.
Large Air Compressor
TODO
Essential Information
- Location: North Basement Workshop
- Responsible Person(s): Malcolm G
- Induction Required: No
Infrastructure
The things that make Maker Space usable.
- Networking
- RFID access controllers
- Hot water dispenser
- DeLonghi Magnifica coffee machine
- Vending machine
- Main Workshop Air Exchange
- Basement Workshop Air filtration
- Music server
- Wiki
RFID Access Controllers

This page contains a brief run-down of the RFID access controller used to control the members door entry system as well as expensive, or hazardous machinery.
Essential Information
- Responsible Person(s): David Pye
User instructions
| LED colour | Meaning | Notes |
|---|---|---|
| Blue | Idle | Associated device is locked and the access controller is waiting for a tag to be presented. |
| Yellow | Verifying | Presented tag is being checked against an updated allowlist. |
| Green | Allowed | Presented tag was on the allowlist and the associated device is unlocked. Remember to log out once you are finished with the machine by presenting your tag again. |
| Red | Denied | Presented tag was not on the allowlist and the associated device remains locked. |
| Magenta | Offline | Controller has no network access and is running in offline mode. Cached tags will still unlock the associated device. |
Note: If you present an RFID that isn’t known to the controller, the LED will briefly go yellow - it checks with the backend server that the database is up to date (ie has this RFID just been added to the list of valid users?) then either green or red, depending on the result.
If the controller appears to remain blue when an RFID is presented, this is most likely because it cannot read it - those small RFID jewellery rings are sometimes prone to this, as the RFID reader boards aren’t always sensitive enough to pick them up.
For access to the door, this should be covered in your member induction, otherwise mention it to whoever did your induction. For access to machinery, this is handled when you receive your induction on the machine in question.
Note: The access controllers are part of the space infrastructure. Hacking them (especially to gain access to a tool you are not permitted to use) will be viewed very seriously, and may result in sanctions.
Technical details
- The controller is powered from a Chinese/Ebay 240v->5VDC (isolated - allegedly…!) power module.
- The main ‘brain’ is an ESP8266 (ESP-12) board, mounted to a custom-designed PCB, containing a 5v->3v3 linear voltage regulator, jumper for run/program mode, FET for triggering a relay, and several rows of pins for connections.
- RFID reader - MFRC522 RFID reader board for reading MiFare NFC cards or similar
- SSR - the access controllers are using Fotek SSRs (nominally rated at 40a, but their pedigree is questionable and they may not actually be able to run at this full rated current)
- LED - a ‘NeoPixel’ addressable LED for status updates
Sequence of events
Init:
- Controller powers up, connects to backend server.
- Checks its’ flash-held database is in sync with the online copy by checking it’s MD5 hash with the MD5 hash of the current server copy. This is done using the HTTP/1.1 ETag function. If the hashes are the same, the databases are in sync.
- If not the LED will remain yellow, the remote database is downloaded, and programmed into flash on the controller.
- The LED will then go blue waiting for an RFID card to be presented.
Valid card (known to local db);
- SSR enabled. LED to green. MQTT message broadcast to MQTTPi in space. Log message sent to backend server.
Possible invalid card: (not in local db):
- Quick check again to see if DB up to date. If not, download remote DB, program to flash and then check again.
- If card now in database, proceed as above. If not, pause few seconds with red LED shown (denied) then proceed to blue awaiting a valid RFID to be presented.
Logout:
- When the LED is green (ie device unlocked), ANY rfid will lock it and sign out the current user.
- SSR off, LED->blue for resting state, MQTT message and remote log message is sent.
Main Workshop Air Exchange
There is an air extraction fan for the main space fitted above the front door. The control for it is located in the south west corder of the ground floor main workshop. It is recommended to open a window in the goldfish bowl when this fan is in use to enable the most effective air exchange throughout the main workshop.
This fan can be used to maintain the main workshop at a comfortable balance of temperature and air quality.
Basement Workshop Air Filtration
Both the north and south basement workshops have Axminster air particle filters. These are suitable for removing the worst of suspended dust from the air.
They are not helpful for very fine or hazardous dust/particles/fibres (i.e. anything you would usually use a HEPA filter or class H vacuum for).
Essential Information
- Responsible Person(s): Dan Nixon
Instructions for use
If the air quality feels a bit shit, or you are about to do/doing something that will make it worse, then push the “Start” button on the control panel in the appropriate workshop.
The air filter will run for 20 minutes, after which it will turn itself off (do not turn power to the air filter off!). At any point the time may be extended by pressing the “Start” button again.
If desired, the fan speed can be changed by pressing the “Speed” button on the panel.
As a general rule, an air filter should be used when using any of the following machines/tools:
- Bandsaw
- Belt sander (free standing or handheld)
- Chop saw
- Track saw
- Workbee CNC
- Router (in table or handheld)
Music Server
The music server is running Logitech Media Server (LMS) on a Raspberry Pi using PiCorePlayer. There are currently 2 players, one in the main room and one in the basement.
Essential Information
- Responsible Person(s): Iain Y
Controlling the music
There are several ways to control the players:
- Using the media control buttons.
- Using the touchscreen mounted on the green pillar in the main room.
- Using http://mediaserver:9000 on a web browser whilst connected to the space WiFi.
- Using a compatible mobile app e.g Squeezer https://play.google.com/store/apps/details?id=uk.org.ngo.squeezer
- Alternative Android Apps https://wiki.slimdevices.com/index.php/Remote_control_apps_for_Android.html
- Alternative iPhone Apps https://wiki.slimdevices.com/index.php/IPhone_control.html
Media Control Buttons

There are Media Control buttons for each player:
- In the main workshop, on the second bank of desks.
- In the basement, in the corner of the South side, next to the amplifier.
Green (Play/Gamble) button:
Short Press = Play/Pause - If there is nothing in the playlist it will start random play.
Long Press (2 Seconds) = Switch the Favourites (which should contain a list of radio stations).
If the light is flashing, it should indicate the music is paused, it should be fully on whilst playing.
Red (“Fire”) button
Short Press = Skip Track
Long Press (2 Seconds) = Clear the current playlist.
The light comes on when you press the button and goes off when the Long Press is reached.
Amplifier control
In the main workshop, the amplifier is switched on and off by the Media Control Buttons based on the status of the player. The controller
In the basement, the amplifier must be switched off manually when not in use.
Adding music to the server
The music is stored on a share on the server at the following location: \\mediaserver\music\
Music can be in MP3, OGG, FLAC, WAV or WMA.
The folder structure should follow Artist > Album > Tracks.
Tracks should be properly ID3 tagged before being copied into this area. A tag editor can be used to edit your files e.g. http://www.softsea.com/review/ID3-Tag-Editor.html.
Modified Bosch Tassimo machine
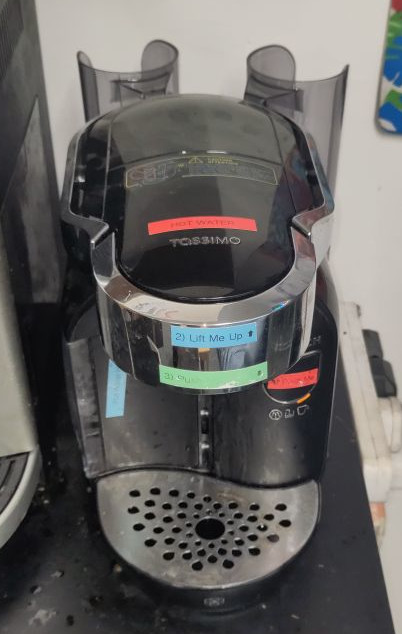
A Bosch Caddy TAS70 Tassimo drinks machine that has been modified to produce ~90C water.
You can still use it for making Tassimo drinks, as long as you enjoy creating a waste product that contains four waste streams and is a pain to separate and not widely processed.
Essential Information
- Location: Ground Floor Workshop
- Responsible Person(s): Dan Nixon
Getting water
- Turn the machine on via the switch on the right hand side
- Lift/open the Tassimo disc loading bay lid
- Close the Tassimo disc loading bay lid
- Push big button (it is a little sticky, ensure it does not get stuck in)
- ???
- Water appears (hope you put your mug under the spout)
Currently you cannot control the temperature or quantity of the water. Maybe you will be able to in the future (but probably not…).
Resources
- Manual
- Quick Start Guide
- Discs
DeLonghi Magnifica coffee machine
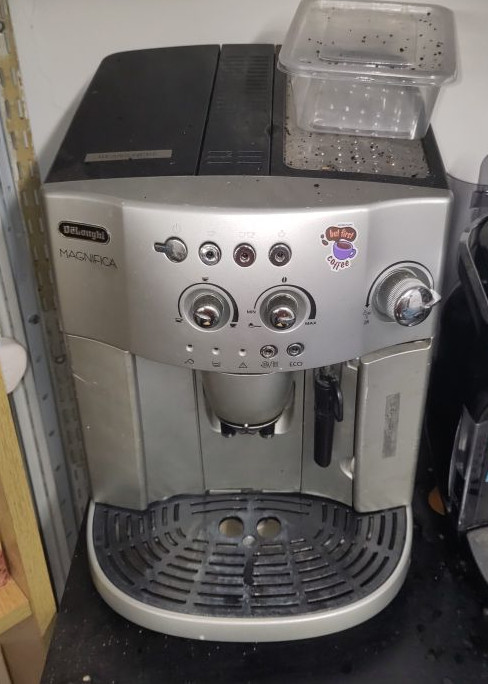
We now have a coffee machine that makes (generally) pretty good coffee.
It’s a bean to cup machine, which means you put whole coffee beans in, and it will grind them and make coffee.
It’s a DeLonghi Magnifica ESAM4200 S.EX1, and the manual can be found here.
Essential Information
- Location: Ground Floor Workshop
- Responsible Person(s): David Pye
Coffee Bean Supply
It’s new to us, so we haven’t got everything straightened out yet. At the moment, the Space has not yet decided to fund the purchase of beans ( and might not, depending on the cost, and the level of interest).
So there are a few options we can discuss:
- The coffee drinkers can buy beans in turn (or every now and again) so we all have access to coffee.
- Keep a bag of beans in your box, and throw a handful into the machine when you want coffee. (discourages freeloaders…!)
- We could discuss, once we know likely usage/cost, whether the space might fund the beans like it does tea. But if it’s much more expensive, it’s not necessarily fair.
- We could have a coffee kitty and set a price for a cup.
Using it/Troubleshooting
Warning: Beans go in the grinder hopper at the top. Water goes in the pull out water container. Putting water in the grinder hopper will cause much distress to the maintainers. We’ve spent an evening overhauling the seized grinder after someone poured water in it, and it rusted solid.
Procedure
- Water goes in the water tank to the right. Tuck the milk frother spout in so its’ out of the way, and pull the water tank forwards, refil (note the MAX mark) and replace.
- Coffee beans go in the hopper on the top left under the black cover.
- The two silver dials - the one on the left sets the amount of water i.e. volume, the one on the left sets the amount of coffee - ie strength.
- It makes espresso, so you probably want to press the two-cup button at the top to make a mug of ‘latte/cappuccino’ etc.
- Press the top right button (with the picture of steam above it) to activate the steamer. When it’s solid red, crank the steam knob half a turn anticlockwise to start steaming. A milk jug is provided. Please wash the jug and the removable spout after use.
Most common warning/status lights:
- Bottom left: Needs water - top it up.
- 2nd from left: Empty the grounds container. Gently hinge the centre section out, and pull the drip tray mechanism OUT. The grounds container is at the back. Ask someone to show you if you’re not sure, it’s difficult to describe in writing!
- Middle one: ‘generic error’. Might be the centre section door not shut properly. Else, it’s broken. Bugger. Tell David Pye/post on -admin mailing list.
- 2nd from right: blinking - needs descaling.
- Far right: ECO light. Should be on. Don’t press the button to turn it off, it won’t turn off automatically, and will waste power.
Wiki
This section describes a little about the wiki, how to use it and how to write content for it.
The wiki uses mdBook, the content is hosted on GitHub and the site is hosted on Cloudflare Pages.
Essential Information
- Responsible Person(s): Dan Nixon
Contributing content
If you would like to make some changes to the wiki, have a read of the style and contributing guides.
Wiki style guide
The key words “MUST”, “MUST NOT”, “REQUIRED”, “SHALL”, “SHALL NOT”, “SHOULD”, “SHOULD NOT”, “RECOMMENDED”, “MAY”, and “OPTIONAL” in this document are to be interpreted as described in RFC 2119.
- File and directory names must be
snake_case - Text should be formatted as one sentence per line (i.e. a newline should always follow a
.) - Each document must make correct use of headings, i.e.
#as the document title, incrementing by one (##,###, …) for each subsequent level of nesting desired - Unless referenced elsewhere, photos should be either in the same directory as the document that references them or in a directory named
imagesin the same directory as the document that references them - Photos should be cropped to only show what is relevant to the document
- Photos should be of an appropriate resolution (i.e. high enough to resolve sufficient detail, but low enough to not be excessive in size or page load time)
Contributing to the wiki
This outlines the means of editing the wiki.
If you are familiar with Git, then you can likely skip most of these docs, install mdBook locally and contribute as you would to any other project. The one caveat is that if you wish to use the CI generated previews then you must not work from a fork of the MakerSpaceNewcastle/wiki repository (you do not need to as being a member of the MakerSpaceNewcastle organisation gives you write permission to this repository).
Relevant parts of the mdBook documentation to reference are:
Prerequisites
- A GitHub account
- Be a member of the MakerSpaceNewcastle GitHub organisation
- Git installed and configured (if following Locally via Git clone)
- mdBook installed (if following Locally via Git clone)
Single page via the GitHub web UI
This will walk through making a change to a single page of the wiki.
In this example, let’s assume you wish to add a couple more tools to the equipment page, only adding them to this list, not creating their description pages.
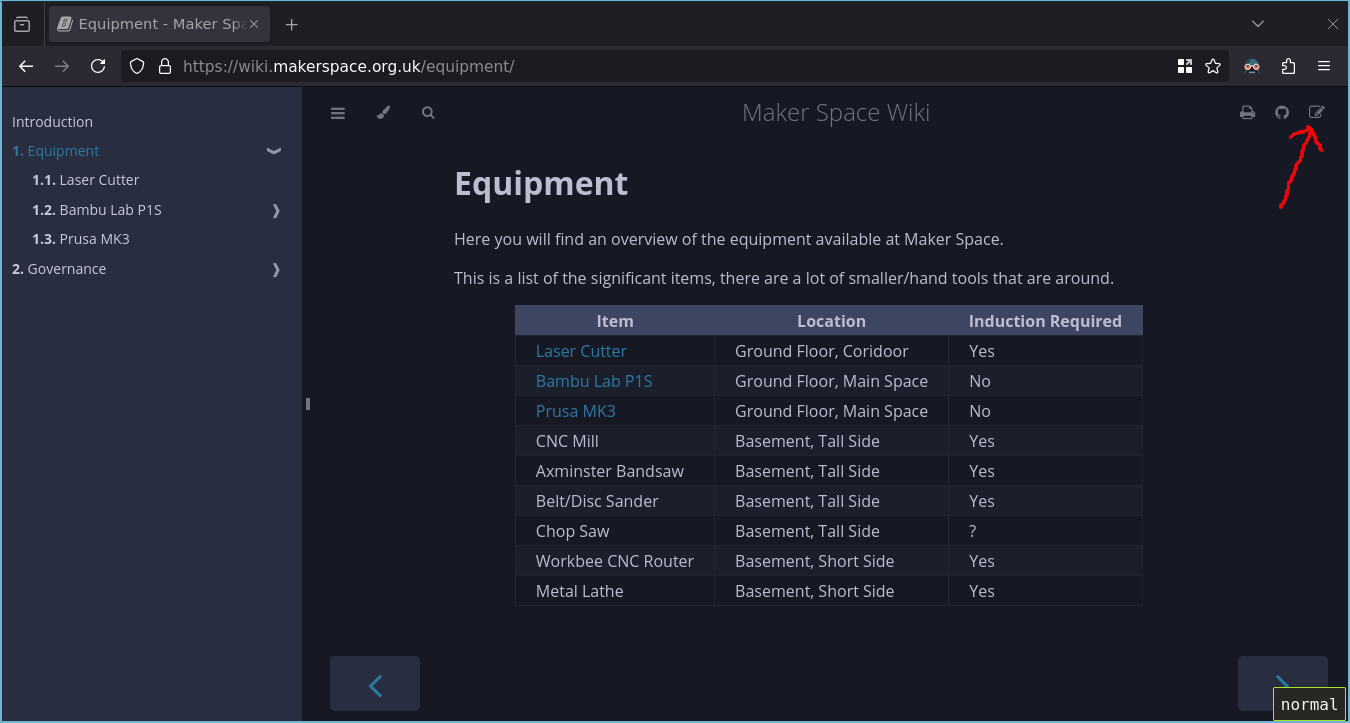
-
On the page, click the edit icon in the top right hand corner:
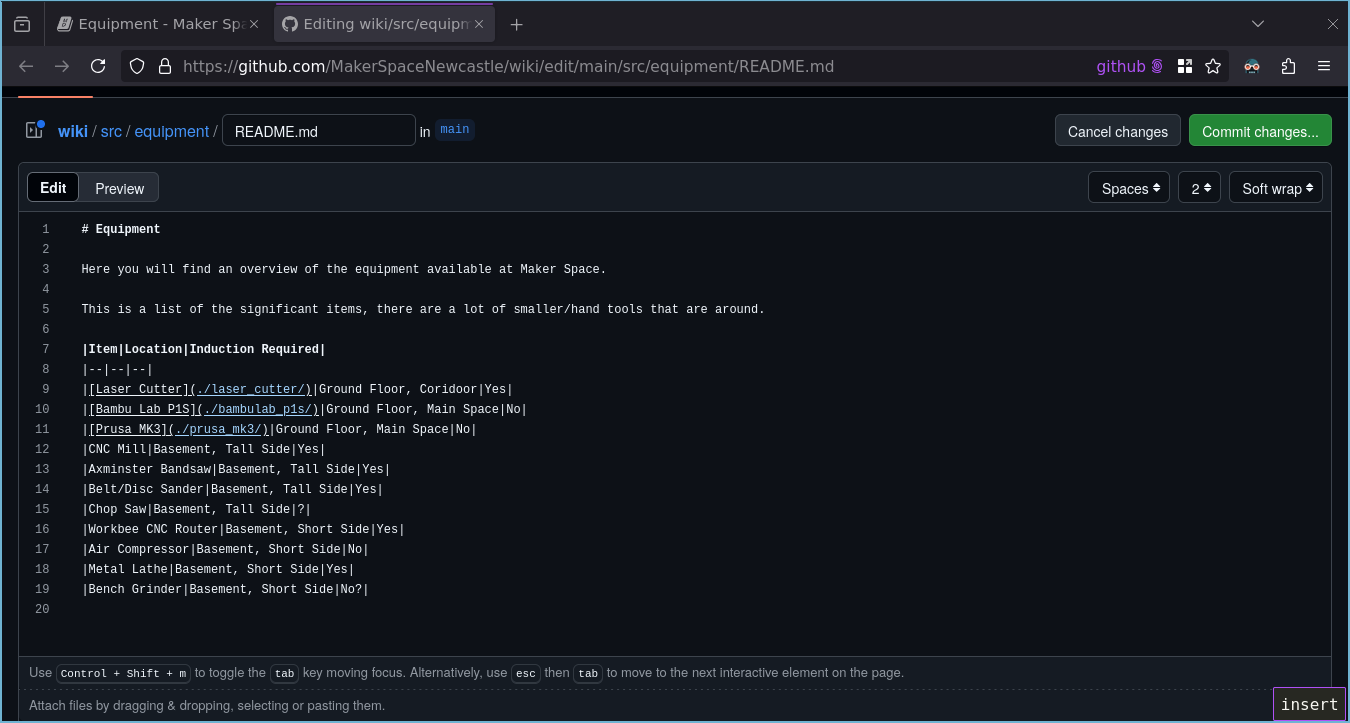
-
This will take you to the online text editor on GitHub (if you are not already signed in then you will be asked to). Make the desired changes (in this case the addition of the air compressor and bench grinder to the list) and click the green “Commit changes…” button.
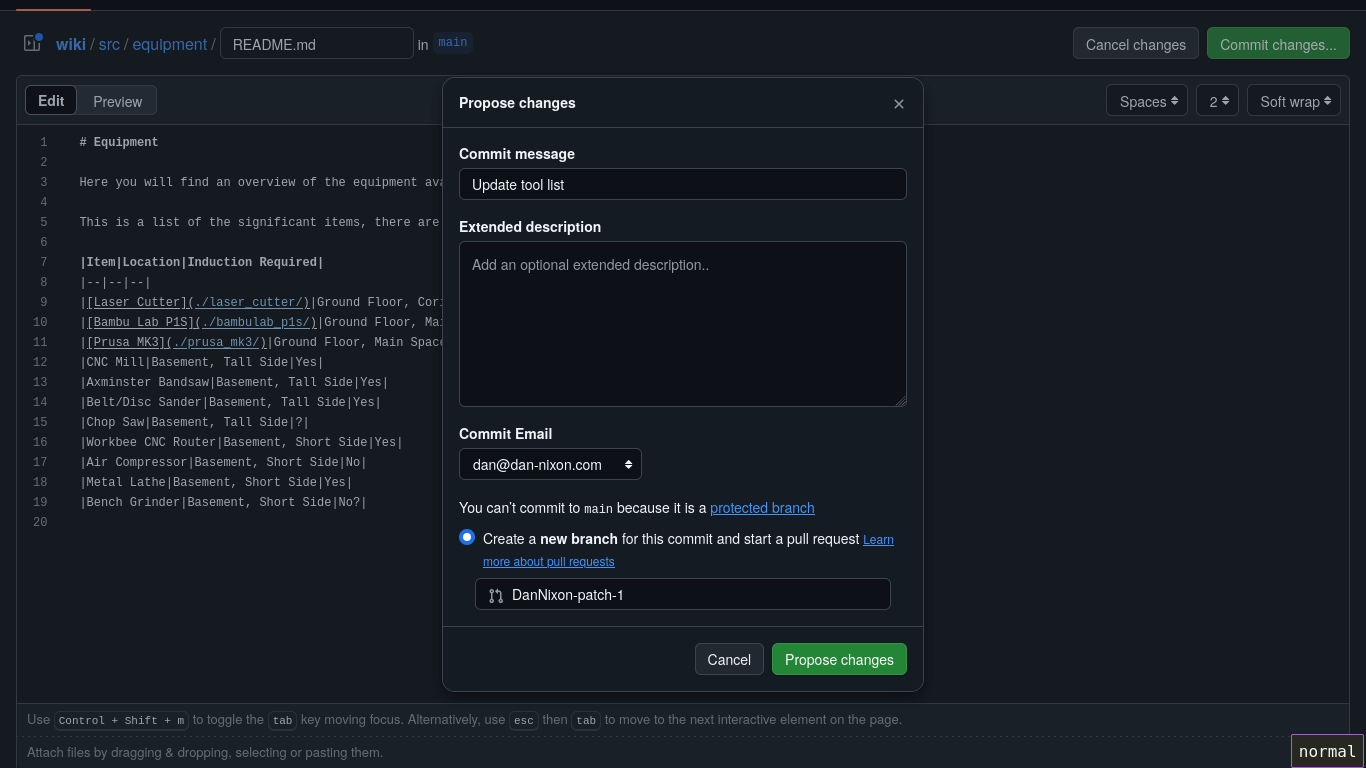
-
You will be asked to provide a commit message, type something descriptive here and click the green “Propose changes” button.
The remaining options may be left as their defaults. If the options provided to you look different to the above then verify you have satisfied the prerequisites.
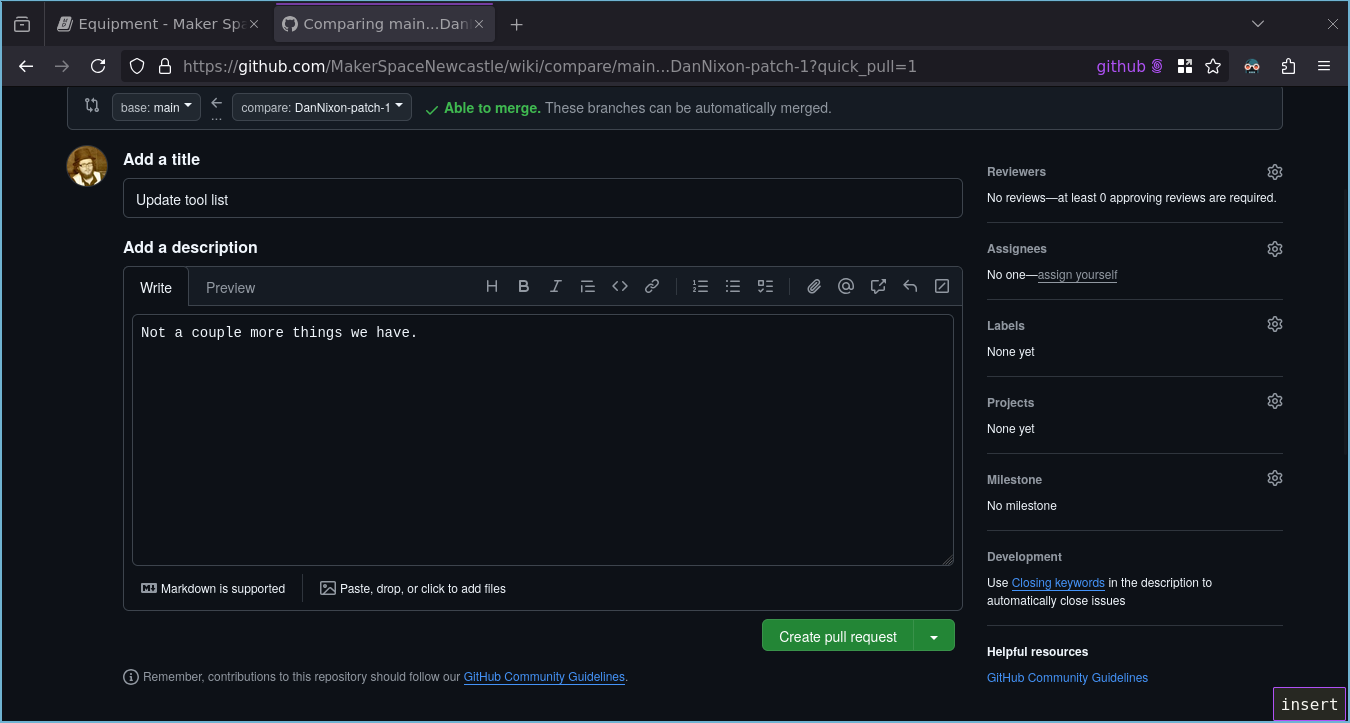
-
You will be taken to the create pull request screen, proceed to Proposing changes via a Pull Request.
Locally via Git clone
Note that these instructions are quite brief for the time being.
- Clone the wiki repository.
- Inside the repository, run
mdbook serve. This will start a local web server that will update the site live as you make changes. - Make your changes via your text editor/IDE of choice.
- Commit the changes to a new branch.
- Push the branch.
- Open a pull request, proceed to Proposing changes via a Pull Request.
Proposing changes via a Pull Request
-
Provide a suitably descriptive title and description of your changes and click the green “Create pull request” button.
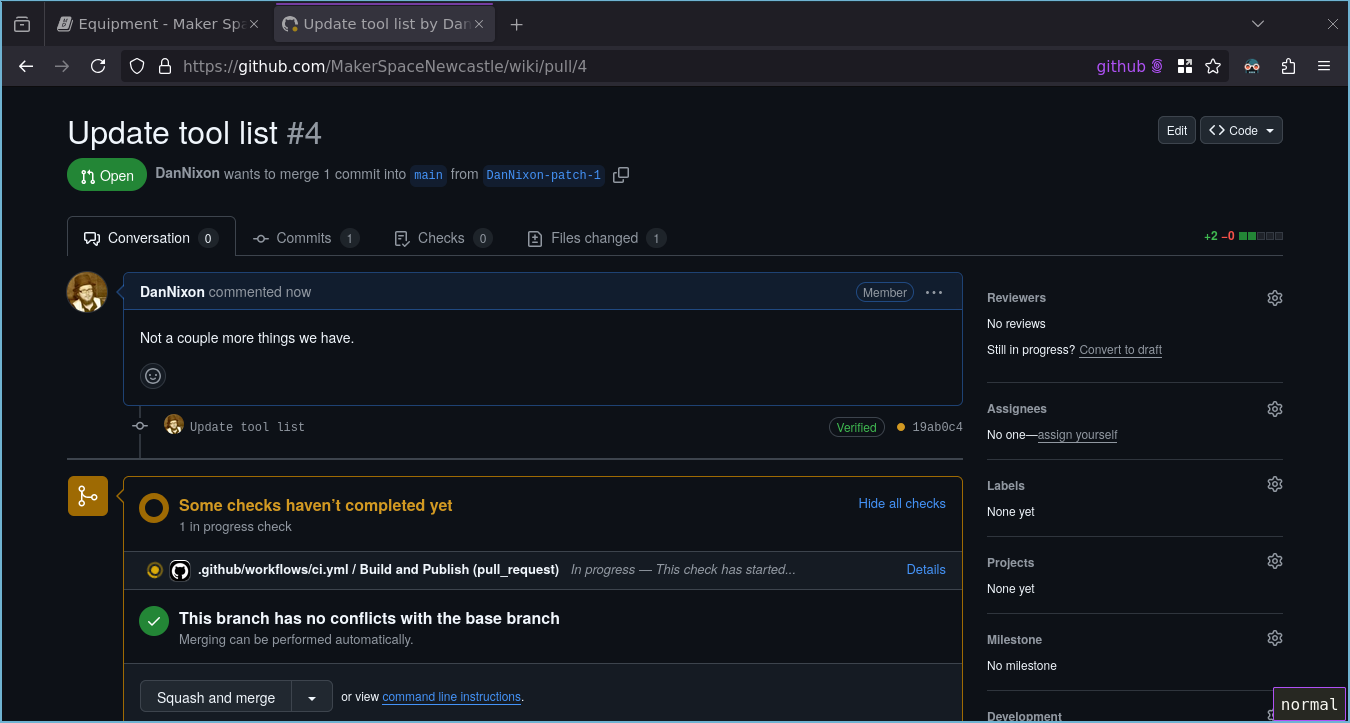
-
One the pull request has been opened, you will see the actions start to run. This will build the site and deploy a preview of it.
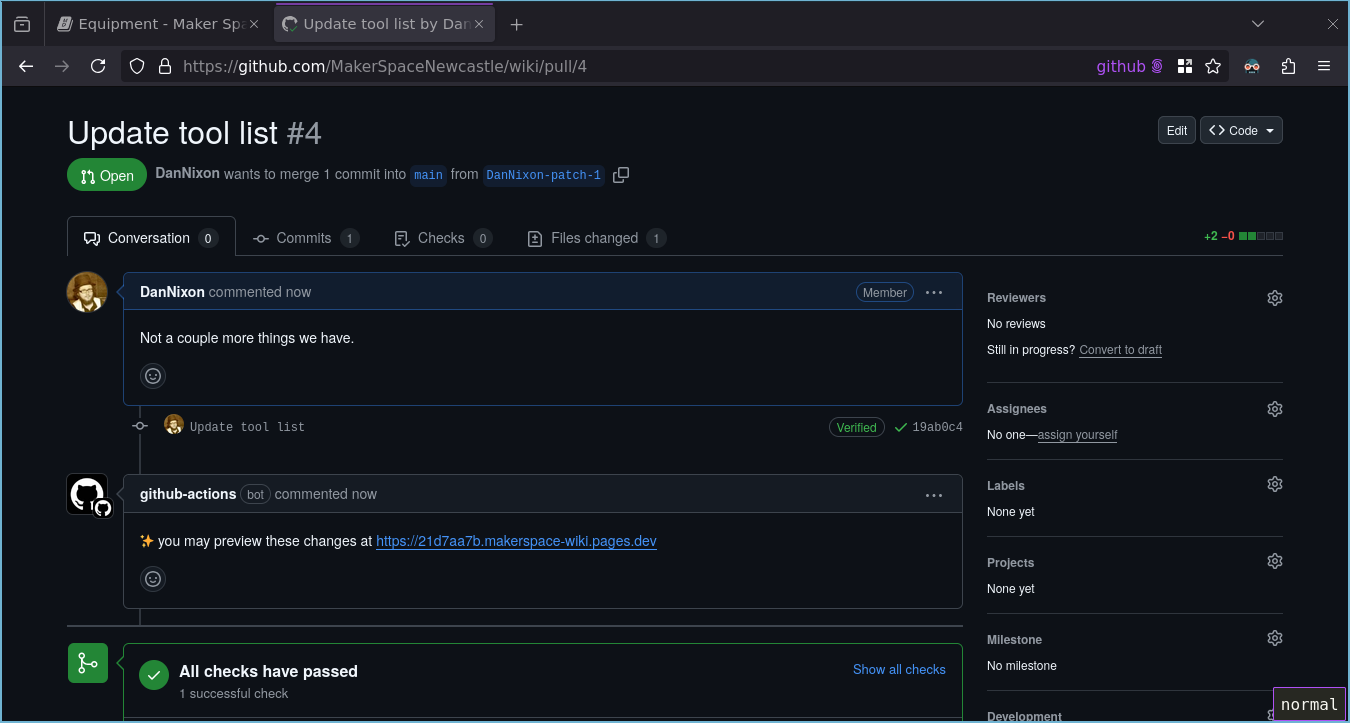
-
Once the actions have completed, you will see a comment appear with a link to preview the changes.
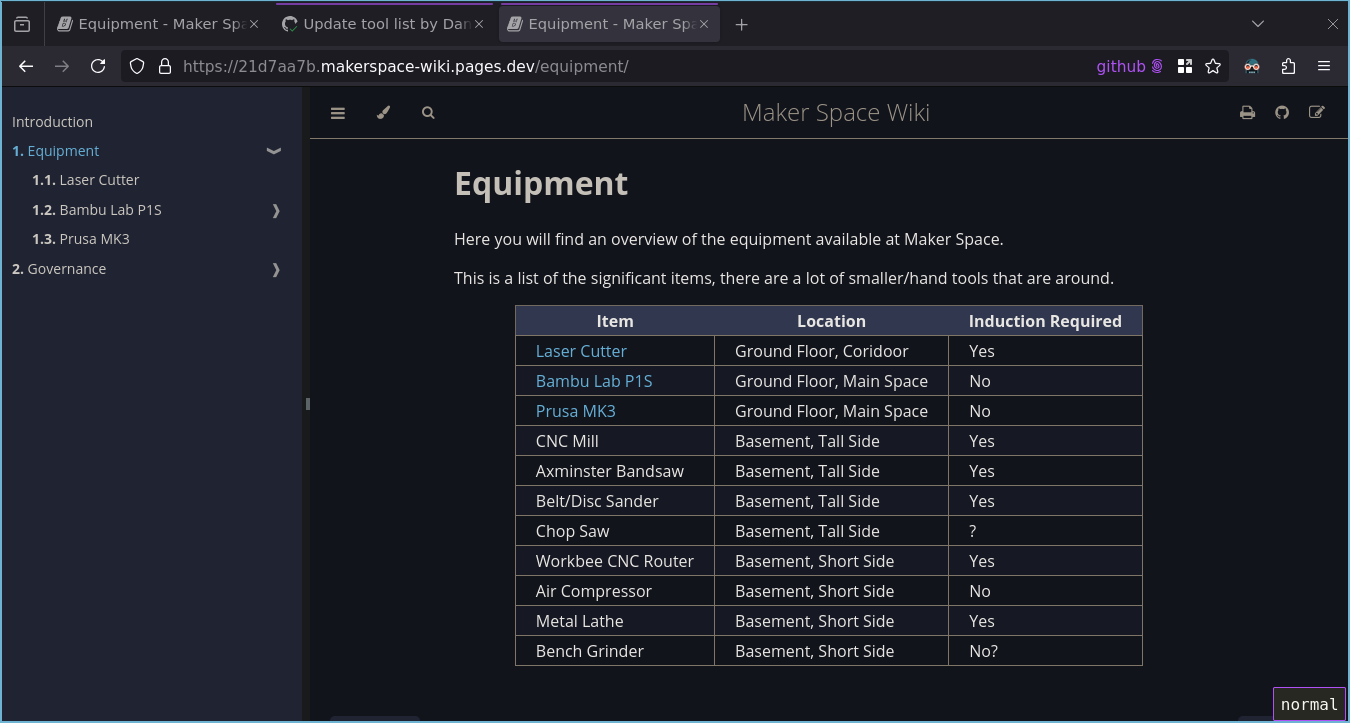
-
Opening the link in the comments and browsing to the equipment page shows the changes made.
-
Depending on exactly what has been changed in the pull request, certain people may have automatically been requested to review your changes, if so they must provide their reviews first. You may also opt to ask people to review your changes if desired.
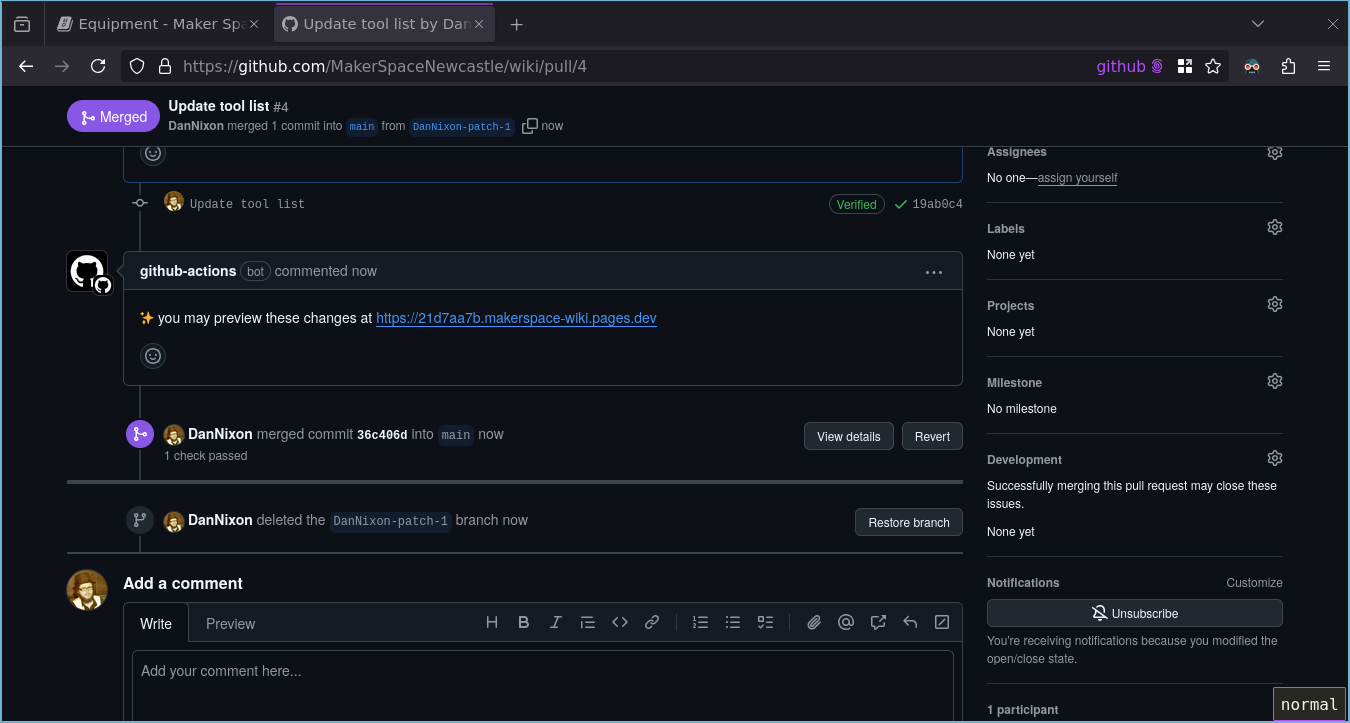
Otherwise you can now click the green “Squash and merge” button, followed by “Confirm squash and merge” to accept the proposed changes.

-
The pull request is closed, the live wiki will now update.
Policies and Procedures
This section describes how Maker Space is managed.
New Members
When joining Maker Space, new members start by filling in an application form which can be found here: https://www.makerspace.org.uk/joinus/
The New Member Procedure explains the process in more detail.
The last step of becoming a member of Maker Space is to go through a general induction. This covers the basic health and safety points, where to find things, what to expect of the space and what we expect of you.
Making changes in the space
Maker Space members are welcome to make and suggest changes in the space. We have a Change Proposal Procedure for proposing and making changes in the space.
Becoming a Keyholder
Most Maker Space members are keyholders, giving them 24hr access to the space. Our Keyholder Policy outlines what we expect of you as a keyholder.
To become a keyholder, you must be sponsored and seconded by existing keyholders and go through the Keyholder Proposal Procedure.
Behaviour Policies
Please, just be nice. We don’t want to have to use our Code of Conduct or our Grievance Procedure.
Checklists
Some quick reference checklists to make sure tasks are done correctly and completely. These are not meant to be training or even documentation of a procedure, they are just to ensure that things are not missed.
Opening Maker Space
Note that the only “approved” way of opening the space is via the main door (i.e. the one with our sign above it).
Hallway:
- Main door: unlocked and opened
- Main door Yale lock: disabled
- Main door: closed
- Alarm: disarmed
Main workshop:
- Doors: unlocked and latched
Rear/courtyard foyer:
- In/out status: in
- Shutter: opened
Closing Maker Space
Basement:
- Equipment: off
- Access controllers: logged out
- Door: closed and locked
- Stair gate: closed
- Light: off
Rear/courtyard foyer:
- In/out status: out
- Shutter: closed if building unoccupied
Main workshop:
- Basement key: on hook
- 3D printers: off
- Fans/heaters: off
- Solder station: off
- Coffee machines: off
- Installations/displays: off
- Other equipment: off
- Windows: closed
- Lights: off
- Doors: closed and locked
Hallway:
- Laser cutter: logged out
- Lights: off
- Alarm: armed
- Main door Yale lock: latched open
- Main door: closed and locked
New Member Procedure
1. Application
The Applicant will start the process by completing the Membership Application Form which can be found here: https://www.makerspace.org.uk/joinus/
The Applicant should ideally have visited the space before submitting the form but this is not an absolute requirement.
2. Review
The Membership Officer and/or the Board will review the application and decide if it should be approved or not.
3. Approval/Disapproval
Approval/Disapproval should be confirmed by the Membership Officer/Board.
On Approval, the Applicant should be sent details of how to set up monthly payments and how to arrange their induction.
The Approver is not responsible for the actions of the Applicant.
4. Payment Verification
Membership Payments should be verified before the Applicant becomes a member.
5. Member Inductions
New members must receive an induction to cover the basic safety points, policies and expectations of the space. Inductions should be given on a voluntary basis and could be given by any member who has already been inducted.
The induction can be found here
- Inductions should ideally be arranged in advance.
- The keyholder for the session should not be obliged to give an induction.
- A member may wish to give an induction in order to meet the new member.
6. RFID Key Fobs
Once the applicant has become a member, an RFID Key Fob (if available) may be registered to the new member.
- Key fobs are available for a small donation but if the new member has a suitable key fob, this may be used.
- See the Access Control page for more details.
Safety Policies
All members are required to read and acknowledge Maker Space’s Safety Policy and Lone Working Policy which can be found here:
These documents are to be reviewed and updated on at least an annual basis.
MS4 Induction checklist
This is a checklist of the things that a person who is inducting a new member to Maker Space should cover during their initial induction tour.
Introduction
Maker Space is a community owned and run working space. We’ve all clubbed together to get a space to work in. There aren’t any grownups looking after this place, its just us, and it works because everyone pulls their weight to keep it running and nice for us all.
If in doubt, ask the mailing list.
- It can be found on the website header -> discussion list
- There is also a private list for members which is for the running of the space. You should have been added to this when you became a member - if not, please say something as you’ll be missing out on key announcements.
Access to the space
- Access is available if a keyholder has opened the space. i.e. Welcome Wednesday and regular evening sessions.
- If you need access outside of the normal hours, ask on the discussion list as a keyholder may be planning to be in.
RFID Access
- RFID fobs can be used to access:
- The space, when a keyholder is in.
- Machines that require an induction.
- If you have a compatible fob already, you can use that. We also have some fobs available if you don’t.
- Register your fob by swiping the main door a few times and letting an admin know when you did it.
General Safety
- Fire exits - keep clear! / Fire Extinguishers / First Aid Kit
- Be mindful of smoke alarms.
- What to do if fire alarm goes off - muster outside - if you find a fire, sound the alarm, yell etc, then leave.
- Fire assembly point is in the car park at the back of the building.
- Don’t leave things on the floor where people might trip over them, bags, cables, project boxes etc, tripping over hurts
- Use ladders when required rather than chairs, tables etc. and make sure it’s stable.
- Be mindful of others if you’re doing something that might impact on them or if they might. e.g. working in doorways, walkways etc.
- Do not work on live mains electricity, it’s quite dangerous.
Toilets / Water / Drainage
- Toilets near entrance.
- Drinking water from Kitchen.
- If you’re covered in oil or grease, cleaning supplies (Swarfega etc.) are available. - Currently downstairs by the lathe.
Using the Space
People use the space differently, please be considerate.
- Avoid telling people how to do their project. Sometimes the objective is to learn a new technique rather than solve the problem in the best way.
- Try not to touch or pick up projects without permission.
- Some people are here to be social, some people are here to work and may not want to talk. Please respect their space and leave them be!
Infrastructure/security
- While many things are fair game for hacking/modifying, the core infrastructure/access control systems are not.
- Attempts to ‘defeat’ security/access control for equipment will be viewed very negatively and may end up in restriction/removal of space access privileges.
- If you want to improve a piece of core infrastructure e.g. music player etc, then discuss any proposed changes with its’ current owner/maintainer first.
Parts/Materials
- We have lots of scraps, off-cuts, spares and components etc. which can be used.
- If you need something specific or a lot of something, please provide your own.
Maker Space has a clean desk policy
- Try to tidy up as you go if possible. Work spaces should be clean and tidy before you leave.
- If you need to leave something out, ask on the discussion list.
- Bins, dustpans, brushes, mops, blue roll and vacuum cleaners etc. are around the space.
- If you have cut, sawed, drilled, sanded, filed or ground anything then there will be something to clean up.
Bins
- Large bins in the workshops - Dustpans and brushes attached.
- Small bins around the space.
- Please do not leave food waste in the space.
- Bins currently to be taken home. Please help out if you can (but only if you will dispose of waste streams correctly).
- Battery disposal - Please take to a battery recycling point e.g. Tesco.
- Recycling - in workshop.
- Small electronics/e-waste in marked box in entrance lobby.
- Do not bring waste into the space just to dispose of it.
- (see Waste Streams)
Entrance Lobby
Main door
- This is our main door and a fire exit route.
- (demonstrate opening it and using RFID when fob is issued)
Hack or Die
- Items on the shelves are for hacking and remaining items are periodically disposed of.
- Please only add items you realistically think will be used by someone.
- Please don’t bring things in just for Hack or Die. Do that virtually (by email) instead.
Laser Cutter
- Induction required - Ask on the members list.
- Scrap material available for use.
Toilets
- Exist.
Workshop
Main room
3D Printers
- Induction required for Bambu Lab printers
- Filament is paid for by the users. See 3D Printer Filament for details.
- (further details given in induction)
Members’ Store
- Your box goes here - 32L - 18cm (h) x 60cm (w) x 40cm (d)
- Please stack things carefully, especially high up.
- Ask on mailing list about storing big things in space, before you bring it in.
General Storage
- There’s a mix of hackable and non-hackable things here.
- Vinyl Cutter
- Batteries / Power Supplies
- If in doubt, ask.
First Aid Kit
- On the end of the shelves
Basement Key
- Next to the first aid kit
- Unlock the basement if you need to, leaving the key in the door
- Leave locking the basement to the keyholder
Wall o’ boxes and other material around space
- OK to use stuff, but please add stuff too - It’s all provided by members and rather than the space.
- Please also apply ‘fair use’ principles to Space items - If you use a lot of something, replace it.
- Put it back in the box and on the correct shelf when done (boxes are colour coded to shelves).
- Glue gun - please make sure you let it cool before putting it away.
- There are “Please hack”/“Do not hack” stickers and labels. Please respect them. If labelling something, write “Please/Do Not Hack”, your name and the current date.
Tea and coffee facilities.
- Coffee machine - used for hot water instead of a kettle.
- Bin bags - on shelves.
- Tea/biscuits/sweets etc often on the table - help yourself - feel free to add more
Fridge
- Lemonade/Fruit - Free but please replenish what you use.
- Club Mate - Prices/Payment details on the fridge.
Recycling
- Soft plastics/films if marked with “Recycle at Store”
- Mixed Recycling.
- Clean/Dry items that could go in a household recycling bin.
- Ensure cans are empty and not likely to leak in someone’s car
- Glass
- (see Waste Streams)
Stationery
- In grey drawers
Soldering station
- Turn irons off after use.
- If don’t know how to use, please ask.
- Hot tools/irons shouldn’t be left unattended.
- Let stuff cool before putting away.
- Scraps tub for collecting bits of wire etc. Please don’t leave bits all over the desk.
Electronics Tools / Multi-meters
- Screwdrivers and small handtools on top of shelves.
- Use the correct screwdriver for the job (Pozi != Phillips != drill bit).
- Multi-meters, crimping tools, spare solder etc in drawers
Media Centre
- See Media Server for details.
Side room (Goldfish Bowl)
- PCs available for use. Please don’t install crap.
- Electronic component storage - keep it tidy!
- Items Stored on the shelves belong to the space. They can be used but not to be hacked. Don’t take them away from the space without permission.
Hallway
“Orbis” door
- This is another fire route.
Orbis kitchen
- Source of potable water
- Can use the sink, kettle and dishwasher only
- Do not make a mess in this kitchen.
Basement Stairs
- Generally OK to leave the gate open
- Keep the gate closed when events are on in the building.
Basement
There are PPE boards - please use them.
- We have provided it, it’s your job to use it. It’s OK to remind people you see not using it when they should be.
- Dust masks are available from the “Spare PPE” box.
- If you know you’re going to need specific PPE for a certain task ahead of time (respirator, coveralls), consider bringing it yourself.
- Hearing protection - if you are making lots of loud noise make sure you and others near you wear it.
- If you are making flying objects, ensure people who may be affected know and are offered eye protection.
Clean up after yourself
- Tools / Bench top / Floor
Tools
- Sander / Pillar Drill / Lathe / Mill / Band Saw / Workbee CNC
- RFID Controlled. Induction Required, ask on the members list or email the maintainer to get inducted.
- Hand tools generally around the space on boards.
- Drills, hand power tools, Dremel and bits/collets near the Workbee CNC machine.
- Return tools when you have finished with them, definitely before leaving space.
Air filters
- Buttons to control them mounted on the walls.
First Aid Kit
- On top of filter on South side.
Storage
- Wood Store - Help yourself - Add more wood/offcuts when finished own projects. Please check for “Do Not Hack” stickers before using.
- Timber recycling box under shelves
- Nuts/Bolts/Screws - please keep tidy - use “M Don’t Know” if you can’t determine the size.
- Metal Store - to be used for projects etc. Be careful of sharp edges, don’t leave any for others.
- Table legs may not be spare. Please check before using.
Chemicals
- Any chemicals in the space should be clearly labelled whether hazardous or not.
- Flammables box - Flammable stuff lives here, put it back after using.
- No dangerous chemicals please.
- No spray painting in the space - ventilation isn’t adequate.
- No flames/smoking
Hot Work - Grinding / Welding
- Grinding requires a second person to act as Fire Watch.
- Welding not currently covered by the insurance.
Change Proposal Procedure
Maker Space members are welcome to make and suggest changes in the space. This procedure defines the decision making process depending on the cost, impact and ability to undo the change.
It’s always best to discuss changes with other members beforehand.
Small Changes
No formal approval is required if a change:
- has no cost,
- can be undone within about 10 minutes,
- is unlikely to upset anyone.
Purchases
Purchases of up to £50 may be authorised by an individual director without needing to get agreement from others.
Purchases of more than £50 require a board agreement. The board agreement does not need to be a regular monthly meeting, but can happen in person, verbally or in any other communication as long as a board quorum is reached so this shouldn’t hold up anything that needs doing.
There will also be an approved list of things such as toilet rolls and tea bags which will not need board approval.
Proposals for larger changes
Any Member can propose something on the Maker Space Members mailing list.
If there are less than three objections within 1 week, the proposal will pass.
If there are three objections or more, it will go to a board meeting to be decided.
Any member can submit items to the agenda of a board meeting for the board members to consider.
The board may veto any decision for the good of the space.
Keyholder Policy
Being a keyholder is a responsibility. You are expected to open up for other members and are responsible for the safety of the space when you do. Every member does not have an automatic right to become a keyholder.
When you are an active keyholder you are responsible for the space and all that goes on within it. You are responsible for the safety of others and the safety of yourself. You may have to deal with incidents, accidents and medical emergencies. Keys will only be granted if members believe you are able to cope with this.
If you are the active keyholder you must not leave the space until you have clearly handed over to another keyholder. The space can not be left unlocked without a current keyholder in the building.
Keys will only be granted if at least three current keyholders can vouch for the honesty or safety of the applicant. Any rejection should not be considered an insult but the applicant should take any reason(s) for rejection seriously and try to address them if they can.
We have no set duration you need to be a member before you can ask for a key but the applicant needs to know other keyholders well enough for them to be proposed and seconded. Three months from a member who attends once a week, or a year for a member who attends once a month is a good guide to the minimum duration. Not knowing the applicant enough is the top reason for applications being rejected.
A keyholder has the right to ask a member not to do something or to leave the building. Keyholders do not have any other authority granted to them by being a keyholder. A keyholder is not of a higher standing than any other member.
A key can be relinquished by the keyholder or withdrawn by the board at any time. If a key has been relinquished the member they will need to reapply for practical reasons but there experience of being a keyholder is likely to result in most applications being fast tracked.
A keyholder is required to undergo an induction and sign the keyholder agreement before receiving a key. The keyholder must be subscribed to the Maker Space admin email list. All important keyholder messages will have a subject starting “Keyholders”. The keyholder may be required to undergo refresher inductions in time to remain a keyholder.
Keyholder Proposal Procedure
The member requesting a key asks a current keyholder to sponsor their application. The current keyholder should only agree to sponsor an application if they fully trust the member requesting the key.
The keyholder sponsoring the application posts the application to the Maker Space admin list. They should give some background to the applicant and why they feel they should be issued with a key.
A minimum of two extra keyholders need to second the application by replying to the original post. These members should only second an application if they fully trust the member requesting the key. Although not mandatory it is wise for the member requesting the key to ask two keyholders to do this in advance.
A Security Officer will be appointed for the proposal. This should be a board member and by default, this will be the Membership Officer. The Security Officer can and should recuse themselves if they are not seen as impartial. In this case another board member will take over the tasks of Security Officer relating to the application.
All members (including keyholder and non-keyholders) will be able to comment on the proposal for seven days. Any member can object publically on the list or in confidence by emailing the Security Officer.
If after seven days two or fewer objections have been raised and no objections are considered serious and pertinent to the application by the Security Officer, the application has been fast tracked. The applicant can be issued with a key after a keyholders induction and signing the keyholders agreement.
If after seven days three or more objections have been raised, or one or more objection that are considered by the Security Officer to be serious and pertinent to the application the application can not be fast tracked. The applicant will be informed of the issues raised by the Security Officer and given the chance to withdraw the application to give time to address these issues. Alternatively they can respond to the issues raised and ask the board to make a final decision at the next board meeting.
At the board meeting the Security Officer will summarise any issues raised. The applicant can respond to this in person or in writing.
The board can either:
- decide that issues raised are serious and need addressing before an application can be considered again
- decide that the issues are not serious or just invalid and the applicant can be issued with a key after a keyholders induction and signing the keyholders agreement
- decide that the proposal needs further review and can be postponed until a later meeting.
A member can re-apply after withdrawing or being rejected at any time if outstanding issues have been addressed.
Code of Conduct
We expect all members, guests and attendees of events to abide by the following policy at Maker Space and all its online meeting places.
Maker Space intends to provide everyone a harassment-free environment, regardless of gender, sexual orientation, disability, physical appearance, body size, race, or religion. We want the space to be a safe space for everyone, and will not tolerate harassment in any form.
Harassment includes (but isn’t limited to) offensive verbal comments related to gender, sexual orientation, disability, age, physical appearance, body size, mental health, race, religion; deliberate intimidation; stalking; following; inappropriate physical contact; unwelcome sexual attention; and inappropriate or unrequested photography or recording; sustained disruption of events; or any action that makes another member uncomfortable.
Anyone asked to stop any harassing behaviour, by anyone, is expected to do so immediately.
If you act or speak in a way that someone thinks is inappropriate, it’s inappropriate. If somebody tells you that you are making them uncomfortable, you must stop making them uncomfortable. Do not put your opinions or desires before the comfort of others; “It’s just a bit of fun”, “It’s just a joke”, “Where’s the harm in it?” (and so forth) are not excuses for behaviour that makes anyone else feel unwelcome or as if they are a target. If you feel compelled to tell someone who is uncomfortable that they are wrong to feel that way, you are most definitely putting yourself in the wrong.
If you are being harassed, notice that someone else is being harassed, or have any other concerns, please don’t ignore it. If you feel that you can, challenge the behaviour directly. If you can’t do that, please contact the Board Members. If the offender is a Board Member, you can contact another Board Member directly.
If anyone engages in harassing behaviour, the Board Members may take any action they deem appropriate, including warning the offender or starting the Grievance Procedure.
Grievance Procedure
Intention
The Board Members of Maker Space have the authority to ban anyone from entering the space and the authority to strip anyone of their membership, or remove keyholder status. This must only be done in circumstances where this authority is best for the Maker Space and its members as a whole.
This policy will only be applied to members who demonstrate unwillingness to address behaviour which has caused offence, harm or distress to another member or members; or has threatened the safety of the space. This may be behaviour directly targeting or witnessed by any individual. The Maker Space Safe Spaces policy elaborates on this somewhat. Throughout the process, all efforts will be made to keep clear and constructive communication between the Board Members, the offending party, and any other affected parties.
In very serious cases, Board Members may invoke temporary access bans until the issue is resolved.
Introduction
This policy applies to members, guests and attendees of events that use Maker Space or its online meeting places. Any person may be banned from the space if they violate existing policies or if they have the potential to harm other users of the space. Before the formal banning procedure is started, the Board Members must make every attempt to resolve the issue informally.
Process
Should a Board Member become the focus of a complaint, they will not be included in their normal capacity during the grievance process.
The offending party must be given at least two written warnings before being banned. At every stage, it must be made clear to the party where they are in this process.
At every stage, all involved Board Members but one must be in agreement that allowing the user to continue to use the space would not be in the best interest of the organisation.
At every stage, the Board Members must make their reasoning available to the offending party. They must also make as much detail as is appropriate available to all members.
By default, a ban will be for a year. At their discretion, the Board Members can issue a reduced ban period.
Bans of more than one year may only be issued in extreme circumstances. The Board Members must review these bans yearly.
If the offending party is a member, the ban will trigger the process to ternimate the offending person’s membership as per the articles.
When a person is banned, their right to access Maker Space is revoked. Any entry to the space without the prior, express permission of Board Members will be considered trespass.
The Board Members must seek feedback from the community to ensure this process remains fair and balanced.
Pre Approved Purchases
This is a list of consumables that are very commonly used in Maker Space, for which reimbursement for reasonable purchase of will automatically be approved.
A “reasonable purchase” constitutes the purchase of something:
- from the table below
- we actually need, i.e. we are low/out of and is still required
- in the quantity listed in the table below
| Item | Quantity | Guide price | Supplier link |
|---|---|---|---|
| Blue Paper Roll | 1 of pack of 6 | £25 | Screwfix |
| Brother TZe-131 12mm Label Printer Tape | 1 of 6-7 tape pack | <£20 | Amazon |
History of Maker Space
Maker Space was founded in 2011 by Alistair and Brian. Approximately 10 people turned up to the first Welcome Wednesday on 20th July 2011. The formation of the space from the initial concept to our first premises took several years.
Timeline of key events
| Date | Event |
|---|---|
| 2008 | Initial idea of creating a hack space combined with a co-working space to pay for it. |
| 6th July 2009 | Newcastle Hackspace Google Group created. |
| 12th July 2009 | Alistair and Brian started renting The Cottage which later became Maker Space 1. |
| 18th May 2010 | Rebranded as Maker Space. |
| 31st March 2011 | North East Makers Google Group created to help build a community in the region. |
| 4th July 2011 | Alistair and Brian attended a Dorkbot event where they found the first members. |
| 20th July 2011 | The inaugural meeting when approximately 10 people turned up. This was the start of regluar drop-in sessions on the 1st and 3rd Wednesday of the month. |
| 15th December 2011 | Maker Space Ltd was formed as a Limited by Guarantee company. |
| 2nd January 2013 | Our first Welcome Wednesday! |
Maker Space Version History
Below is a list of the premises Maker Space has used over the years. All of which, excuding the current one, have since been domolished.
| Version | From Date | Location | Floorspace (m2) | Description |
|---|---|---|---|---|
| MS1 | 2011-07-20 | The Cottage, Star and Shadow, 1 Coquet Street | 25 | Our first home! A small office at the back of a cinema. |
| MS2 | 2013-06-01 | 18 New Bridge St. West | 91 | Our first proper space in the centre of Newcastle with large shop windows to fill with fun stuff. |
| MS2.5 | 2017-04-21 | 4th Floor, Commercial Union House, Pilgrim Street | 45 | A small temporary space in CU house with a lot of our stuff in storage. |
| MS3 | 2017-07-24 | Basement, Commercial Union House, Pilgrim Street | 103 | An area of basement that had previously been used as a document archive. |
| MS3.1 | 2019-09-13 | Basement, Commercial Union House, Pilgrim Street | 166 | Expanded into another area of basement that had previously been used as an alcohol store, known as the zombie cage. |
| MS4 | 2021-09-04(storage only) Re-opened November 2022 | 65 High Street, Gateshead | 200 | Ground floor and basement space in a building that was originally a pub. |
Maker Space 1 (2011 - 2013)
Maker Space 1 (MS1) was our first space which was a small office at the back of Star and Shadow Cinema’s (https://www.starandshadow.org.uk/) building at the time.
Address
1 Coquet Street,
Ouseburn,
Newcastle upon Tyne
NE1 2QE.
Floorspace
25 square metres
Rooms
- The Space
Description
The space was a small office approximately 5m x 5m, one of four, in a part of the building known as The Cottage. It was originally rented by Brian and Alistair and used as their office until it became Maker Space. The room had deskspace along three of the walls, and 2 sets of shelves for members’ boxes and a small amount of tools, equipment, books and electronic components.
The space didn’t have many tools or much equipment at the time. Most of the things we had were personal items that had been donated such as screwdriver sets, drill bits, a small bench power supply etc. Several members were getting into 3D printing at the time. The space had a Makerbot Thing-O-Matic and a number of members clubbed together to buy the parts to build a Prusa Mendel.
The small size of the space was a challenge at times, especially open studio events such as The Late Shows (https://thelateshows.org.uk/). By the time Maker Space had grown to have more than 20 members, it became clear that we needed to find a larger space. Financially, this was seen as a gamble at the time but it proved to be a risk worth taking.
MS1 Photos
External
The space was accessed from the door shown below on Coquet Street. Our room was to the left of the door.
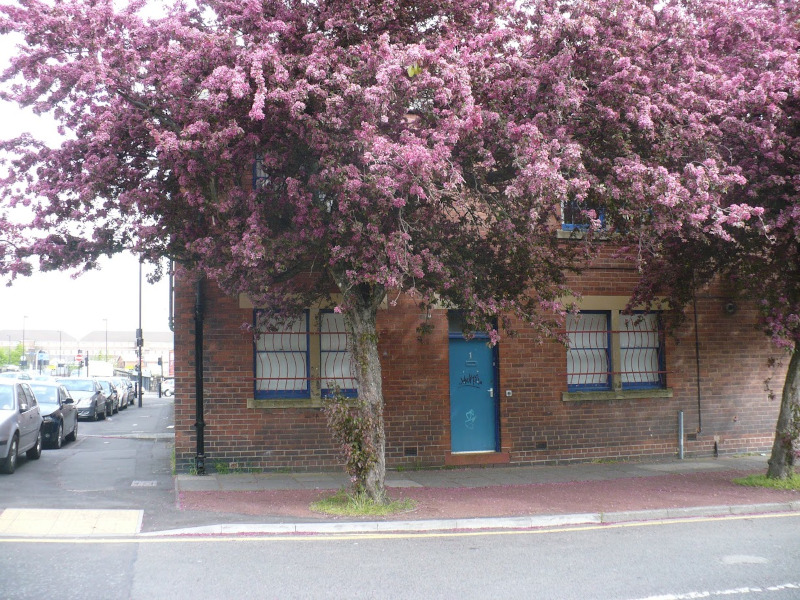
Internal
Here are some photos from inside the space.
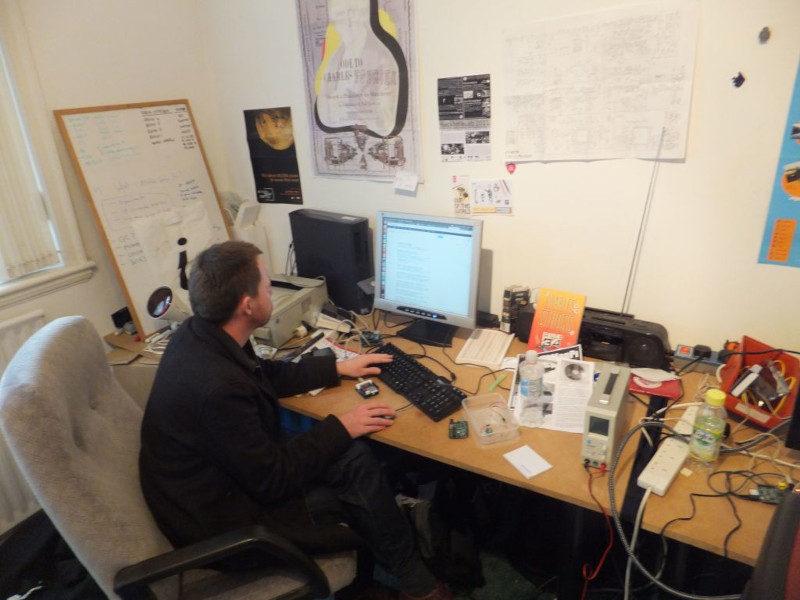
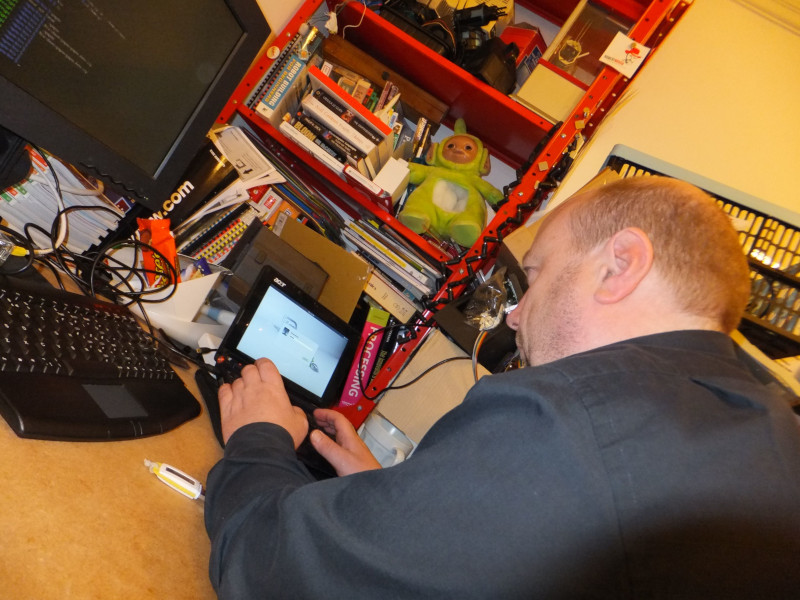
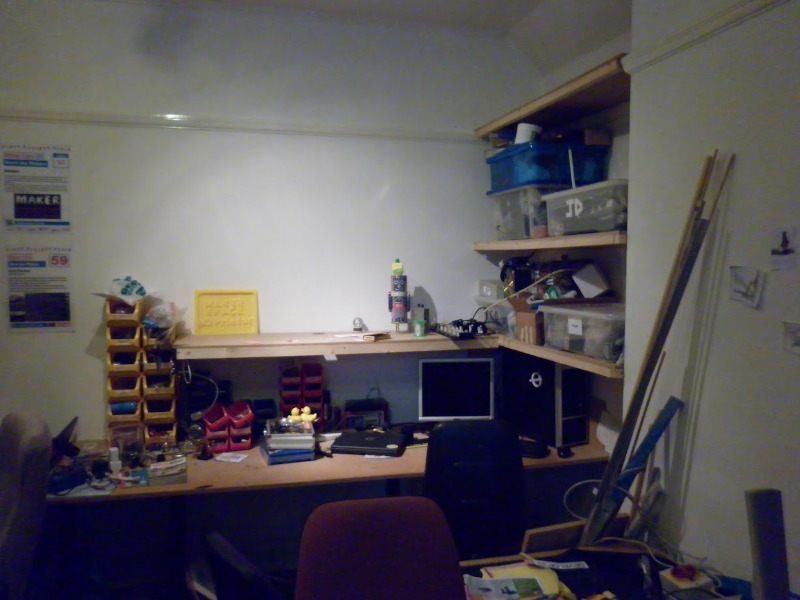
And a panorama!

Demolition
The building has since been demolished. This was the state of MS1 in February 2021.
Maker Space 2 (2013 - 2017)
Maker Space 2 (MS2) was in a busy location in Newcastle City Centre. The property had previously been used as an estate agent and as a gallery for The New Bridge Project (https://thenewbridgeproject.com/) who occupied the rest of the building at the time.
Address
18 New Bridge Street West,
Newcastle upon Tyne,
NE1 8AW.
Floorspace
91 square metres
Rooms
- Main Workshop
- Machine Room
- Computer Lab
- Members’ Store
- Wet Lab
- Corridor and “Hack Me” Shelves
Description
MS2 was much larger than the previous space with multiple rooms that were broadly dedicated to different activities. As the space was originally for retail, there were several large windows which were quite often used to display members’ projects. One of the windows was also used for displays, especially at Christmas and Halloween.
The location helped greatly to improve awareness of the space and increase membership. This, in combination with the increased floorspace meant that we could start to acquire more equiment such as a laser cutter.
With more members, we started to open up for regular themed sessions on Thursday evenings.
- 3D Thursday, on the 1st and 3rd Thursday og the month, for anything related to 3D printing.
- Make It Sew, on the 2nd and 4th Thursday of the month, for learning to sew using sewing machines.
- TWAIN Thursday, (Thursday Without An Interesting Name) when there was a 5th Thursday in a month.
We aslo set up an FPV drone racing circuit with gates hanging from the ceiling and held a few relaxed flying sessions for non-members to join the fun. (Video:https://youtu.be/qNBZ2tCU2GA)
Main Workshop
The main workshop had desks and a large workbench for general use. This room was also used for 3D printing.
Machine Room
The machine room was used for woodwork, metalwork and laser cutting. We had a selection of bench top machines and tools including a drll press, chop saw, band saw, scroll saws and lathe.
Computer Lab
The computer lab was almost the same size as the whole of MS1 and had a couple of PCs permanently set up for CAD etc. This was often a quieter place to work if the main workshop was busy.
Members’ Store
Where we stored project boxes and space equipment. The safe place for things that shouldn’t be hacked with.
Wet Lab
This was intended to be set up with a sink for brewing and anything else biology related but instead it ended up being used more as storage than anything else. Before we managed to get it set up as a wet lab, we received notice that the building was to be demolished.
Corridor and “Hack Me” Shelves
The corridor between the main workshop and the machine room was wide enough for shelves full of all the stuff that was available for hacking.
Window Displays
The window in the machine room was used for window displays. Most of the time, it had a selection of members’ projects on display. (It was a convenient storage place for projects that were being worked on!)
There were some more organised displays as well:
- Duck TV - a small TV displaying photos the rubber duck from a photography project called Duck 365 (https://www.agm.me.uk/duck365/) being watched by a collection of more rubber ducks. Unexpectedly, the collection of ducks grew over time as more and more people added to it.
- Christmas 2014: Marble Run - A Christmas window with a marble following the route of a Christmas present. (Video:http://youtu.be/OmBVfjYjjZA)
- Christmas 2015: Penguin Race - A large Tyneside themed version of the kid’s toy. (Video:https://youtu.be/S5oH3TsZ8es)
- Halloween 2016: Ghosts - 4 ghosts with LED eyes, floating up and down randomly. (Video:https://youtu.be/ftle01KvXbk)
MS2 Photos
External
MS2 had 2 entrances. A front door with a disabled ramp on New Bridge Street West (right) and a side door (left) leading into the main workshop.
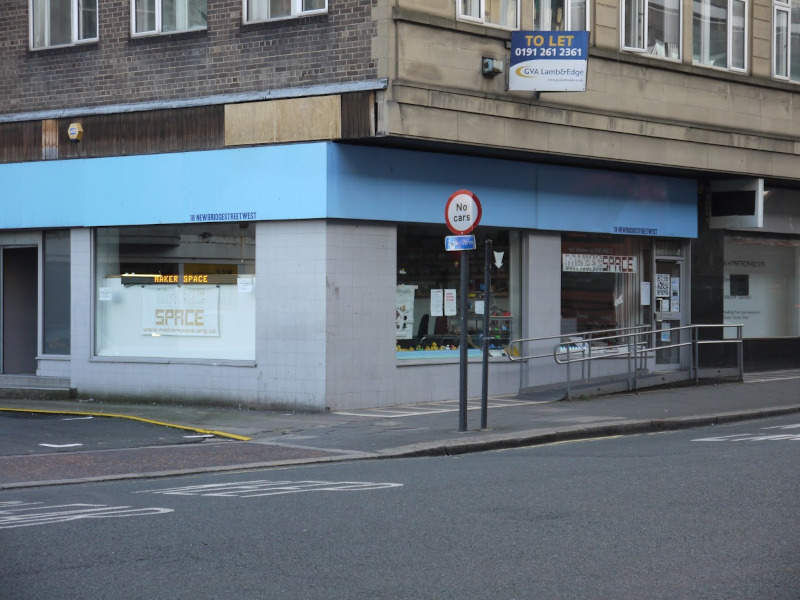
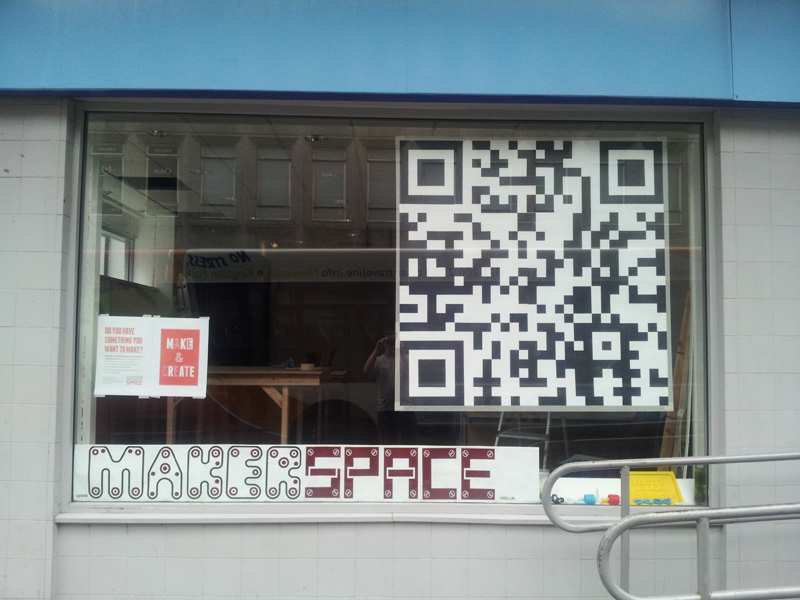

Internal
Main Workshop
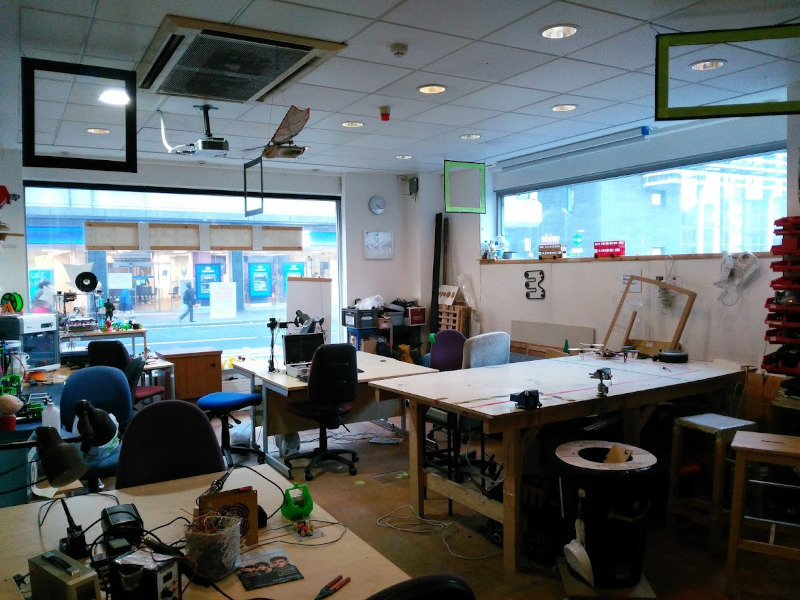
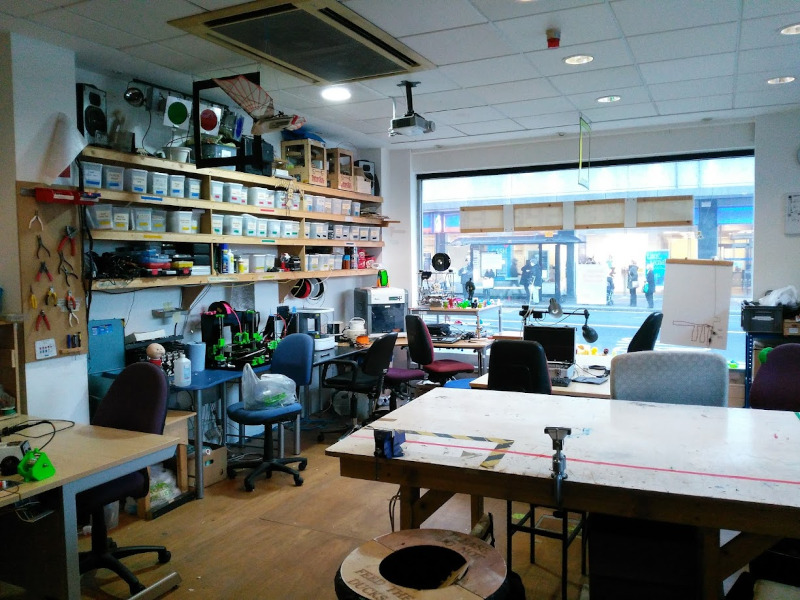
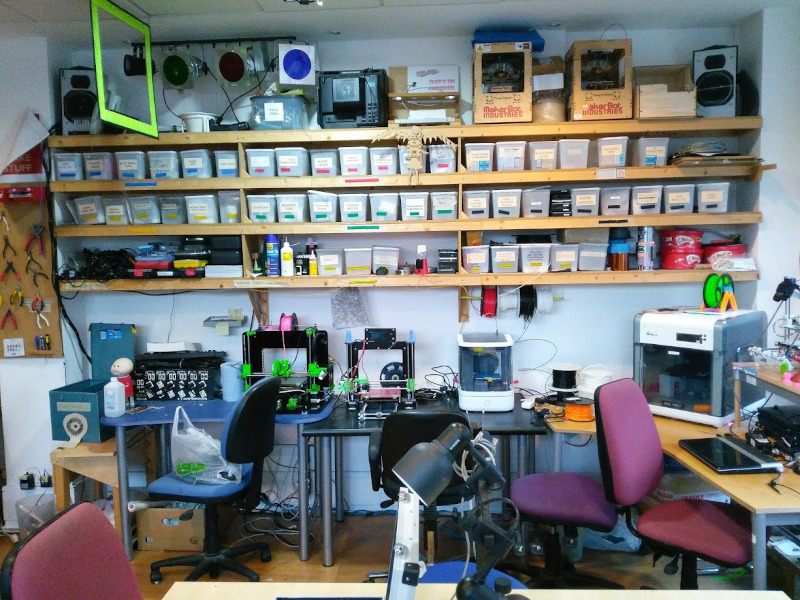

Machine Room
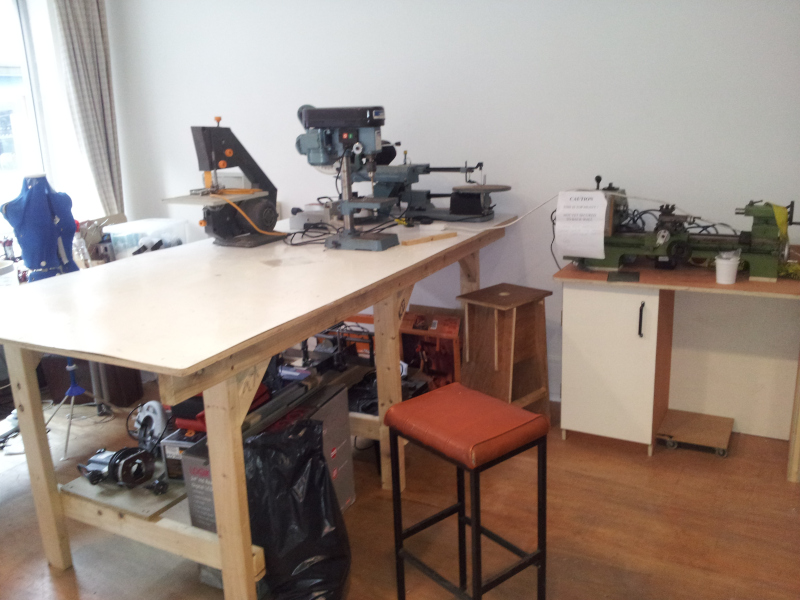
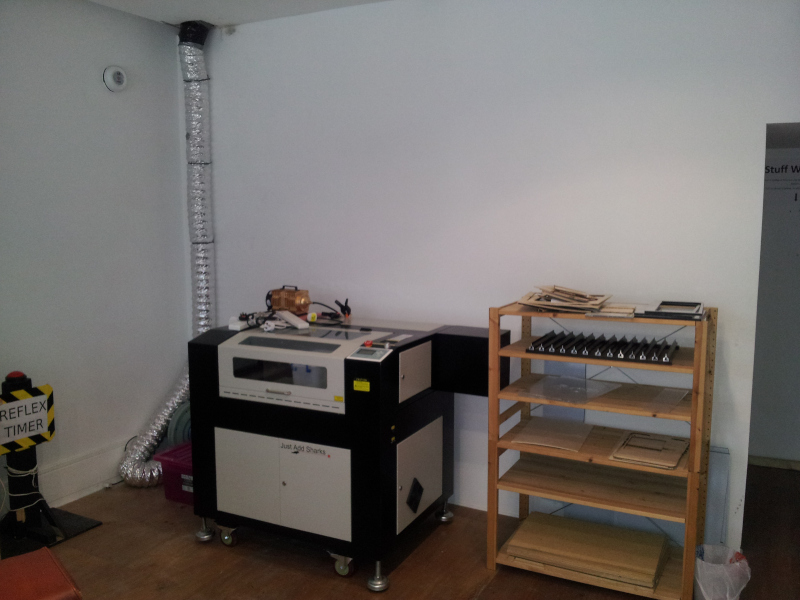
Computer Lab
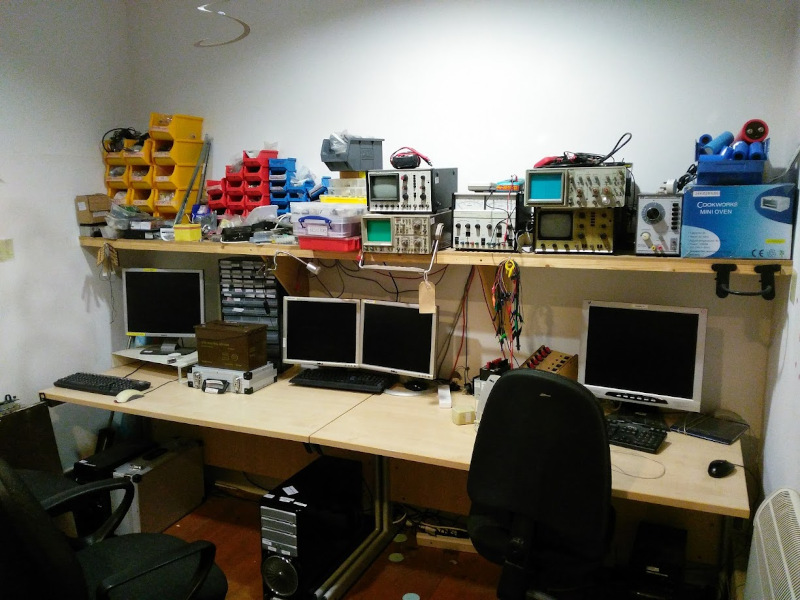
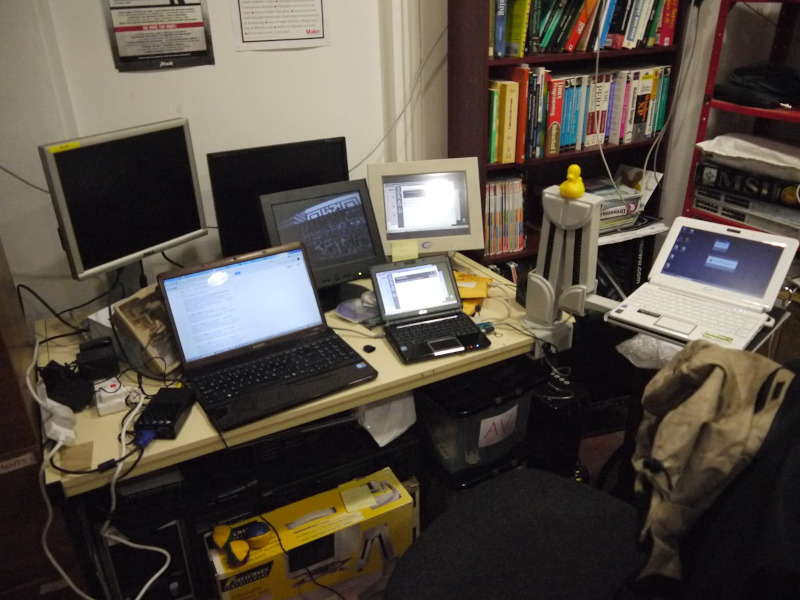

Members’ Storage
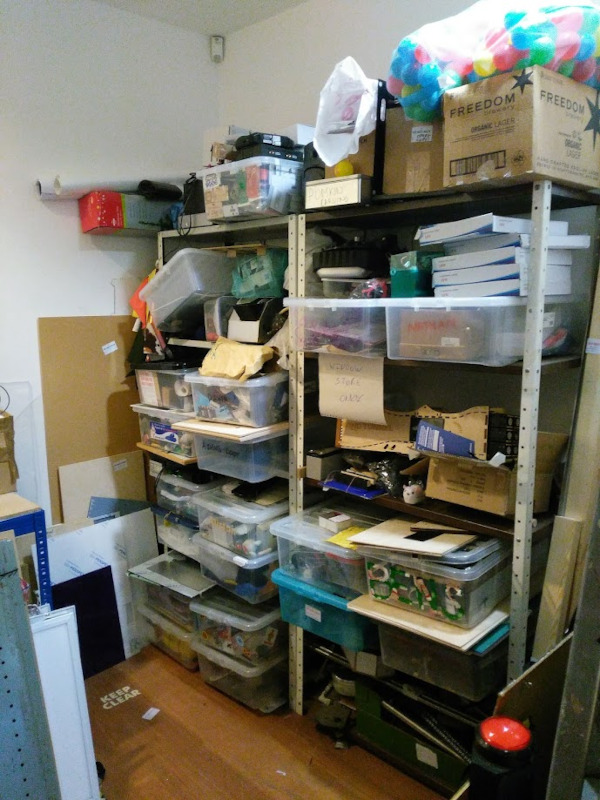
Hack Me Shelves
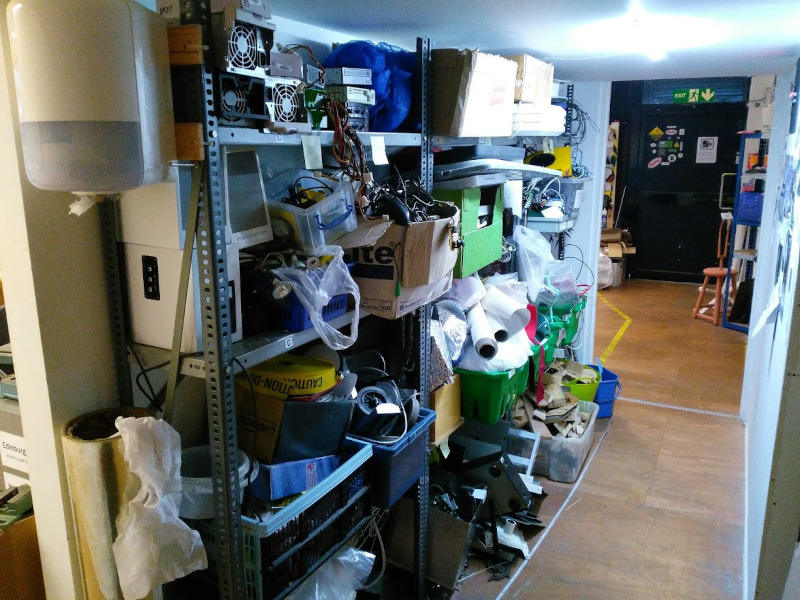
Wet Lab

Demolition

Maker Space 3 (2019 - 2021)
Maker Space 3 (MS3) was around the corner from MS2 in Commercial Union House. A grey and inposing brutalist building on the outside and a vibrant haven for artists and creatives inside. The building was managed by Orbis Community (https://www.orbiscommunity.com/) and had several other tenants including Ampersand Inventions (https://www.ampersandinventions.com/) and Vane Gallery (https://www.vane.org.uk/).
Address
Commercial Union House,
39 Pilgrim Street,
Newcastle upon Tyne
NE1 6QE.
Floorspace
45 - 166 square metres.
Rooms
- Main Workshop
- Machine Room
- Laser Annex
Description
Initially, we had a couple of small studios on the 4th floor with a lot of our equipment in storage and the laser in a small room in the basement. This was referred to as MS2.5 as it was only ever intended as a temporary arrangement.
After a while an area of the basement became available where we could set up MS3 properly.
Main Workshop
This part of the basement had previously been used as a document archive and came complete with a large amount of wooden shelving. This area was initially split into two parts, with desks, 3D printers and a soldering station on one side and woodwork and metalwork tools in the other. More space meant we could buy bigger and better tools so we bought a pillar drill, band saw and combination sander for thw woodworking area.
Machine Room
Later on, we expanded into another portion of the basement when it became available. Originally, it had been used as a store for the nightclub that used to be on the top floor of the building. It was known to us as the Zombie Cage due to the steel bars across the middle of the room which once kept the alcohol secure. This area became the machine room, with one side for woodwork and the other side for metalwork.
Laser Annex
The Laser Annex had originally been the lobby for a goods lift which no longer worked. We used it for the laser as it was an easier location to set up ventilation than the rest of the space.
MS3 Photos
External
A 3D printed model of the building
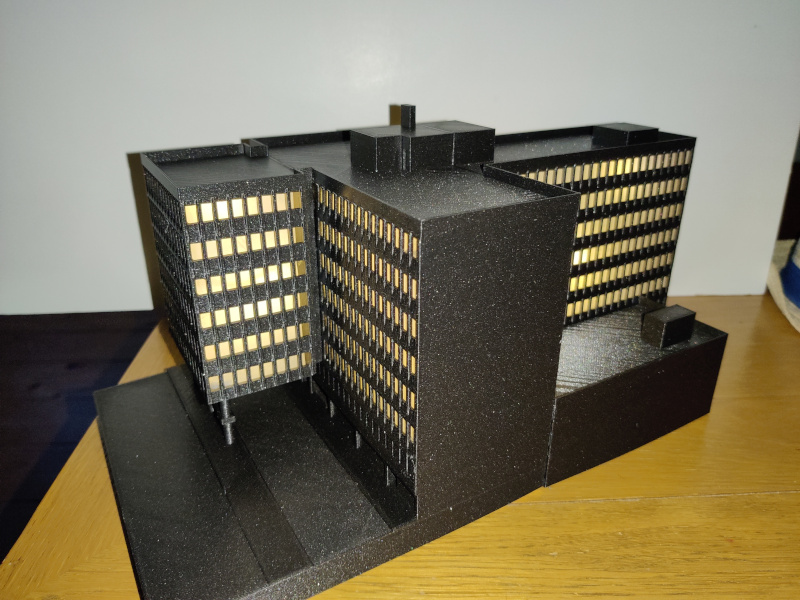
The entrance to the space from within the underground car park
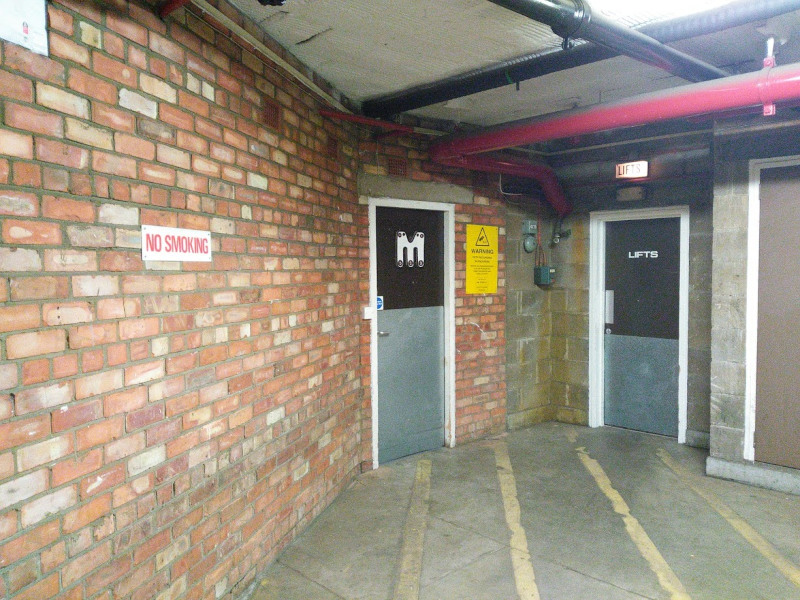
Internal
Main Workshop
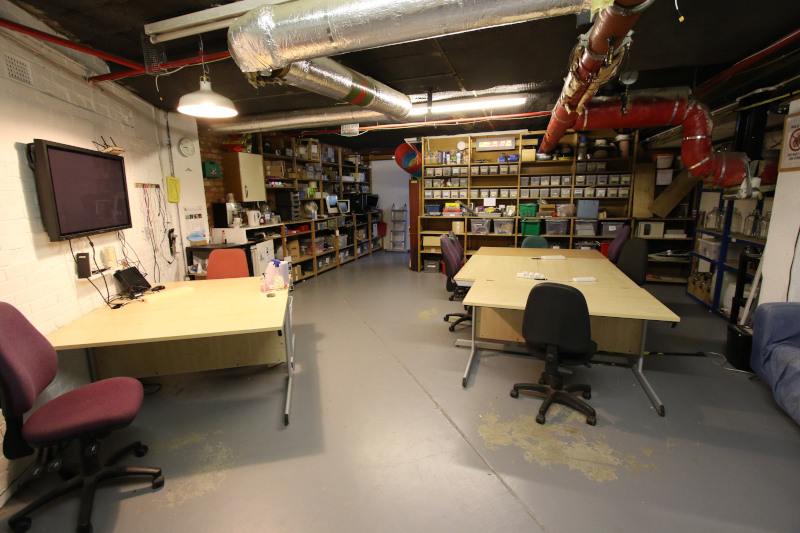
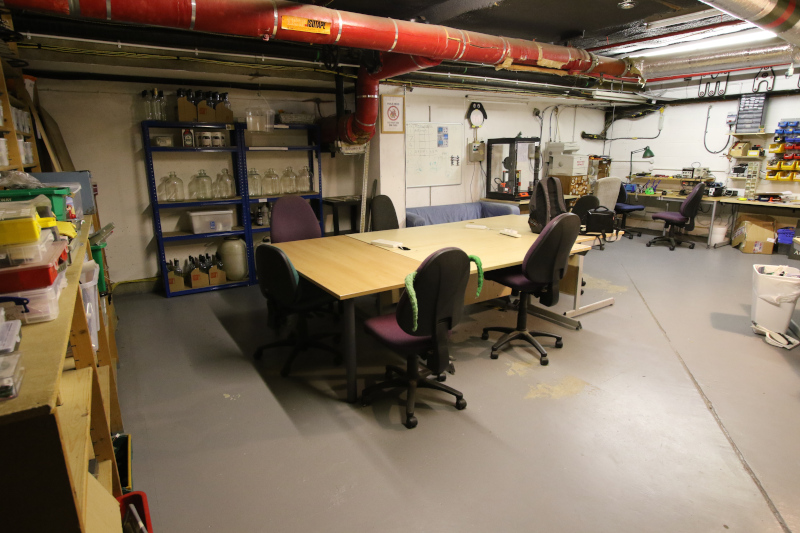
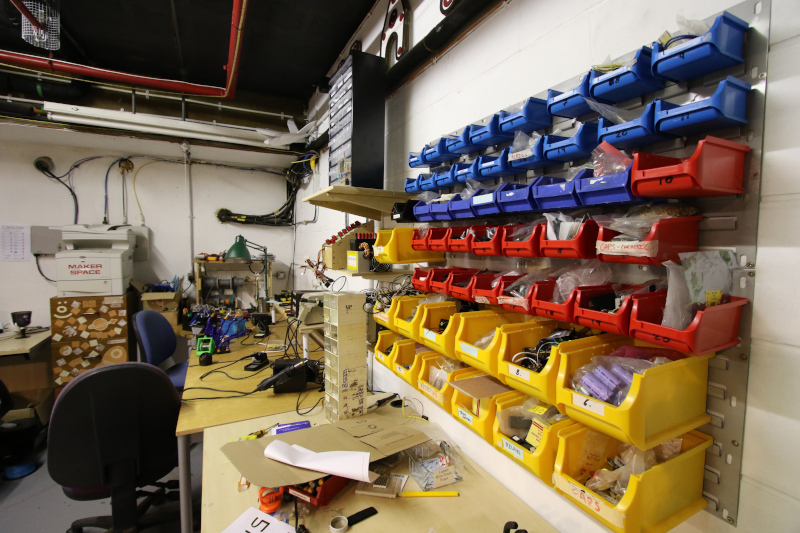
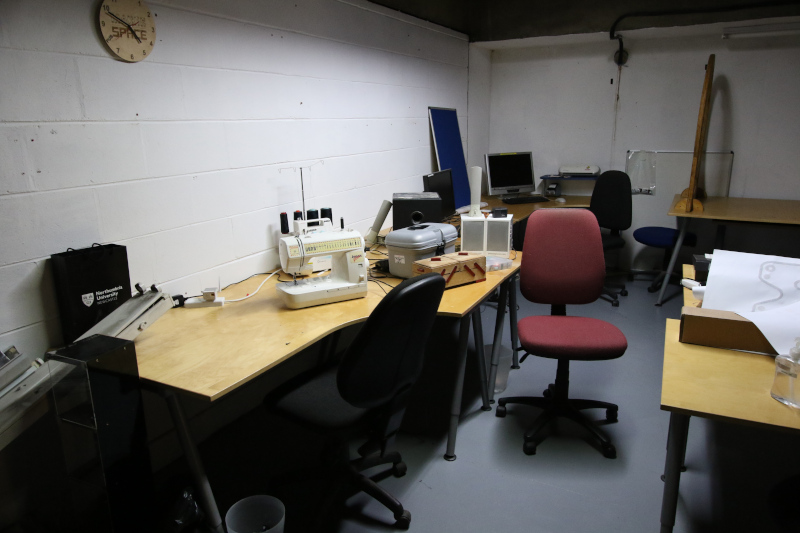
Part of the drone racing circuit in the main workshop.
Machine Room
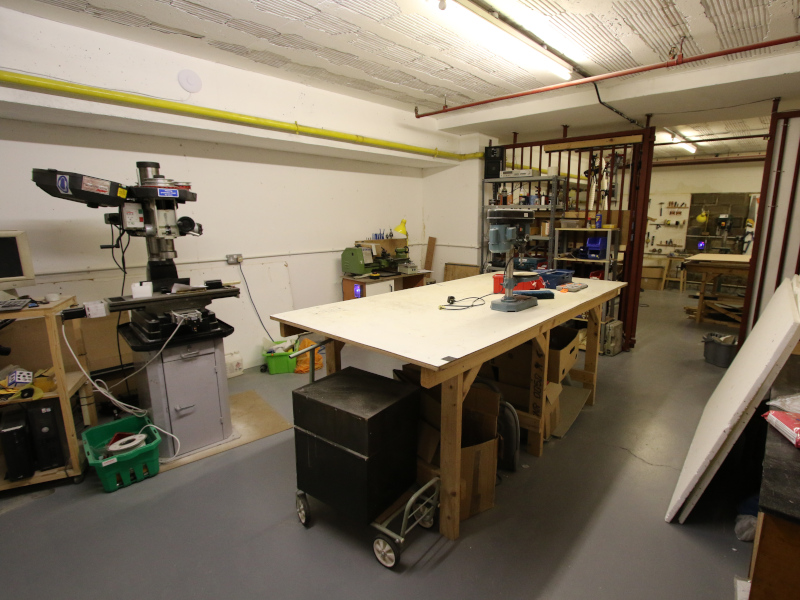
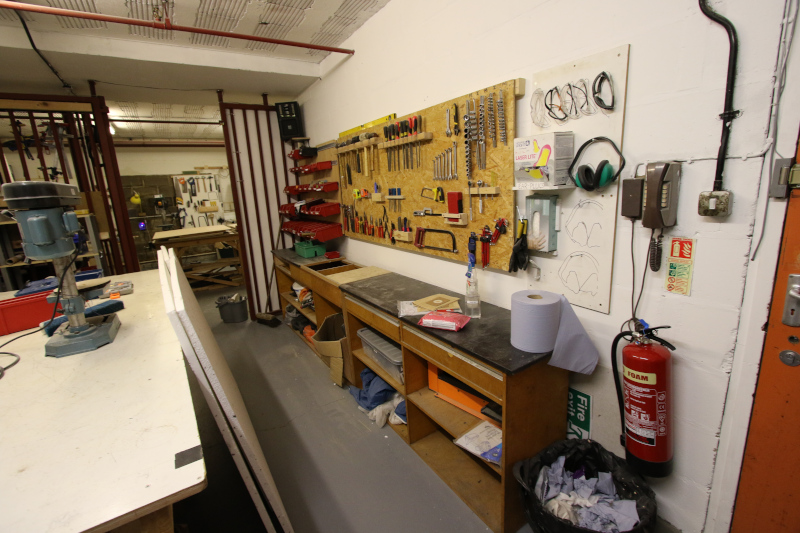

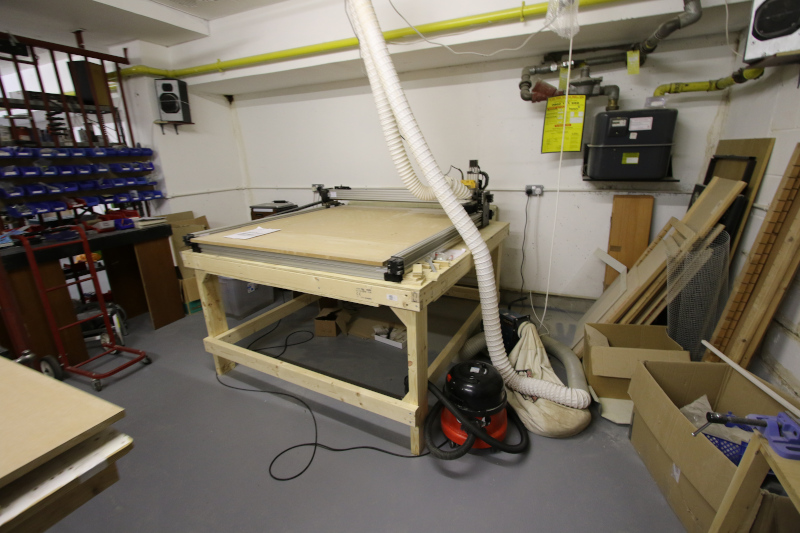
Laser Annex
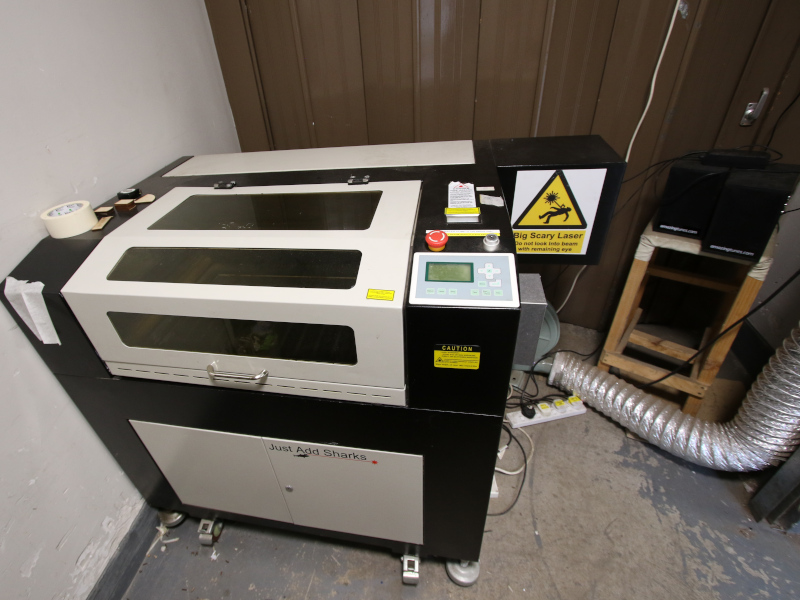
Demolition
The white walls visible below were where MS3 was.
